Implementing Two-Tier Architecture in AWS with Terraform: Step-by-Step Guide #10weeksofCloudOps

Hello, I'm Ankit Jodhani, a B.tech graduate from P P SAVANI UNIVERSITY. I have a strong passion for DevOps and Cloud technologies. During my internship, I gained valuable experience in DevOps, focusing on Continuous Integration and Deployment (CI/CD) using popular tools like GitLab and CircleCI. Currently, I am actively expanding my knowledge in DevOps and Cloud.
With a particular emphasis on the AWS cloud, I have successfully completed numerous projects and explored various AWS services, including EKS, ECS, EC2, LightSail, S3, VPC, CloudFront, WAF & Shield, DynamoDB, RDS, CloudWatch and CodePipeline. Furthermore, I possess proficient skills in backend development, particularly with Node.js.
I have very good knowledge of DevOps tools such as Kubernetes, Docker, Terraform, Ansible, and Jenkins. Leveraging these tools, I have consistently implemented robust and scalable solutions.
I am enthusiastic about sharing my experiences and knowledge regarding AWS, DevOps, and the projects I have undertaken. I look forward to providing insightful content in these domains
ℹ️Synopsis
Hi folks, this is Ankit jodhani I recently graduated from university and currently exploring and learning DevOps and cloud with AWS. I have participated in the #10WeeksOfCloudOps challenge launched by Piyush Sachdeva. and this is the 3rd challenge of the series. In this challenge, we need to implement 2 tier architecture using Terraform which should be highly available and scalable. so to achieve that we gonna use the following list of services of AWS. you can use any cloud provider that you like. in my case it is AWS.
📃 list of services
Amazon Certificate Manager (SSL)
Amazon Route 53 (DNS service)
Amazon CloudFront(CND)
Amazon EC2 (Server)
Amazon Auto Scaling group (Scale on demand)
Amazon VPC (Virtual private cloud: Private Network)
Amazon RDS (Relational database services: Database)
Amazon DynamoDB (State-locking for tfstate file)
Amazon S3 (storing backend and achieving versioning)
Amazon CloudWatch (Alarm when CPU utilization increase or decreases)
so let's get started.
💡Plan of execution
What is two-tire architecture
Architecture of project
Local setup
IAM secret key setup
Write terraform file
Outputs
Resources
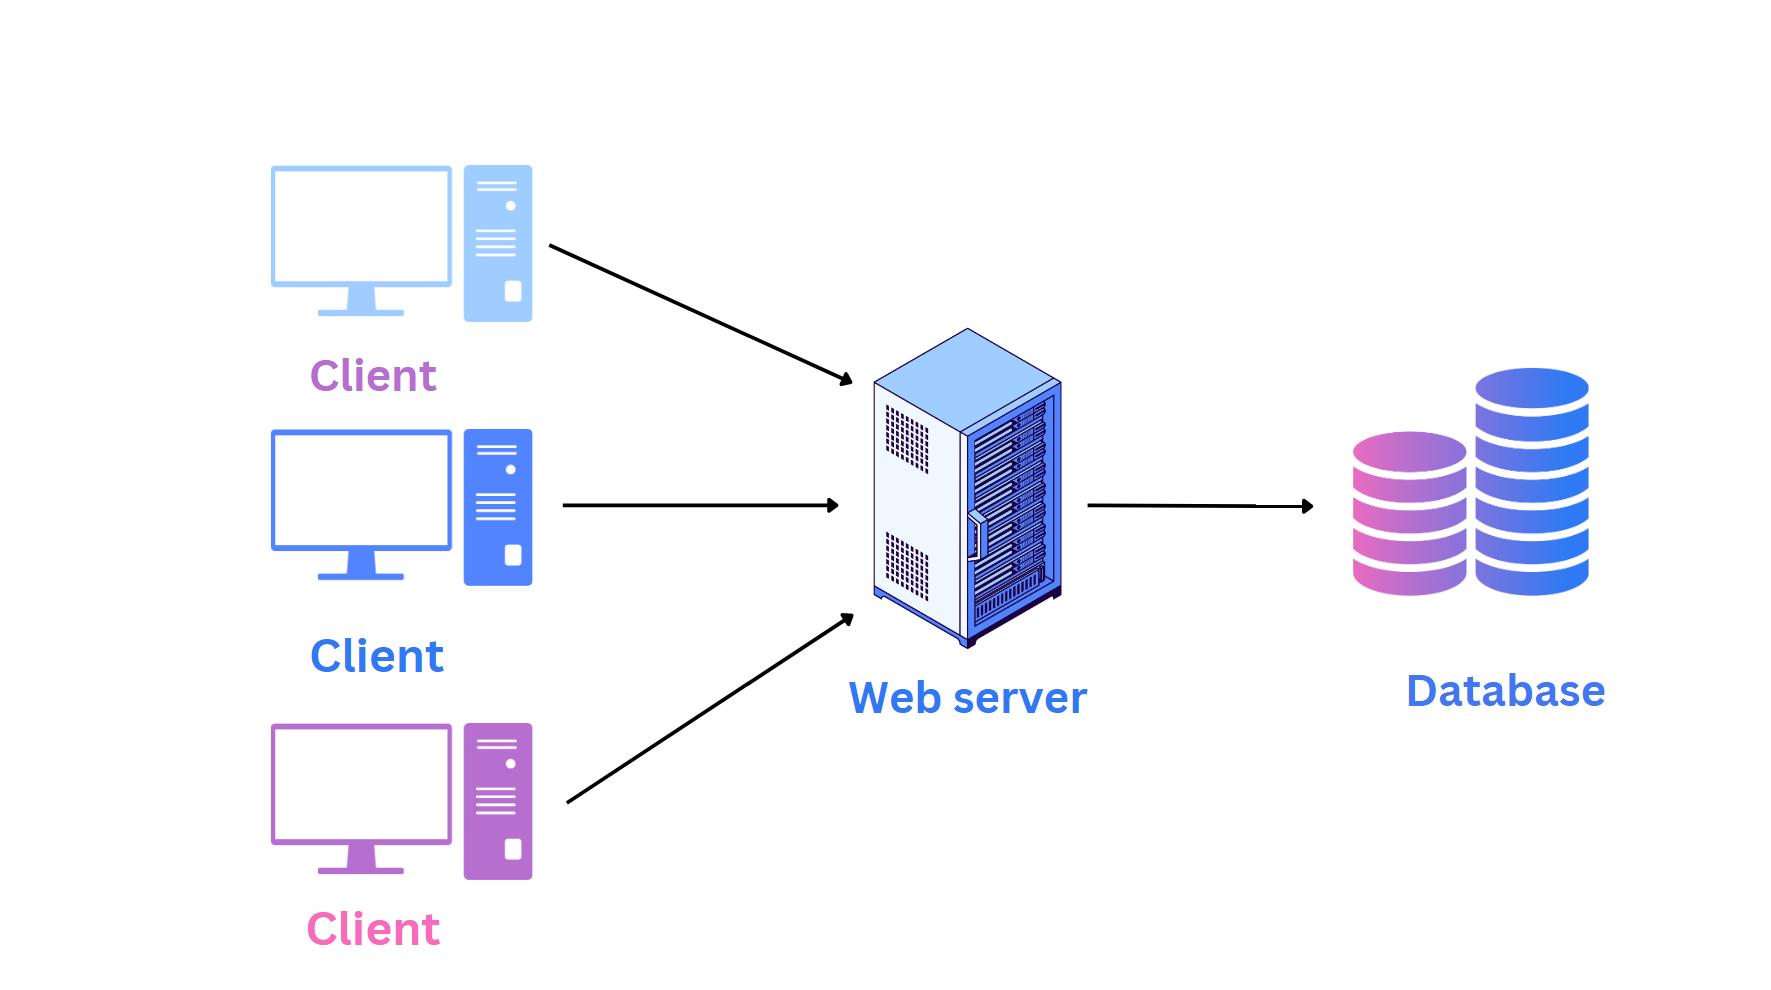
🏠Two-tire architecture
Two-tier architecture, also known as client-server architecture, is a software design pattern that divides an application into two main parts or tiers: the client tier and the server tier. Each tier has specific responsibilities and interacts with each other to provide functionality to end-users.
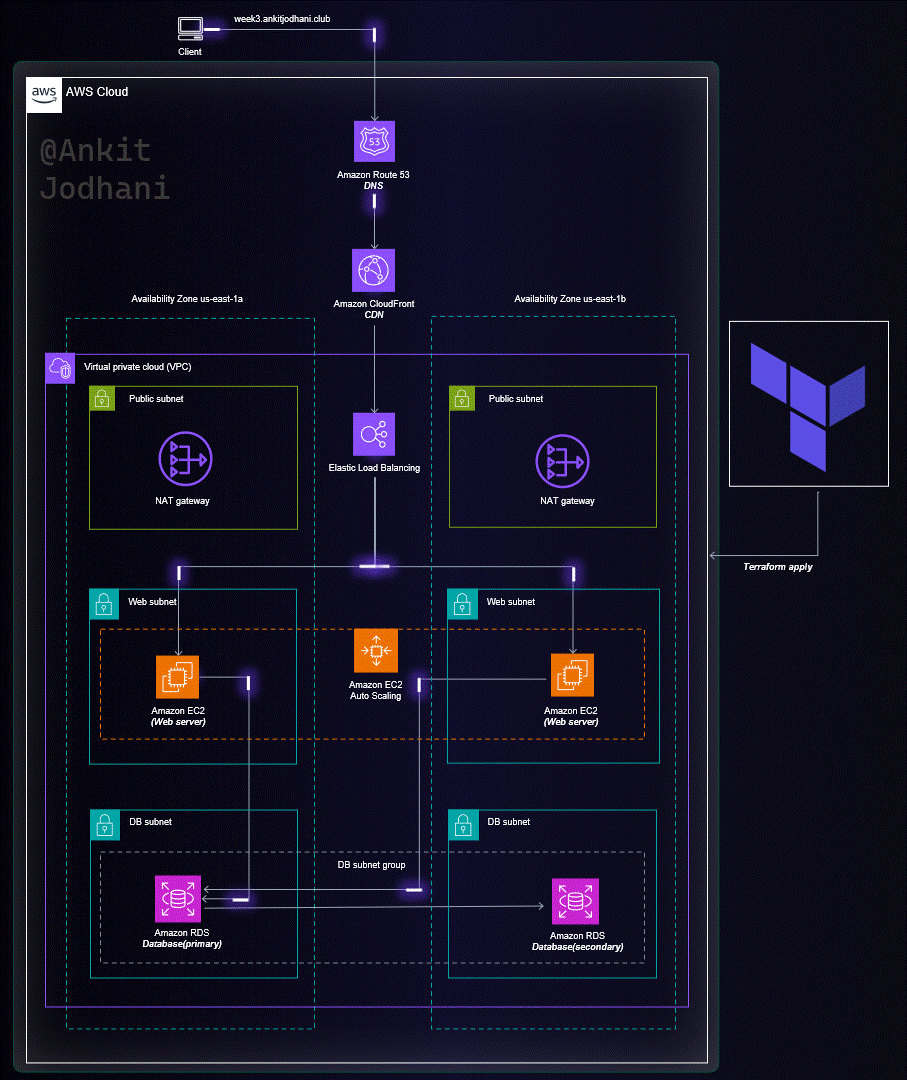
🏡Architecture
Let's see the architecture of today's project. we are going to follow a goal-driven approach that helps us to put in minimum effort and gain lots of results. it's very important to understand what we are going to build and to understand you can follow the below architecture. I request you please go through it once. it helps you a lot while building this project.
🖥️Local setup
VS Code
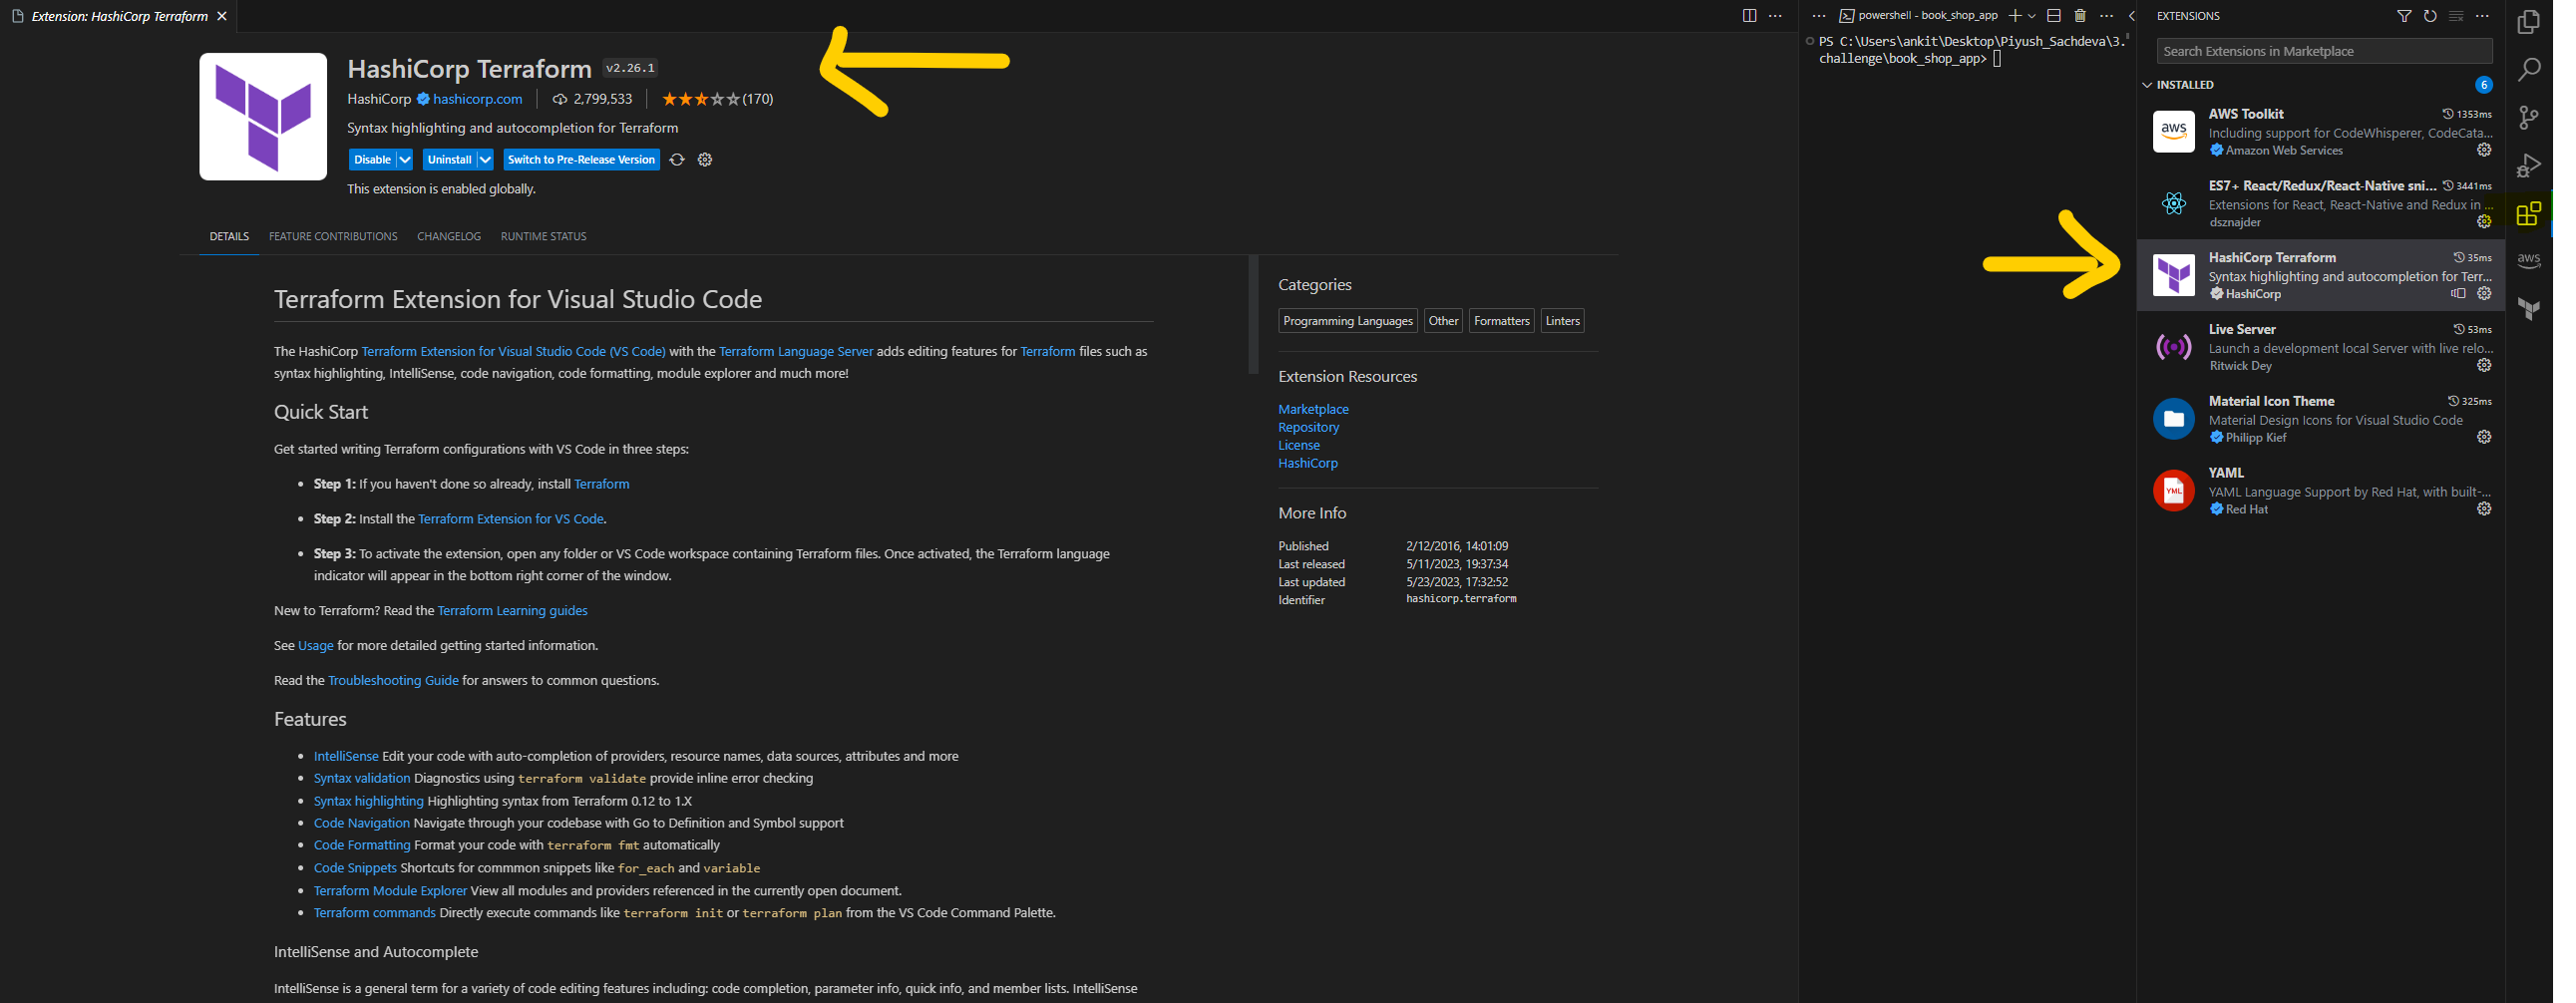
We are going to use vs studio as a code editor. please download it from here. it's very lightweight and easy to use. now to boost your productivity we are going to install Terraform extension in vs code. and the name of the extension is HashiCorp Terraform.
Terraform Install
- Please install Terraform on your platform from this link. it's very easy to most important and make sure to restart your system after installation.
AWS CLI
- You need to install aws-cli to use the aws functionally from your terminal. here is the link to download it.
🚨 IAM secret key
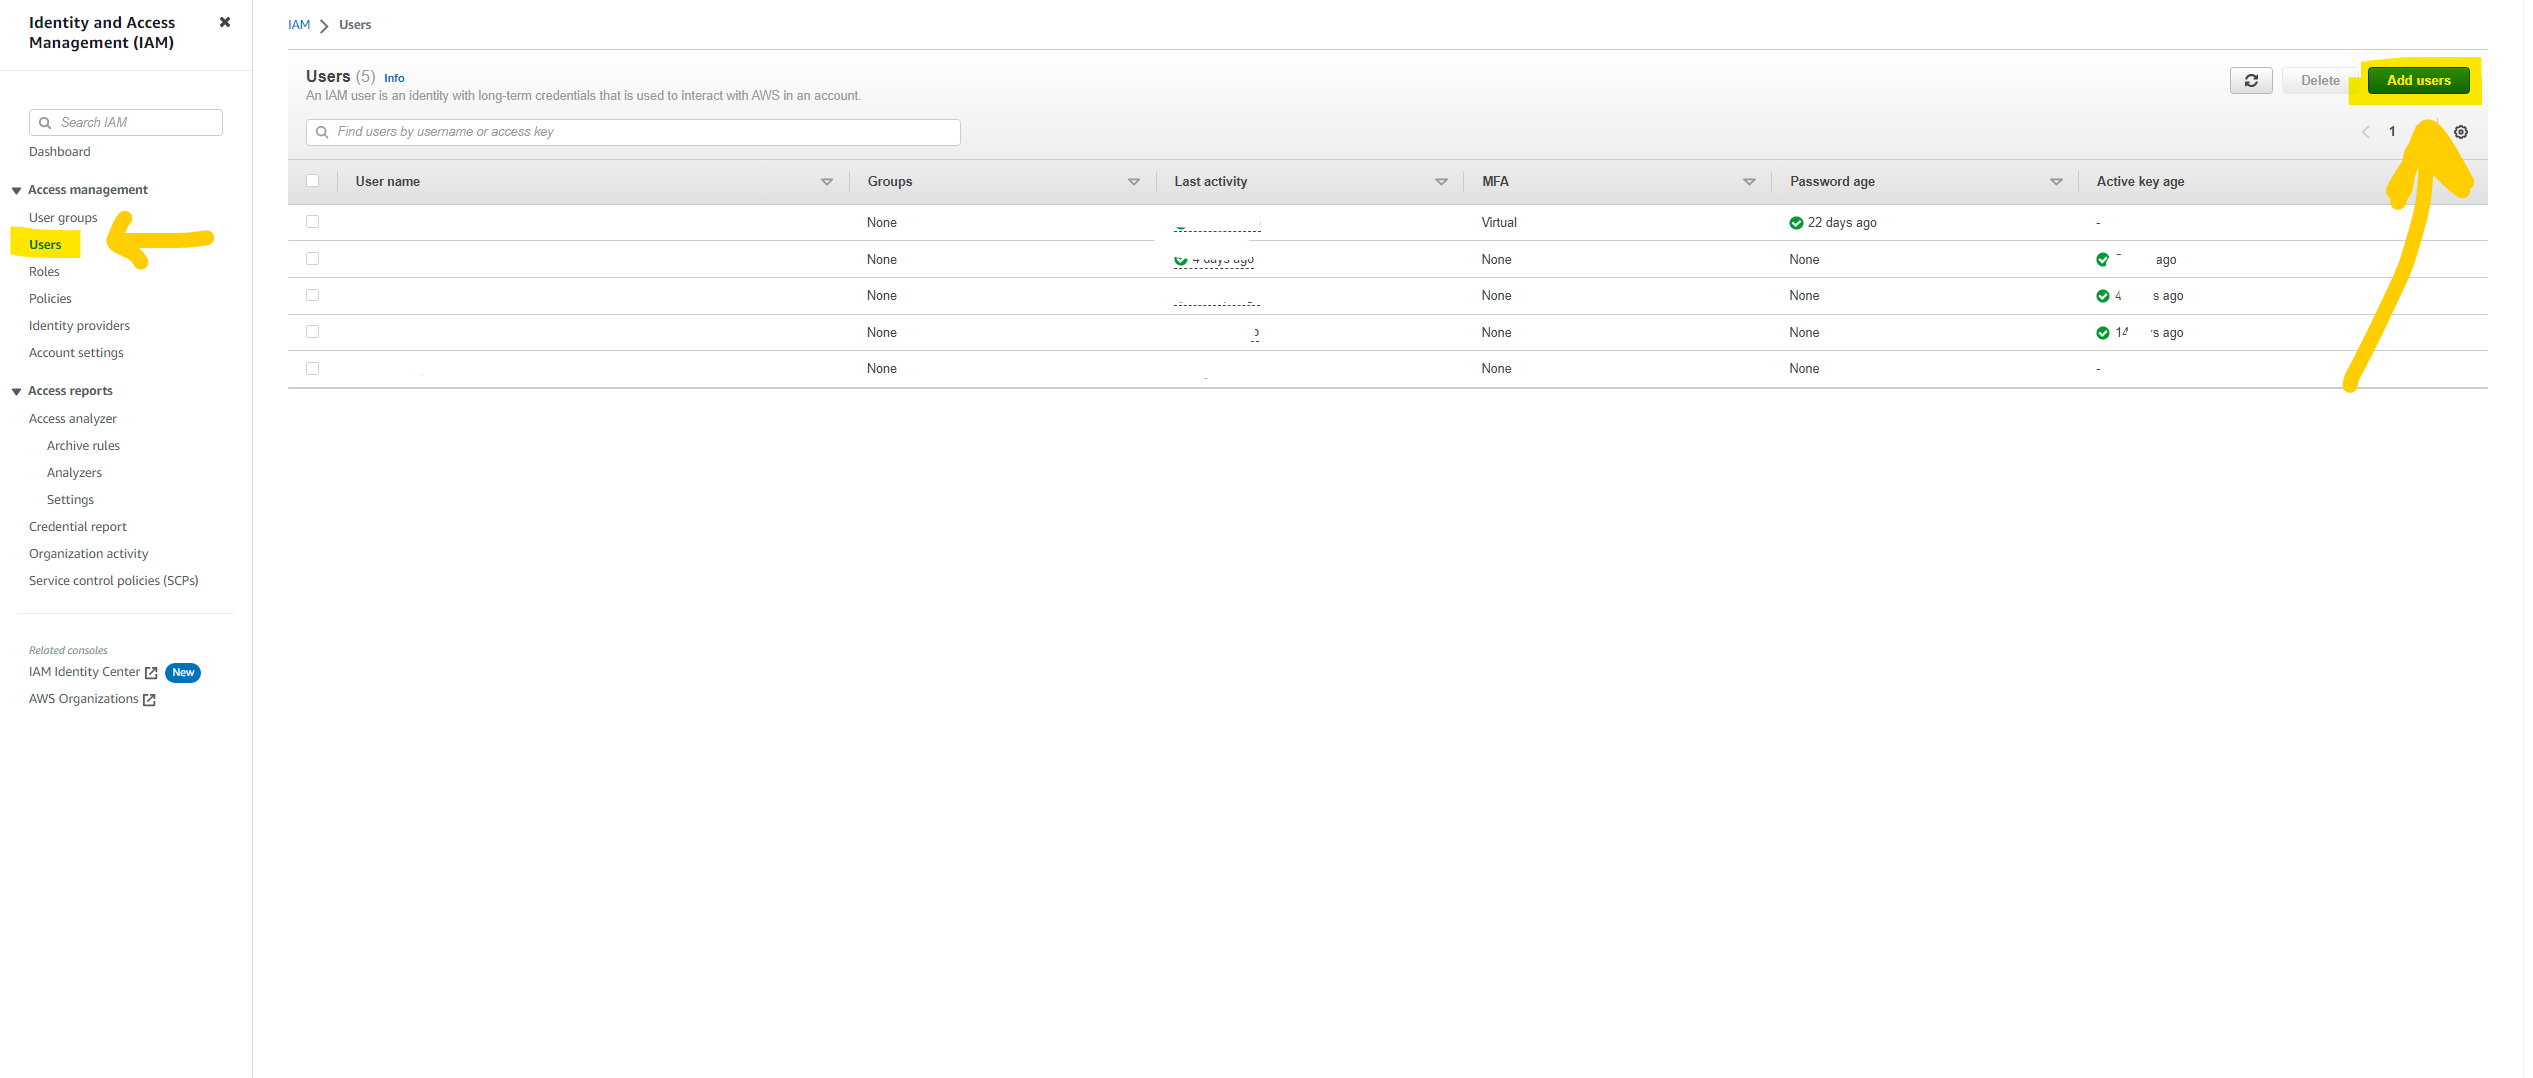
I hope you have installed all the software and tools. now it's time to open the AWS console. please head over to IAM service.
Create USER
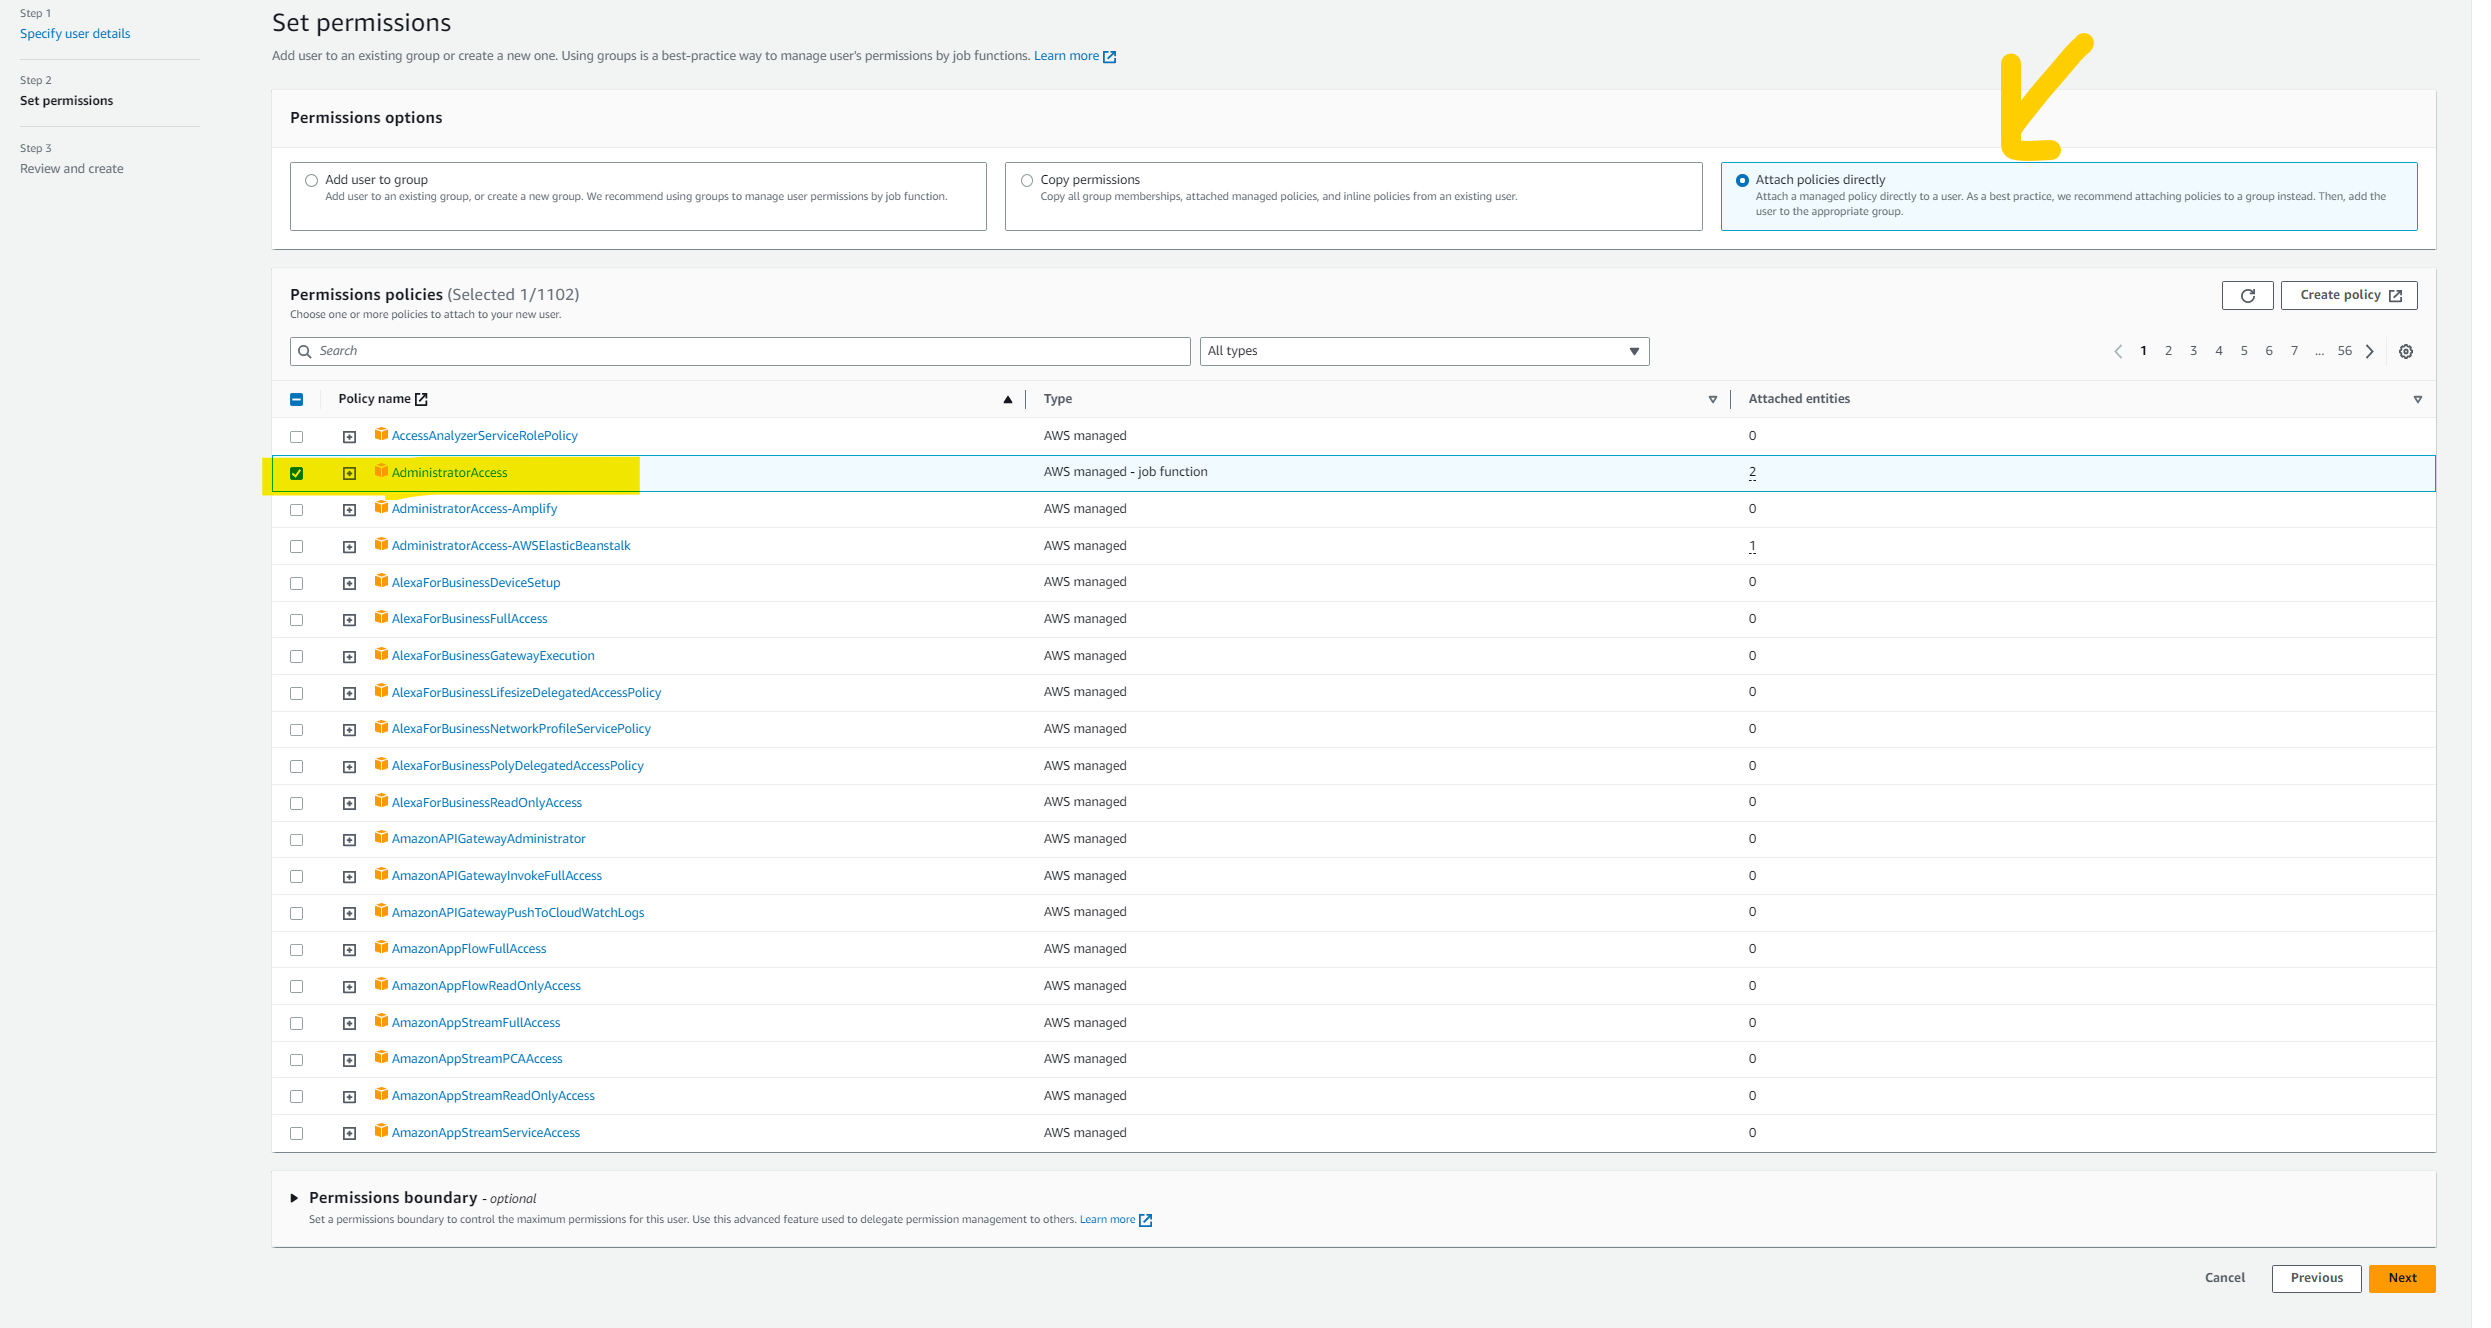
please click on the user tab in the left corner. now click on the add user button on the top right corner and give the name to the user. now you need to attach the Policy for the user. actually, we should follow the Principle of least privilege but we need to use many services to here you can give AdministratorAccess. but it is not at all advisable to give AdministratorAccess OR you can follow the above list of services part and attach the policy accordingly. now click on the next button. and click on the Create User button.
Create a secret key.
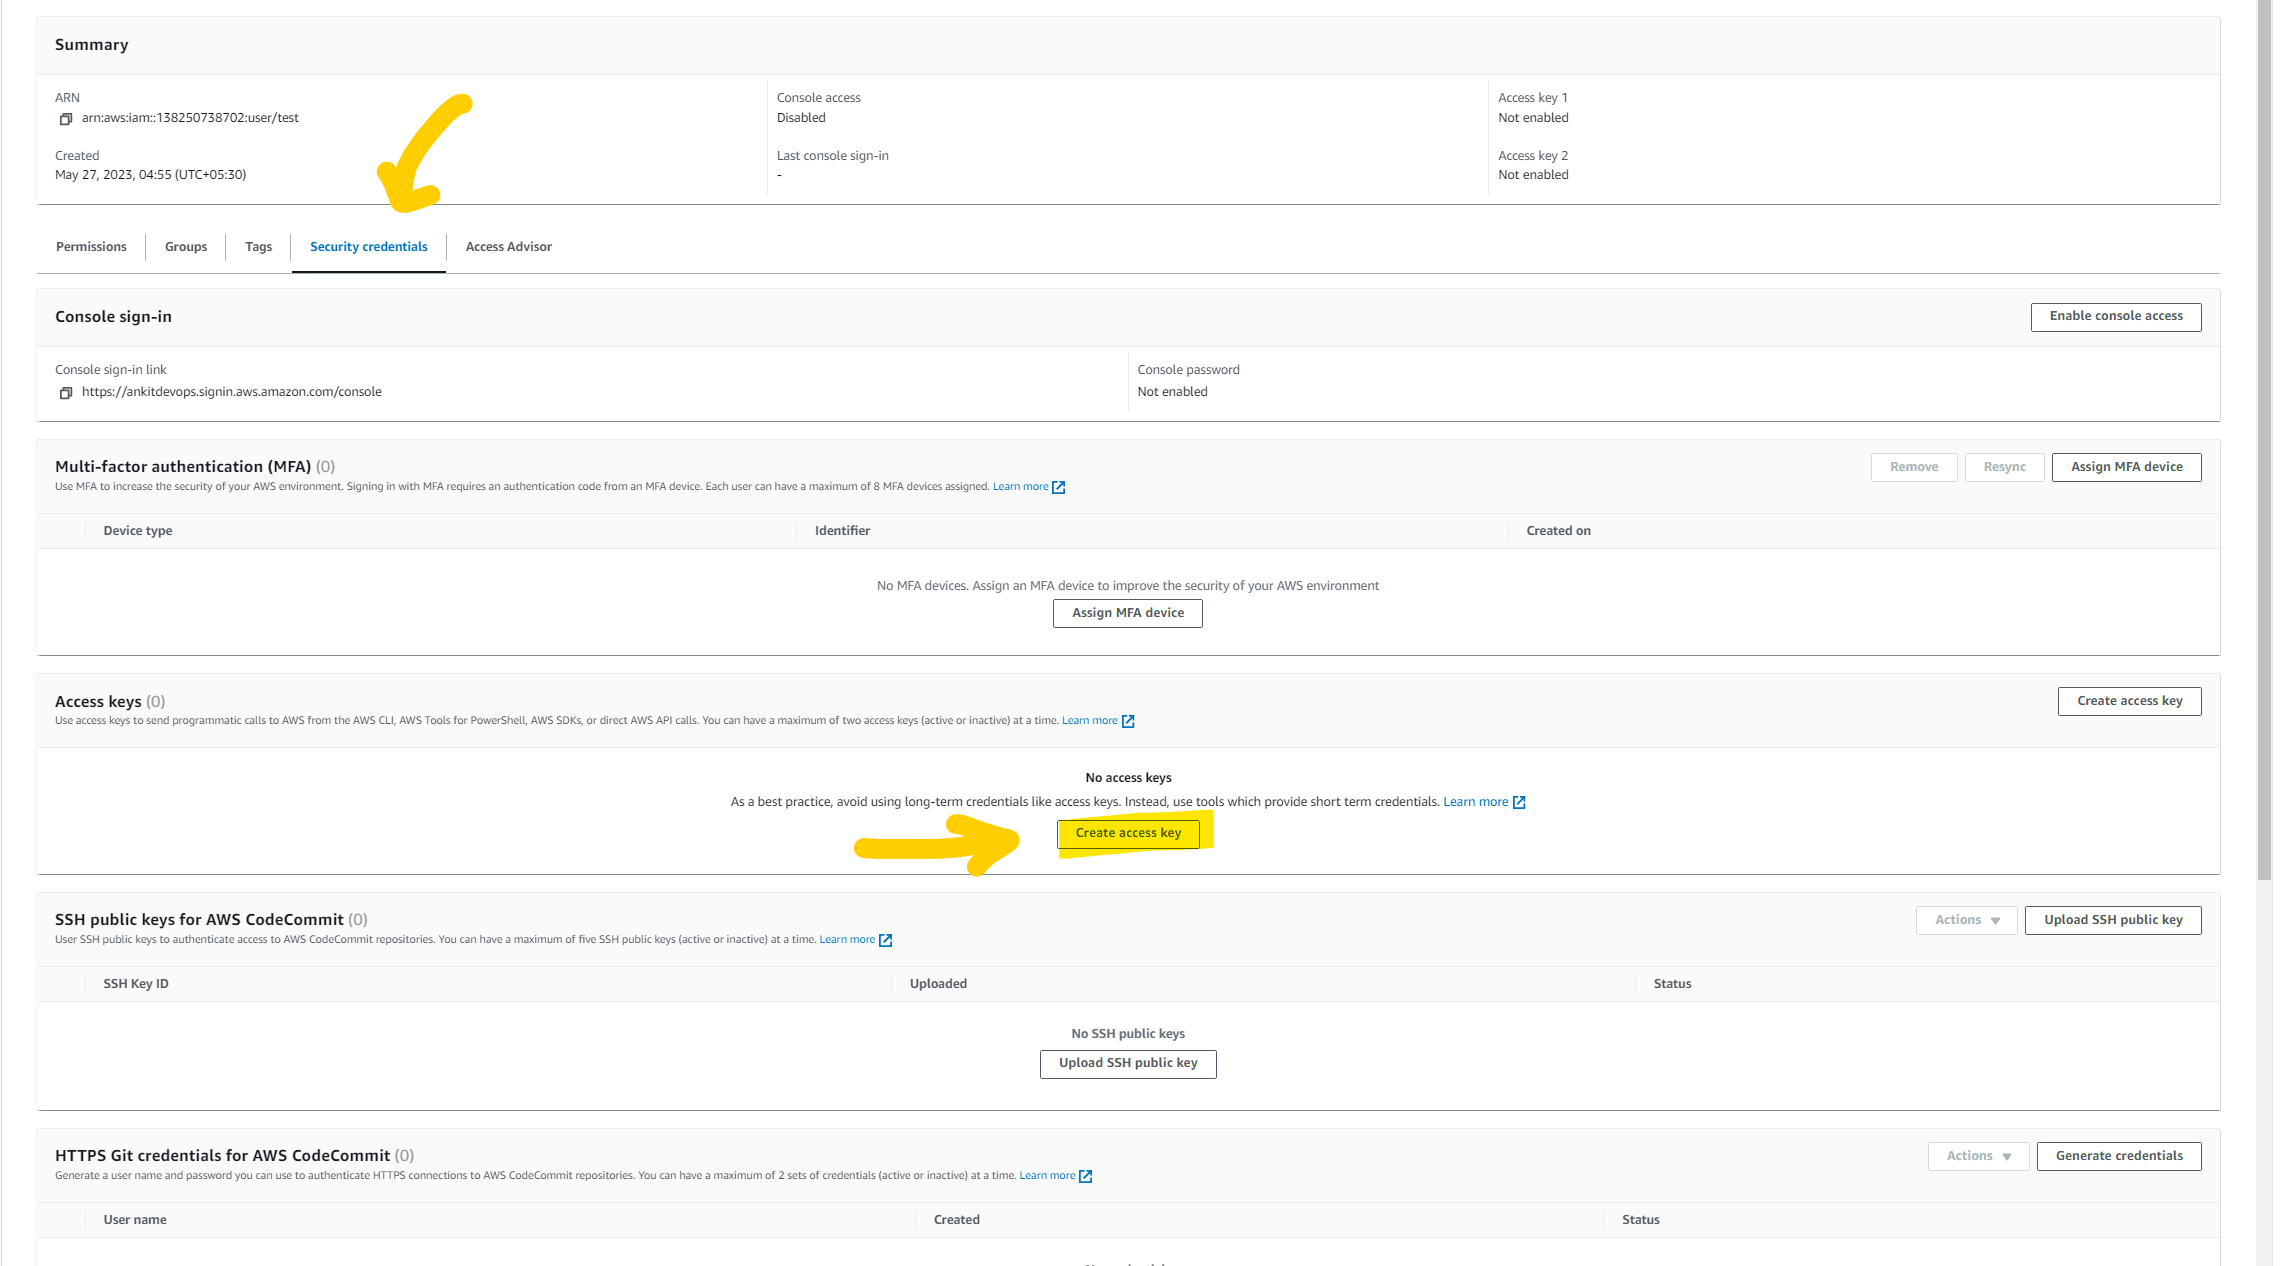
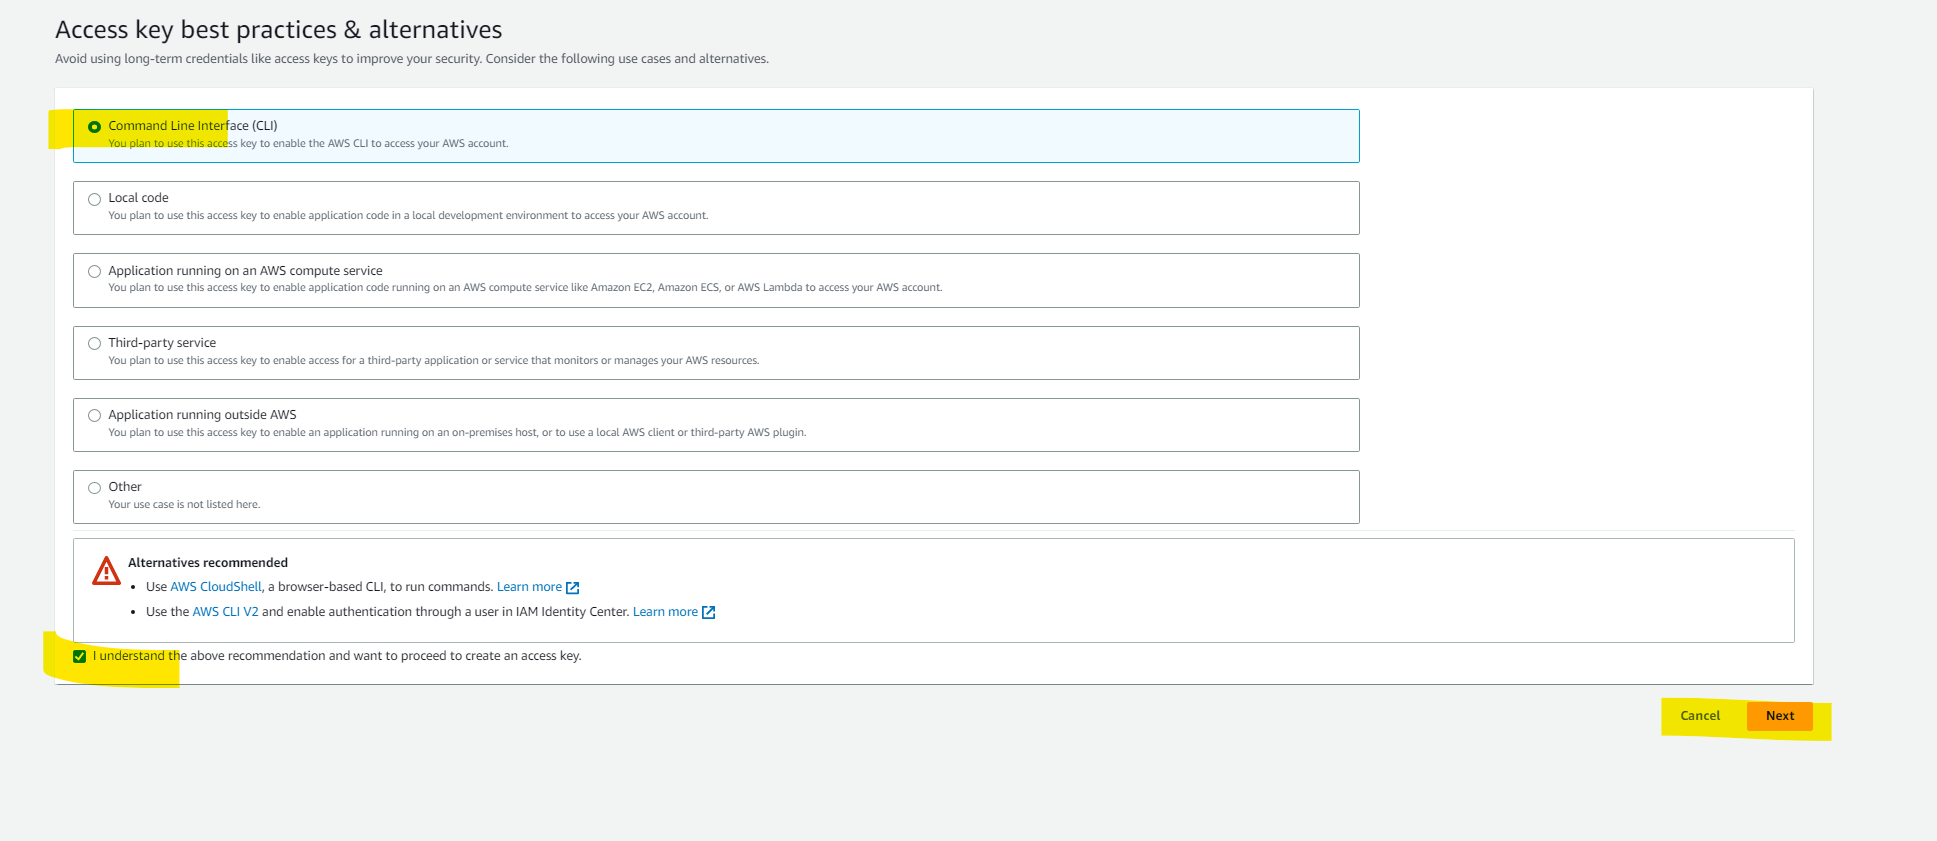
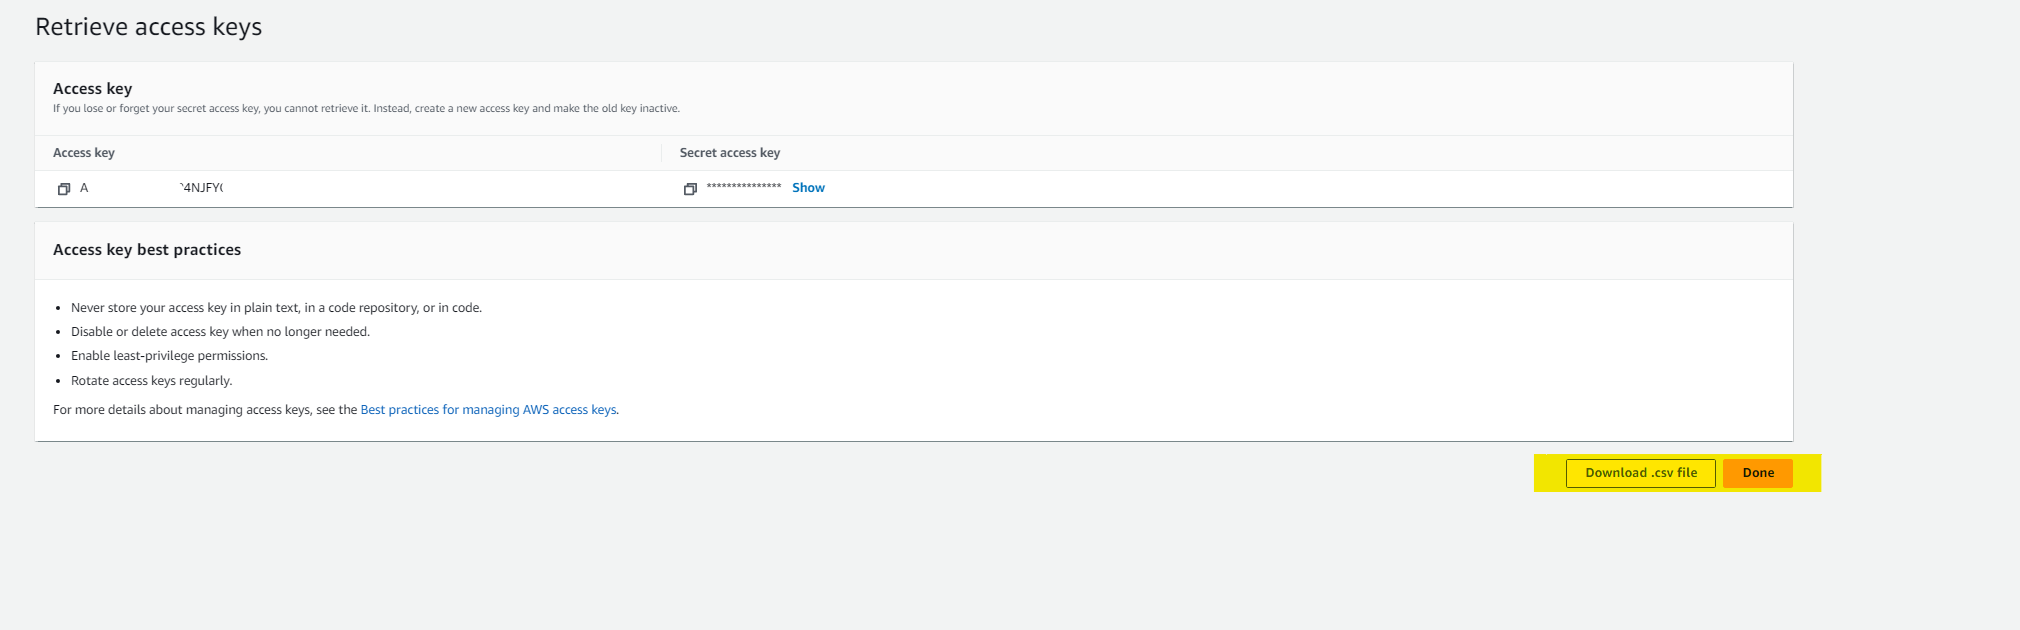
select the user that you have created just now. click on the security credentials tab. below you will find an option with the name Create Acess key just click on it. after that select CLI and mark the checkbox below and click on the Next button, give some description about it. and then click on the Create Access key button here you will see your Access Key ID and Secret Key. make sure you download it because you won't be able to see it once you close your window. and remember DO NOT SHARE THE KEY with anyone.
Configure AWS-CLI
open the terminal on your system and type
aws configure. it will ask for your Acess key ID and secret key id. please enter what we have just created. furthermore**,** it will ask output formatJSONdefault regionus-east-1. you can enter the region where you want to deploy your app. Follow the below images to get more ideas.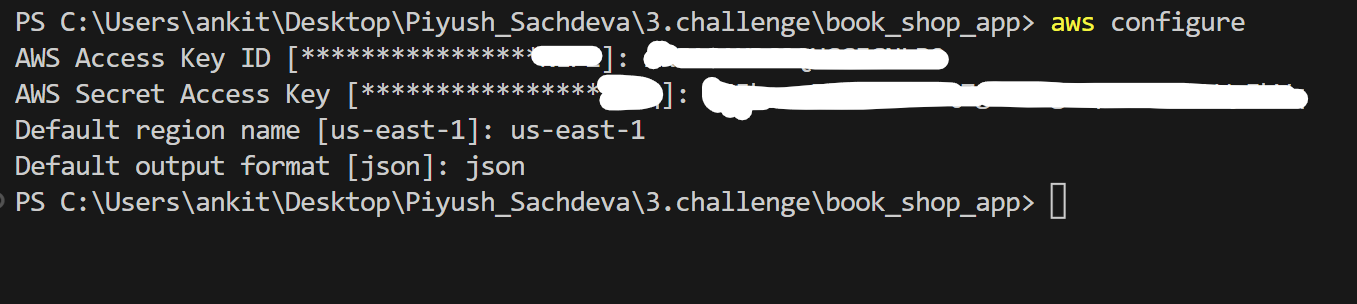
Now we don't need to explicitly mention the key it prevents us to expose the access key and secret key on the internet.
✍️ Write Terraform files
Finally, it's time to write your infrastructure. but before you jump on it. let me clarify a few things, we are going to best practices while writing code.
🤩Best practices
store state files on remote location
so let's first create an s3 bucket to save the state file on a remote location. in my case it is s3 but in yours, it might be different. so just head over to s3 and click on create bucket button. give any name to your bucket and click on Create a bucket.
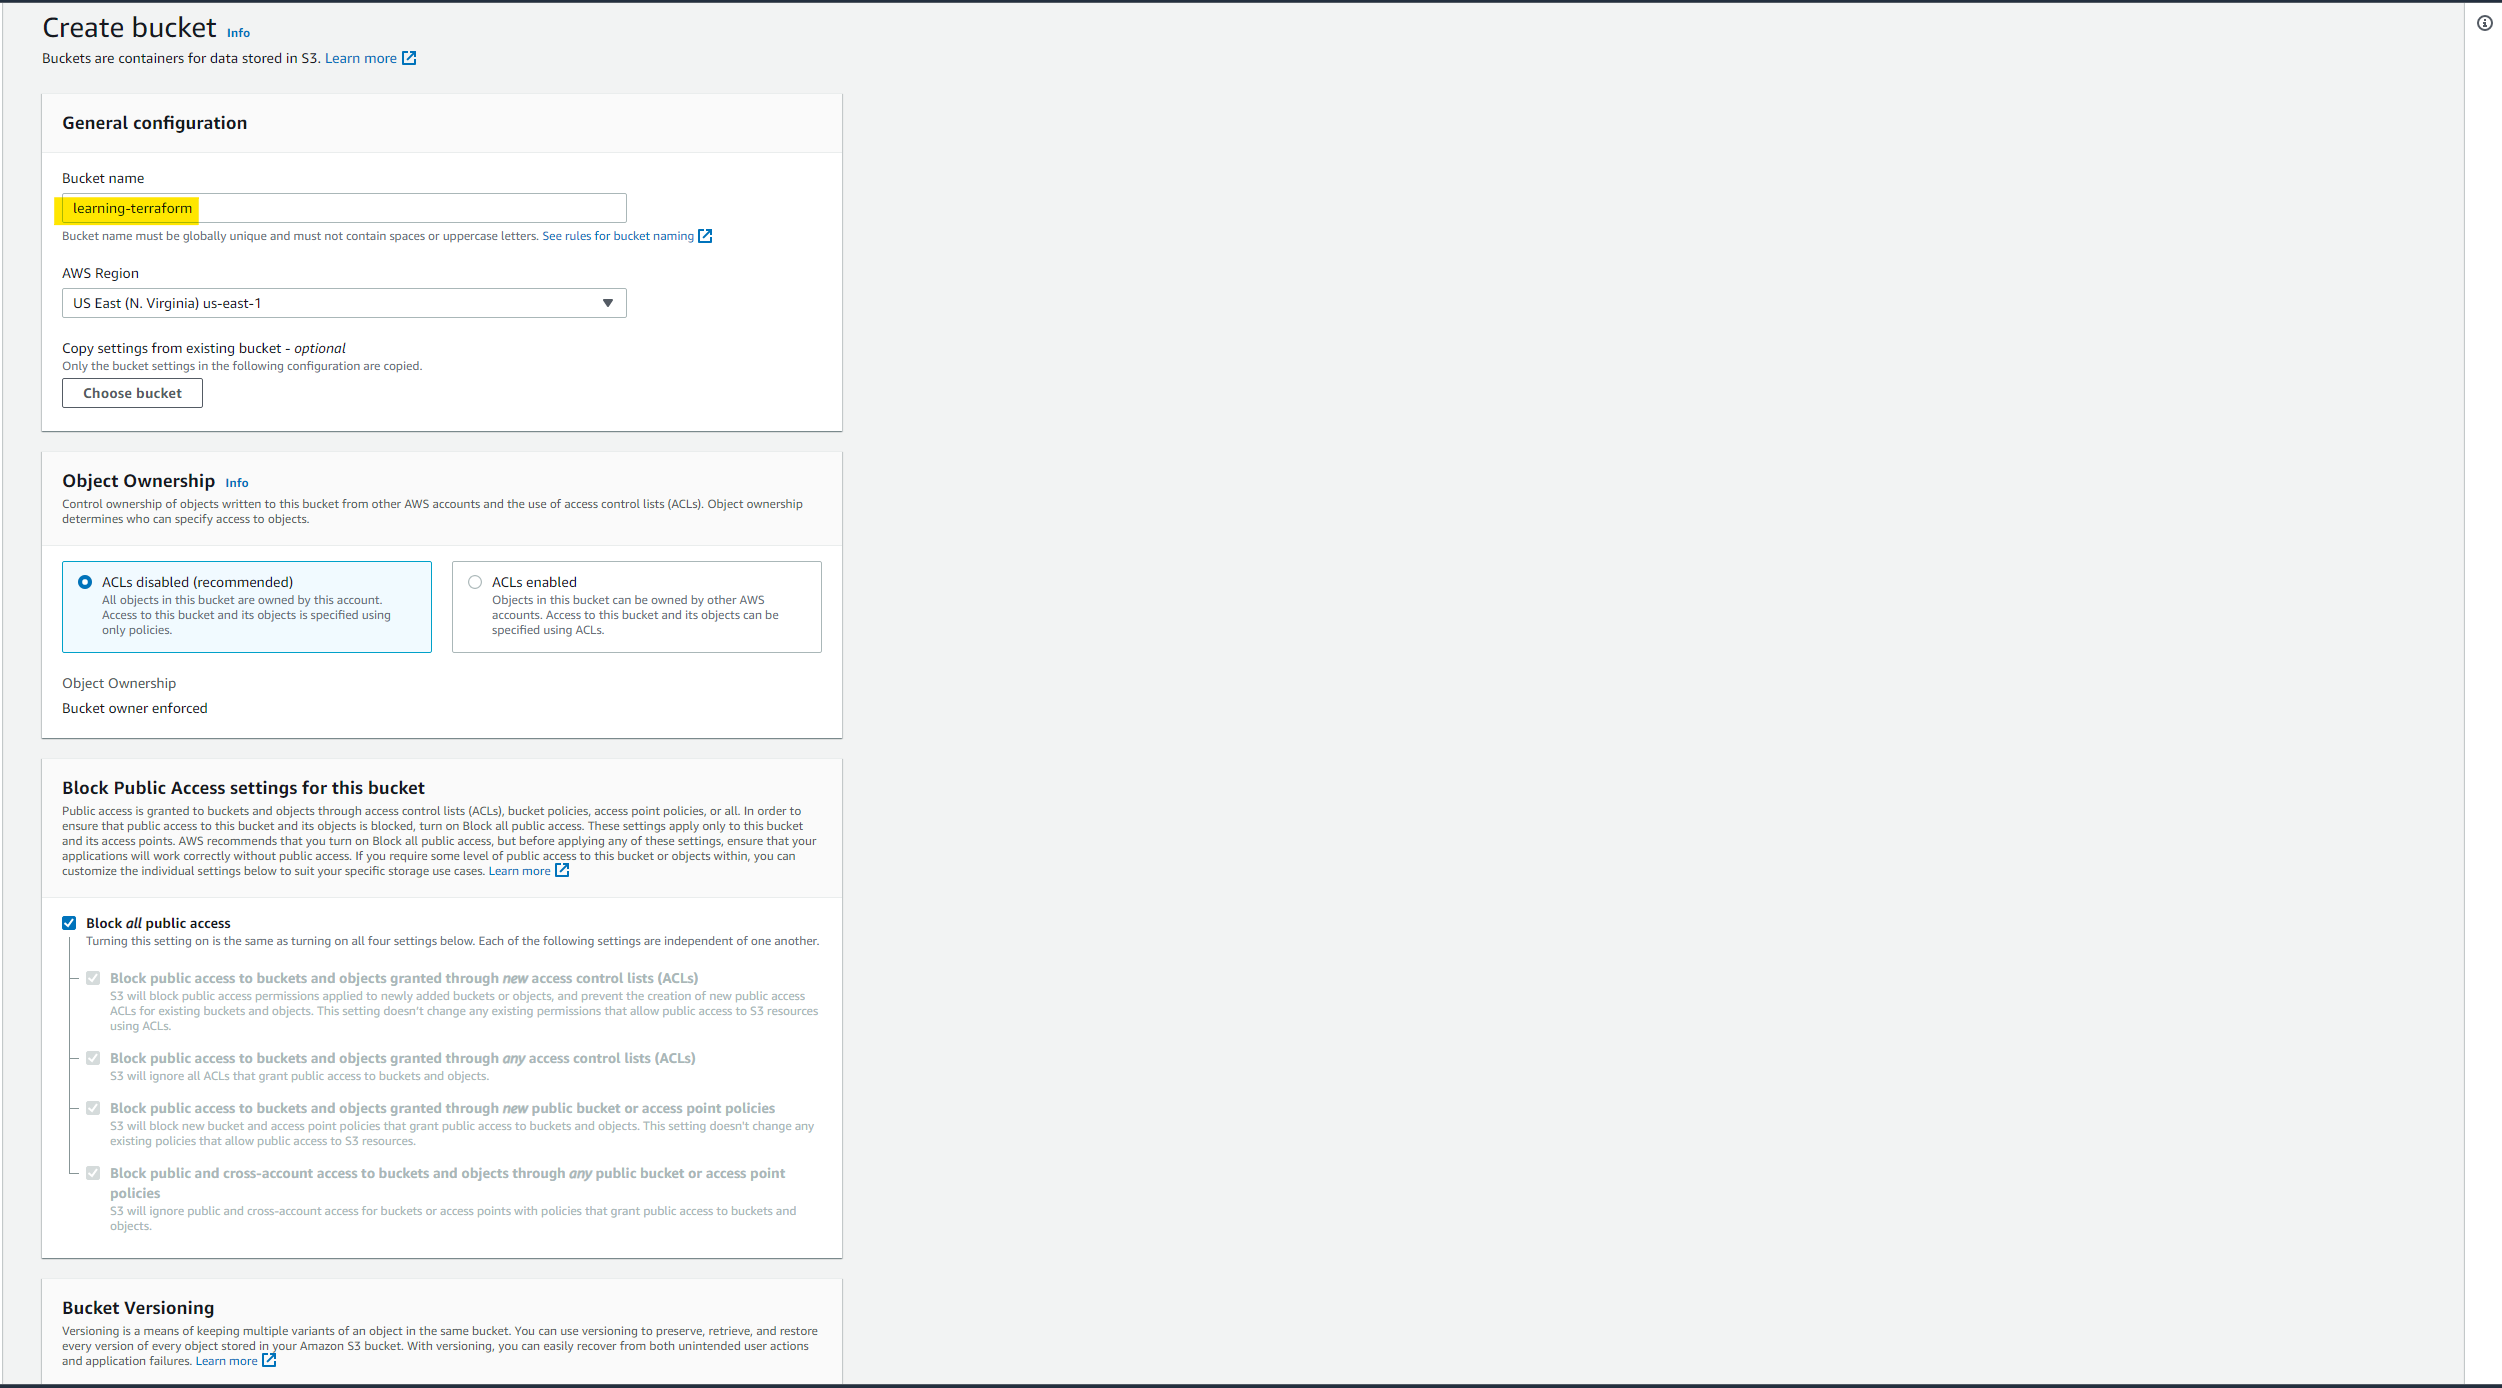
try to keep versioning for backups
You can enable versioning while creating a bucket but if you forget then select the bucket that you have just created and click on the Properties tab and on the top you will find the option Bucket versioning. click on edit and enable it.

state-locking so that we can keep tfstate file consistent while working on a collaborative project
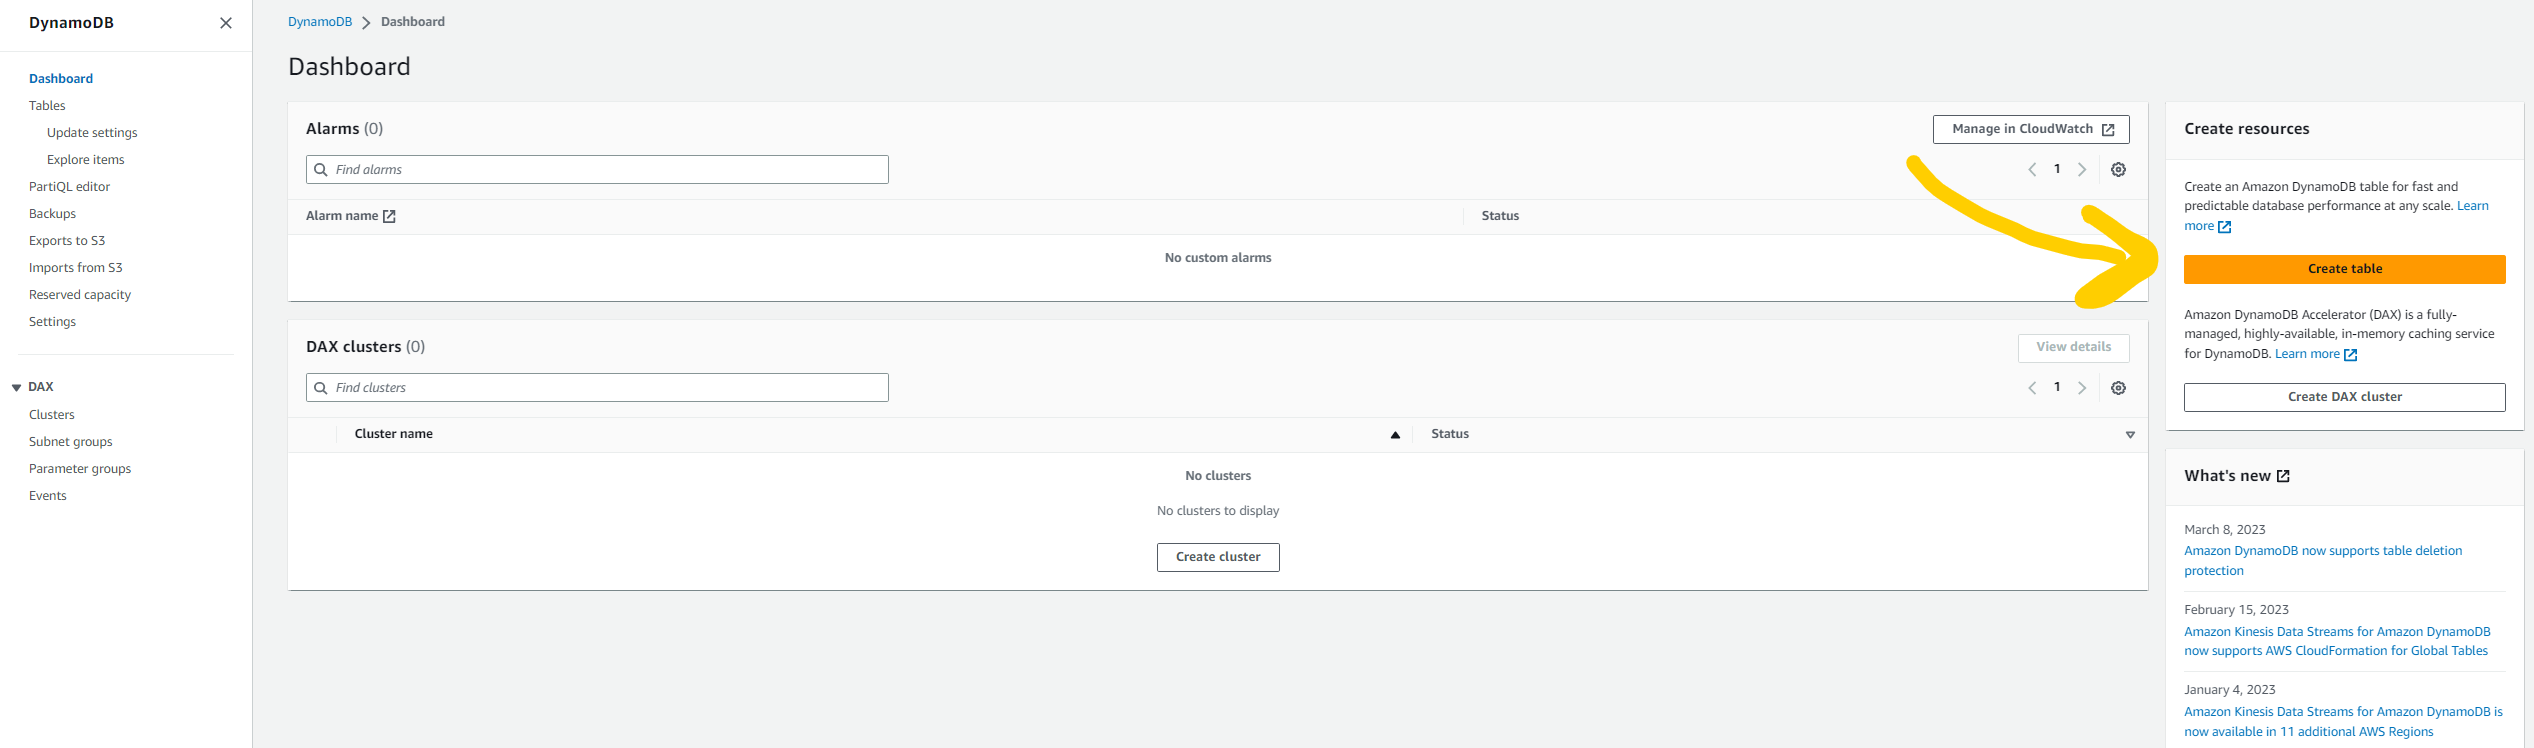
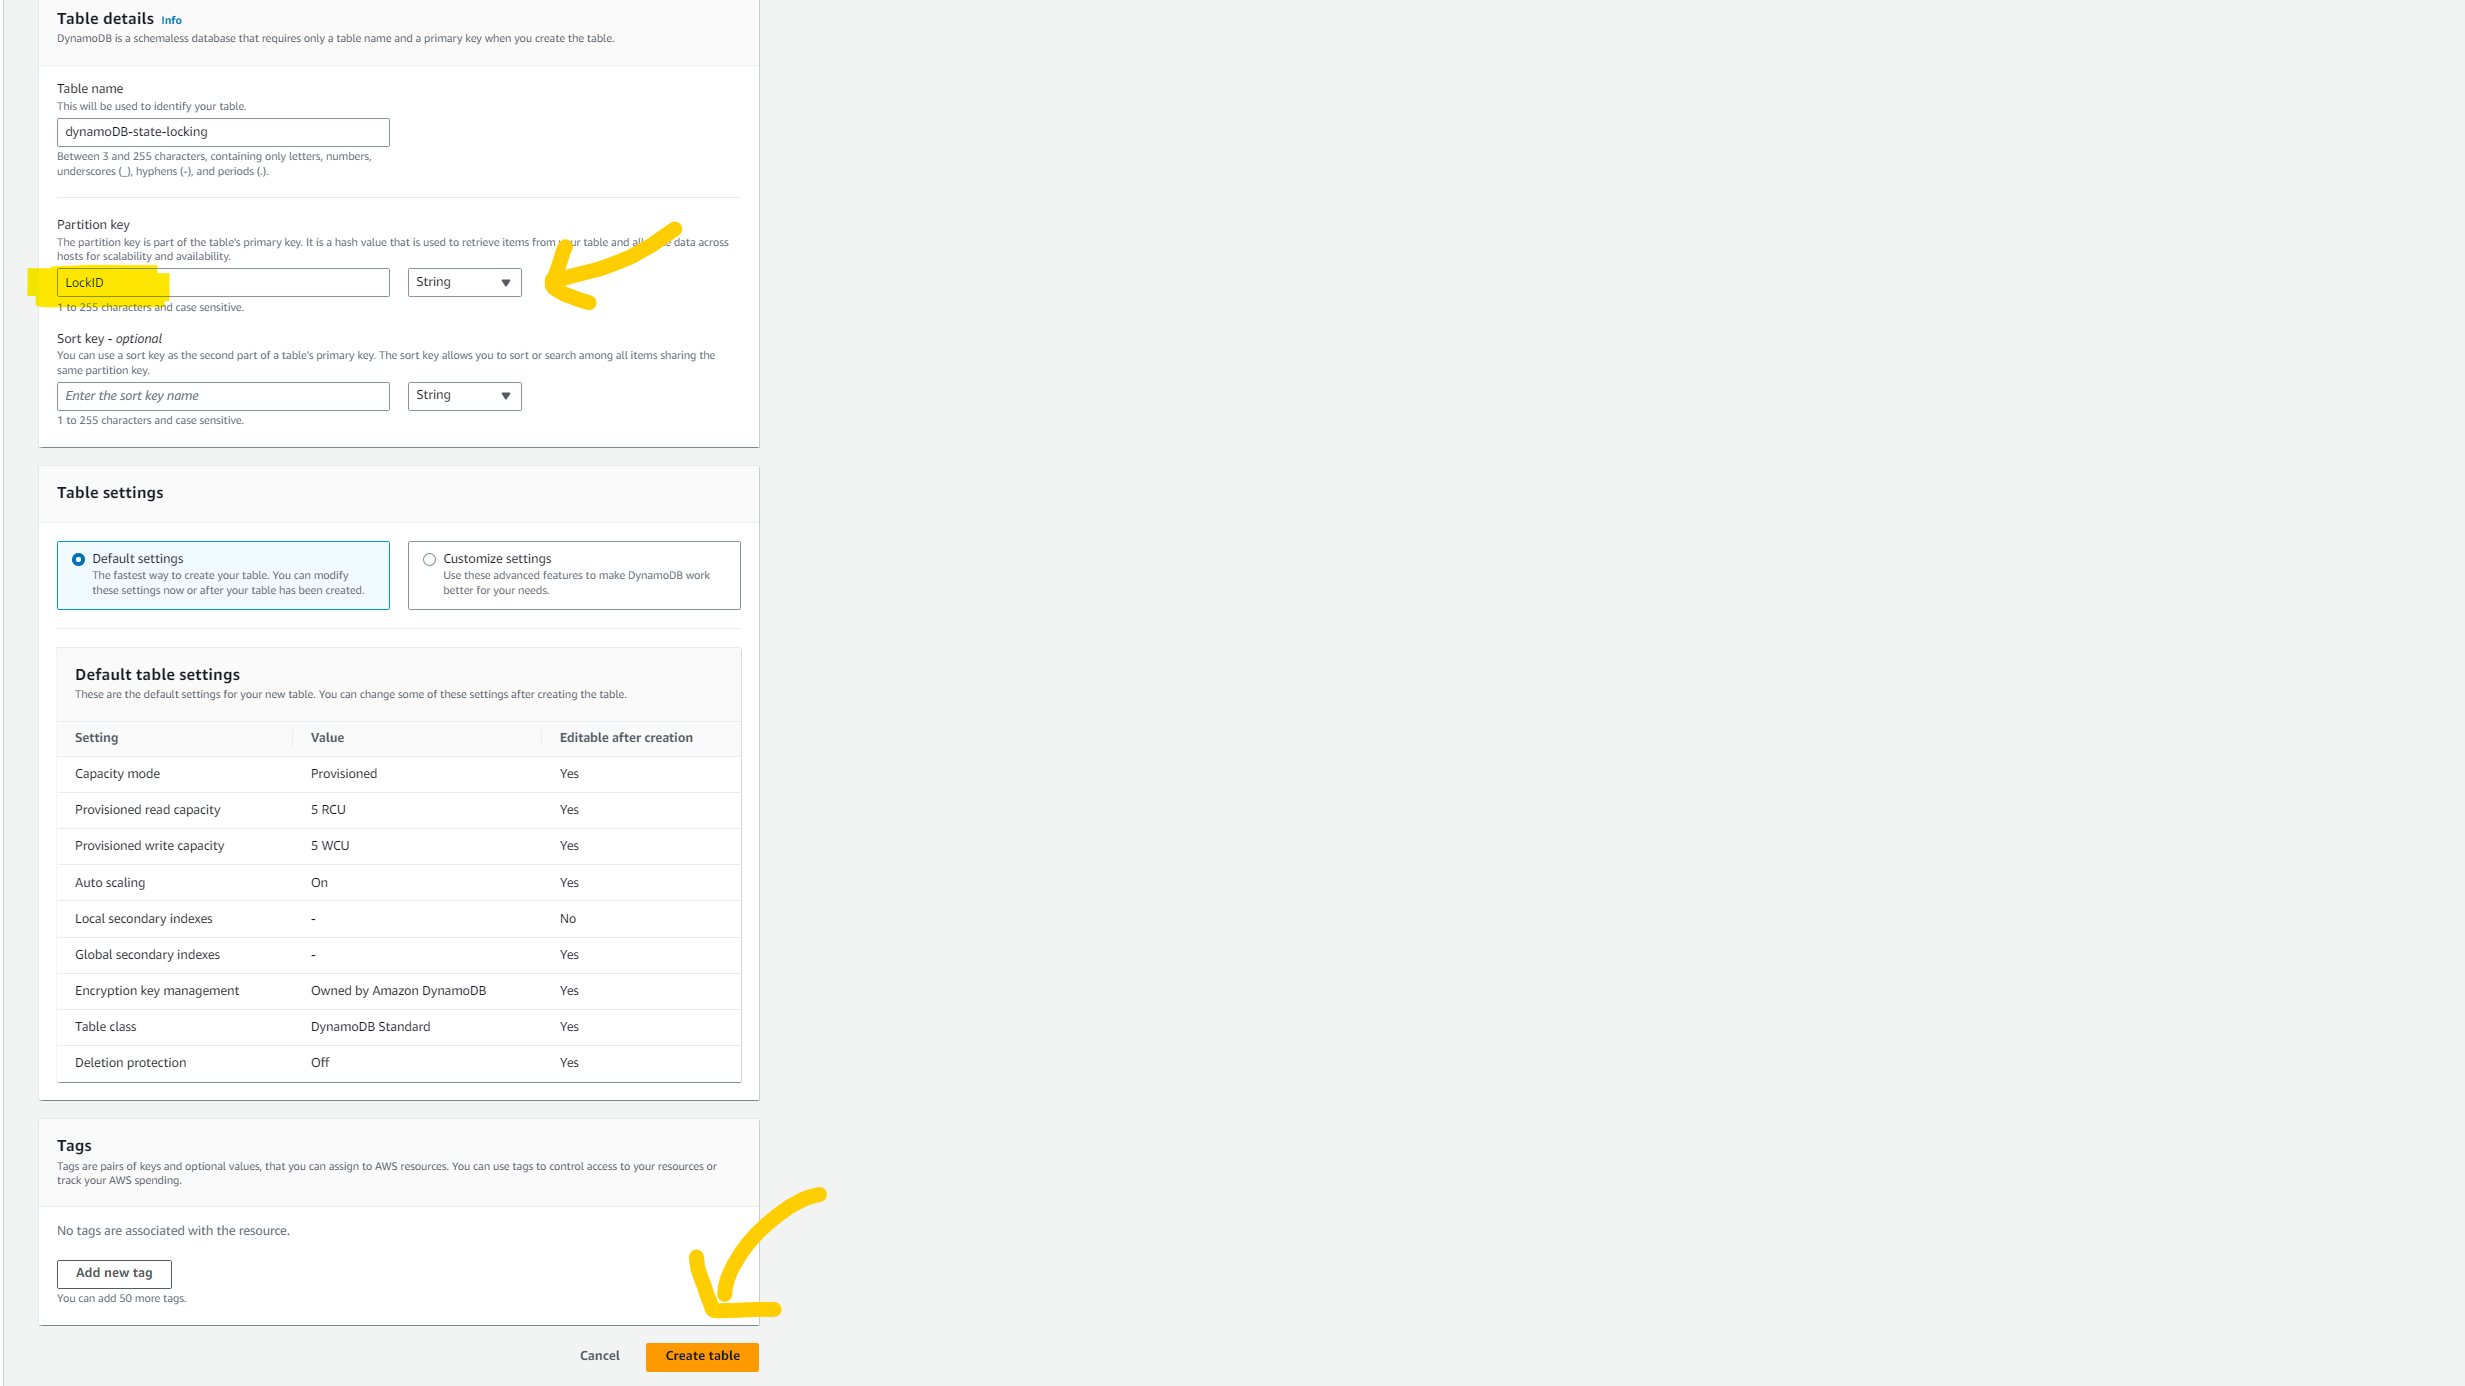
please go to the dynamoDB service dashboard and click on create table button. Give your table name whatever you want but in Partition Key give the name LockID (NOTE: it is case sensitive) coz then only dynamoDB will be able to lock the file and release the file. and then click on create table button. The locking system is just like the semaphore that we have studied in the Operating system and here tfstate file is a critical section. so two processes should not access it simultaneously.
use VCS like git and github
follow modular approach
NOTE: You will get all the code and files on my GitHub repository and I'll share the link with you at the END of the blog. but let me share a few things that you need to take care of while writing code in the backend.tf file.
book_shop_app/backend.tf
terraform {
  backend "s3" {
    bucket = "BUCKET_NAME"
    key    = "backend/FILE_NAME_TO_STORE_STATE.tfstate"
    region = "us-east-1"
    dynamodb_table = "dynamoDB_TABLE_NAME"
  }
}
Create one file with the name of terraform.tfvars in the project directory.
book_shop_app/terraform.tfvars
REGION                  = ""
PROJECT_NAME            = ""
VPC_CIDR                = ""
PUB_SUB_1_A_CIDR        = ""
PUB_SUB_2_B_CIDR        = ""
PRI_SUB_3_A_CIDR        = ""
PRI_SUB_4_B_CIDR        = ""
PRI_SUB_5_A_CIDR        = ""
PRI_SUB_6_B_CIDR        = ""
DB_USERNAME             = ""
DB_PASSWORD             = ""
CERTIFICATE_DOMAIN_NAME = ""
ADDITIONAL_DOMAIN_NAME  = ""
Note: above file is very important to set up the infrastructure so make sure you fill all the variable's values carefully.
Please visit my Github repository for to source code. and there you will find instructions to clone the repo and run it on your local machine.
Github link: https://github.com/AnkitJodhani/3rdWeekofCloudOps
🖥️Outputs
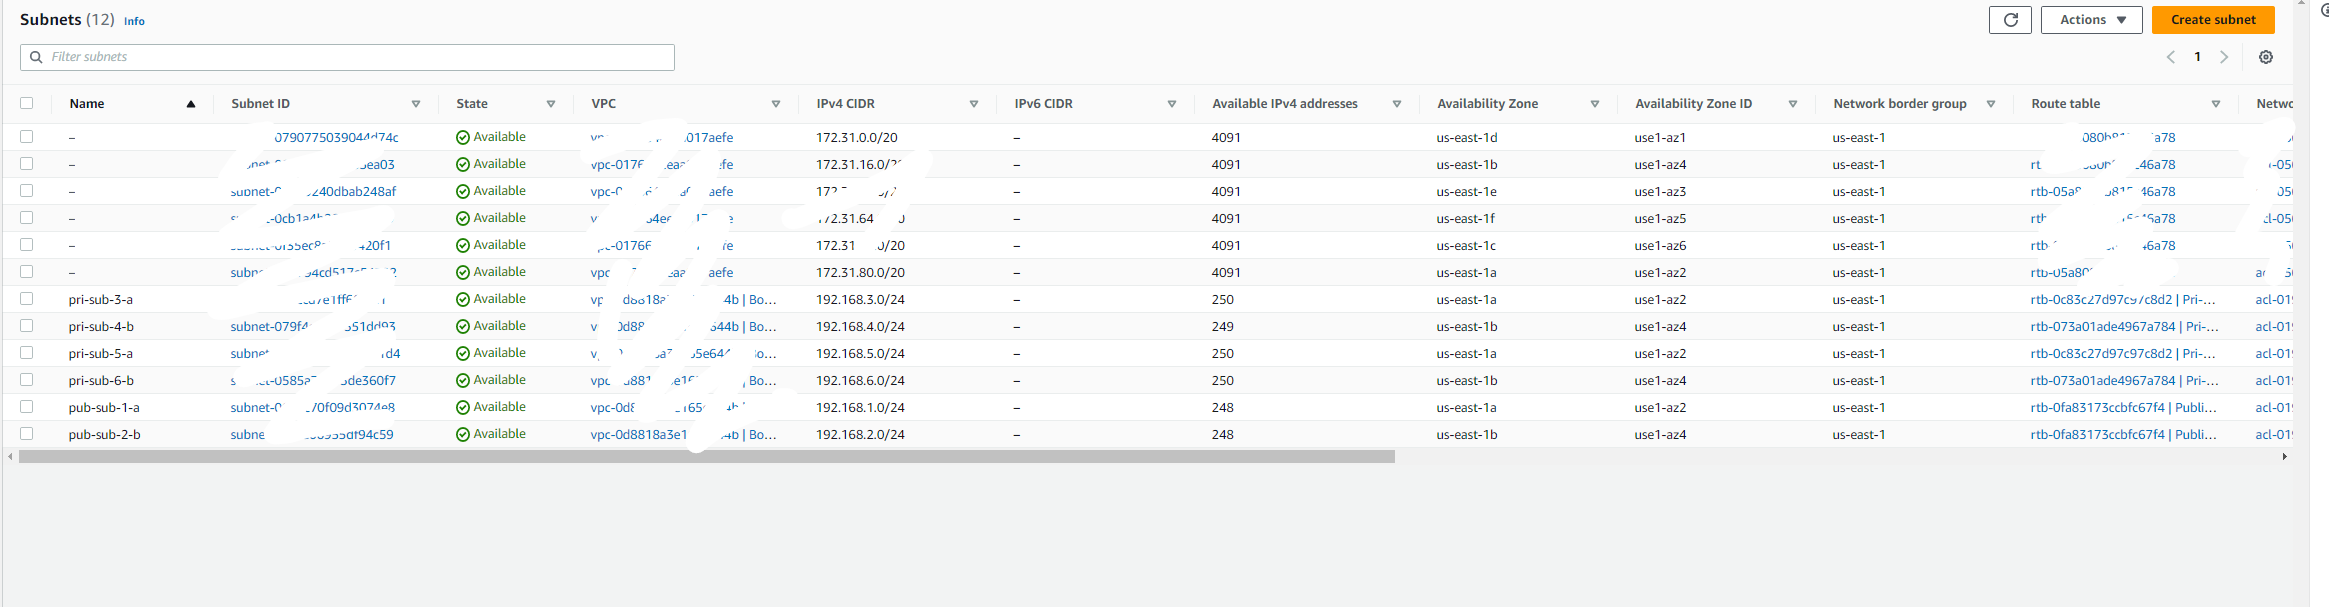
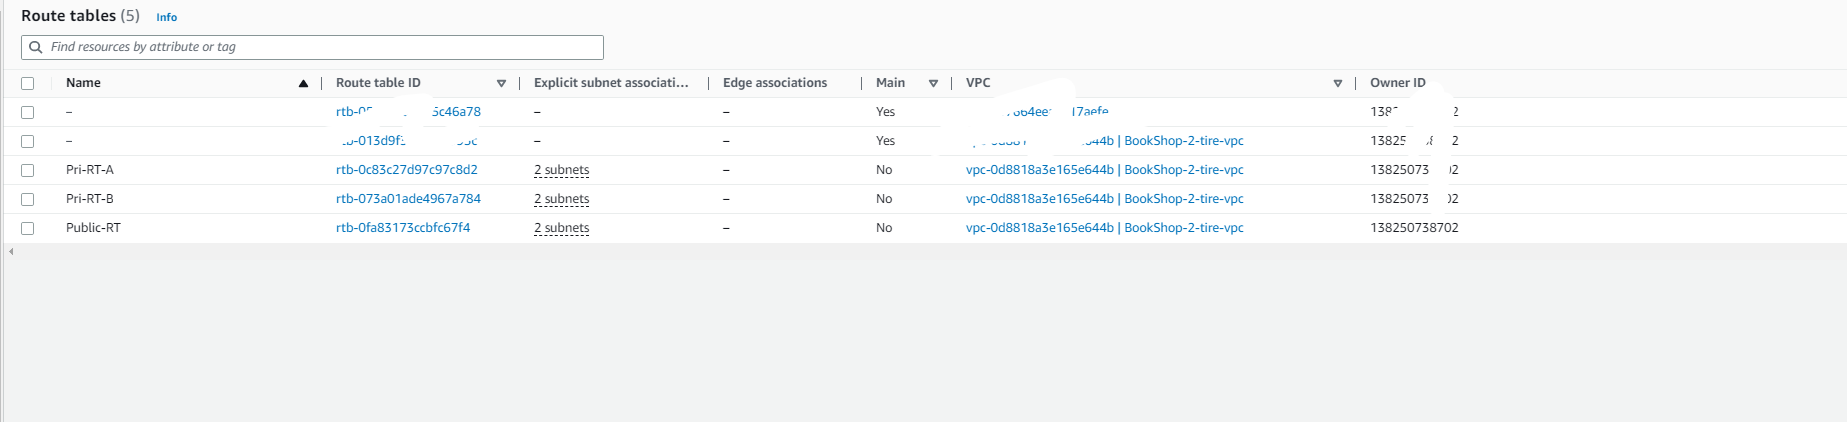
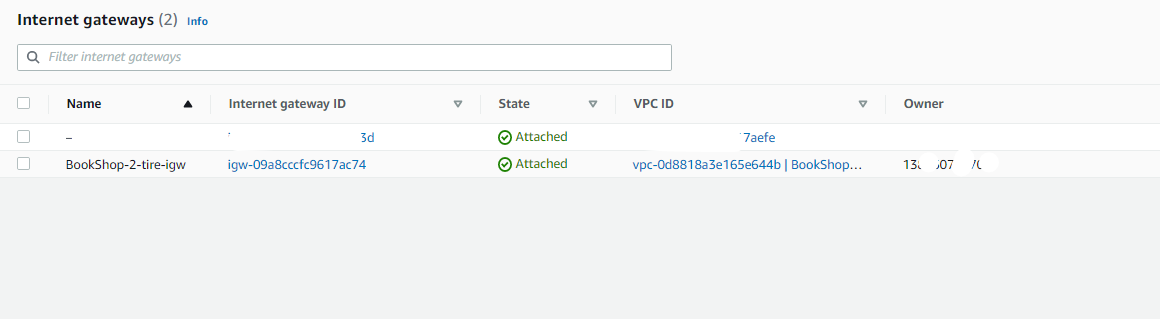
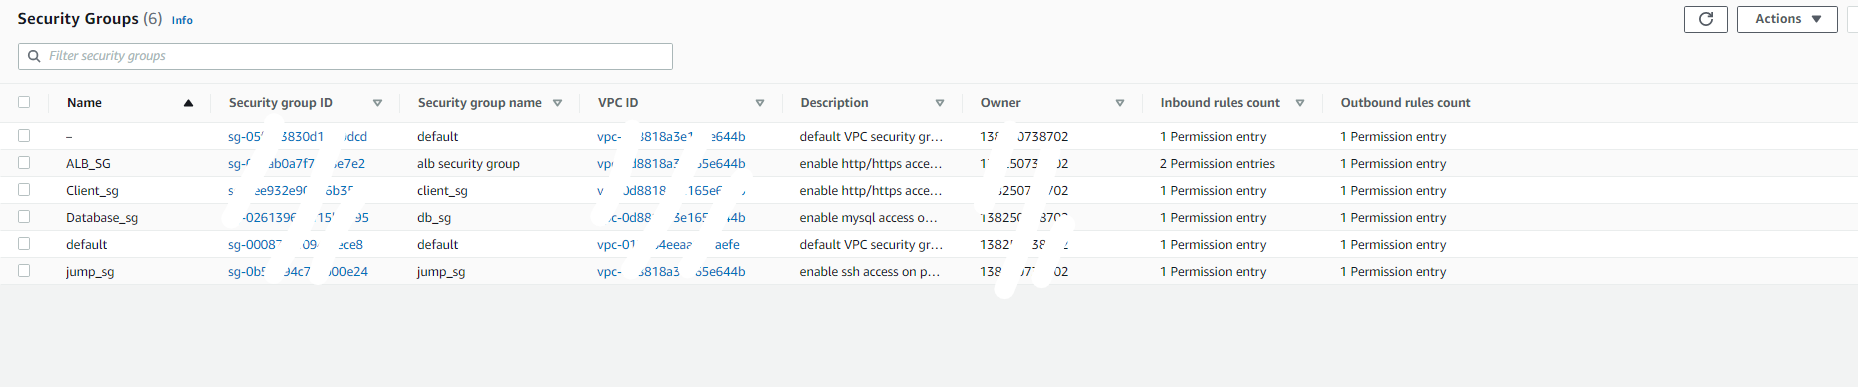
let's see what Terraform created on our AWS console.
VPC
Routing table
NAT-gateway

Internet-gateway
security groups
launch template

auto-scaling group

EC2 servers (Jump server )

Target group

Application load balancer

RDS instance

CloudFront distribution

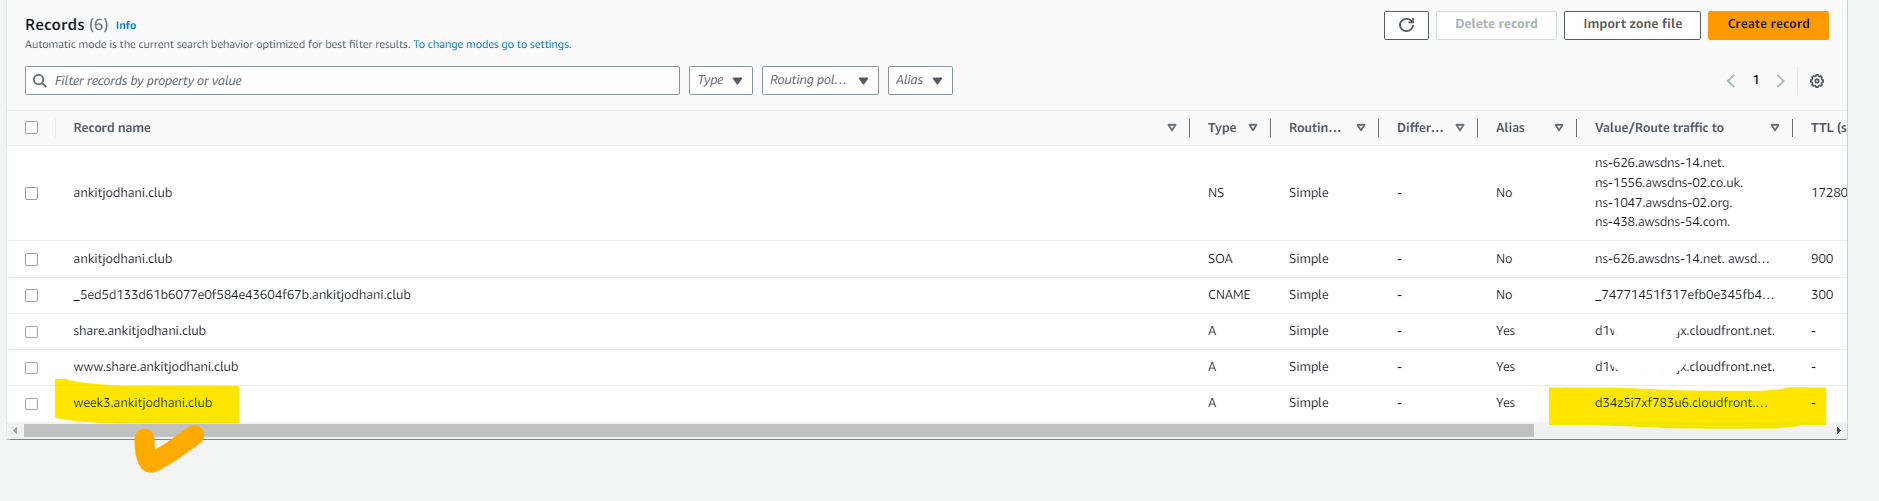
Record in route 53
📚Resources
https://cloudacademy.com/blog/architecting-on-aws-the-best-services-to-build-a-two-tier-application/
https://hands-on.cloud/cloudfront-terraform-examples/#h-integrating-cloudfront-with-alb-using-terraform
https://gmusumeci.medium.com/how-to-create-route-53-records-from-aws-cross-accounts-with-terraform-ef242528d606
https://registry.terraform.io/providers/hashicorp/aws/latest/docs
https://www.youtube.com/watch?v=ZP_vAbjfFMs
https://www.youtube.com/watch?v=oohXRXjahFA&list=PL184oVW5ERMCxA4336x_TM7q1Cs8y0x1s&index=8
https://www.youtube.com/watch?v=1OYONBN2jgE&list=PL184oVW5ERMCxA4336x_TM7q1Cs8y0x1s&index=11
https://spacelift.io/blog/terraform-best-practices
🙏Thank you for reading...
please follow for more such content😅.
🧑💻 Github repository link: https://github.com/AnkitJodhani/3rdWeekofCloudOps
🧑💻 Github profile: https://github.com/AnkitJodhani
✈️ Linkedin: https://www.linkedin.com/in/ankit-jodhani/


