


Table of contents
Prerequisite 🙂
AWS Account
WordPress backup if you have
So let's start our small journey.
step 1: Log in to your AWS account
Step 2: Search Lightsail in the search bar of the AWS Management console. and open it. just as I show below.
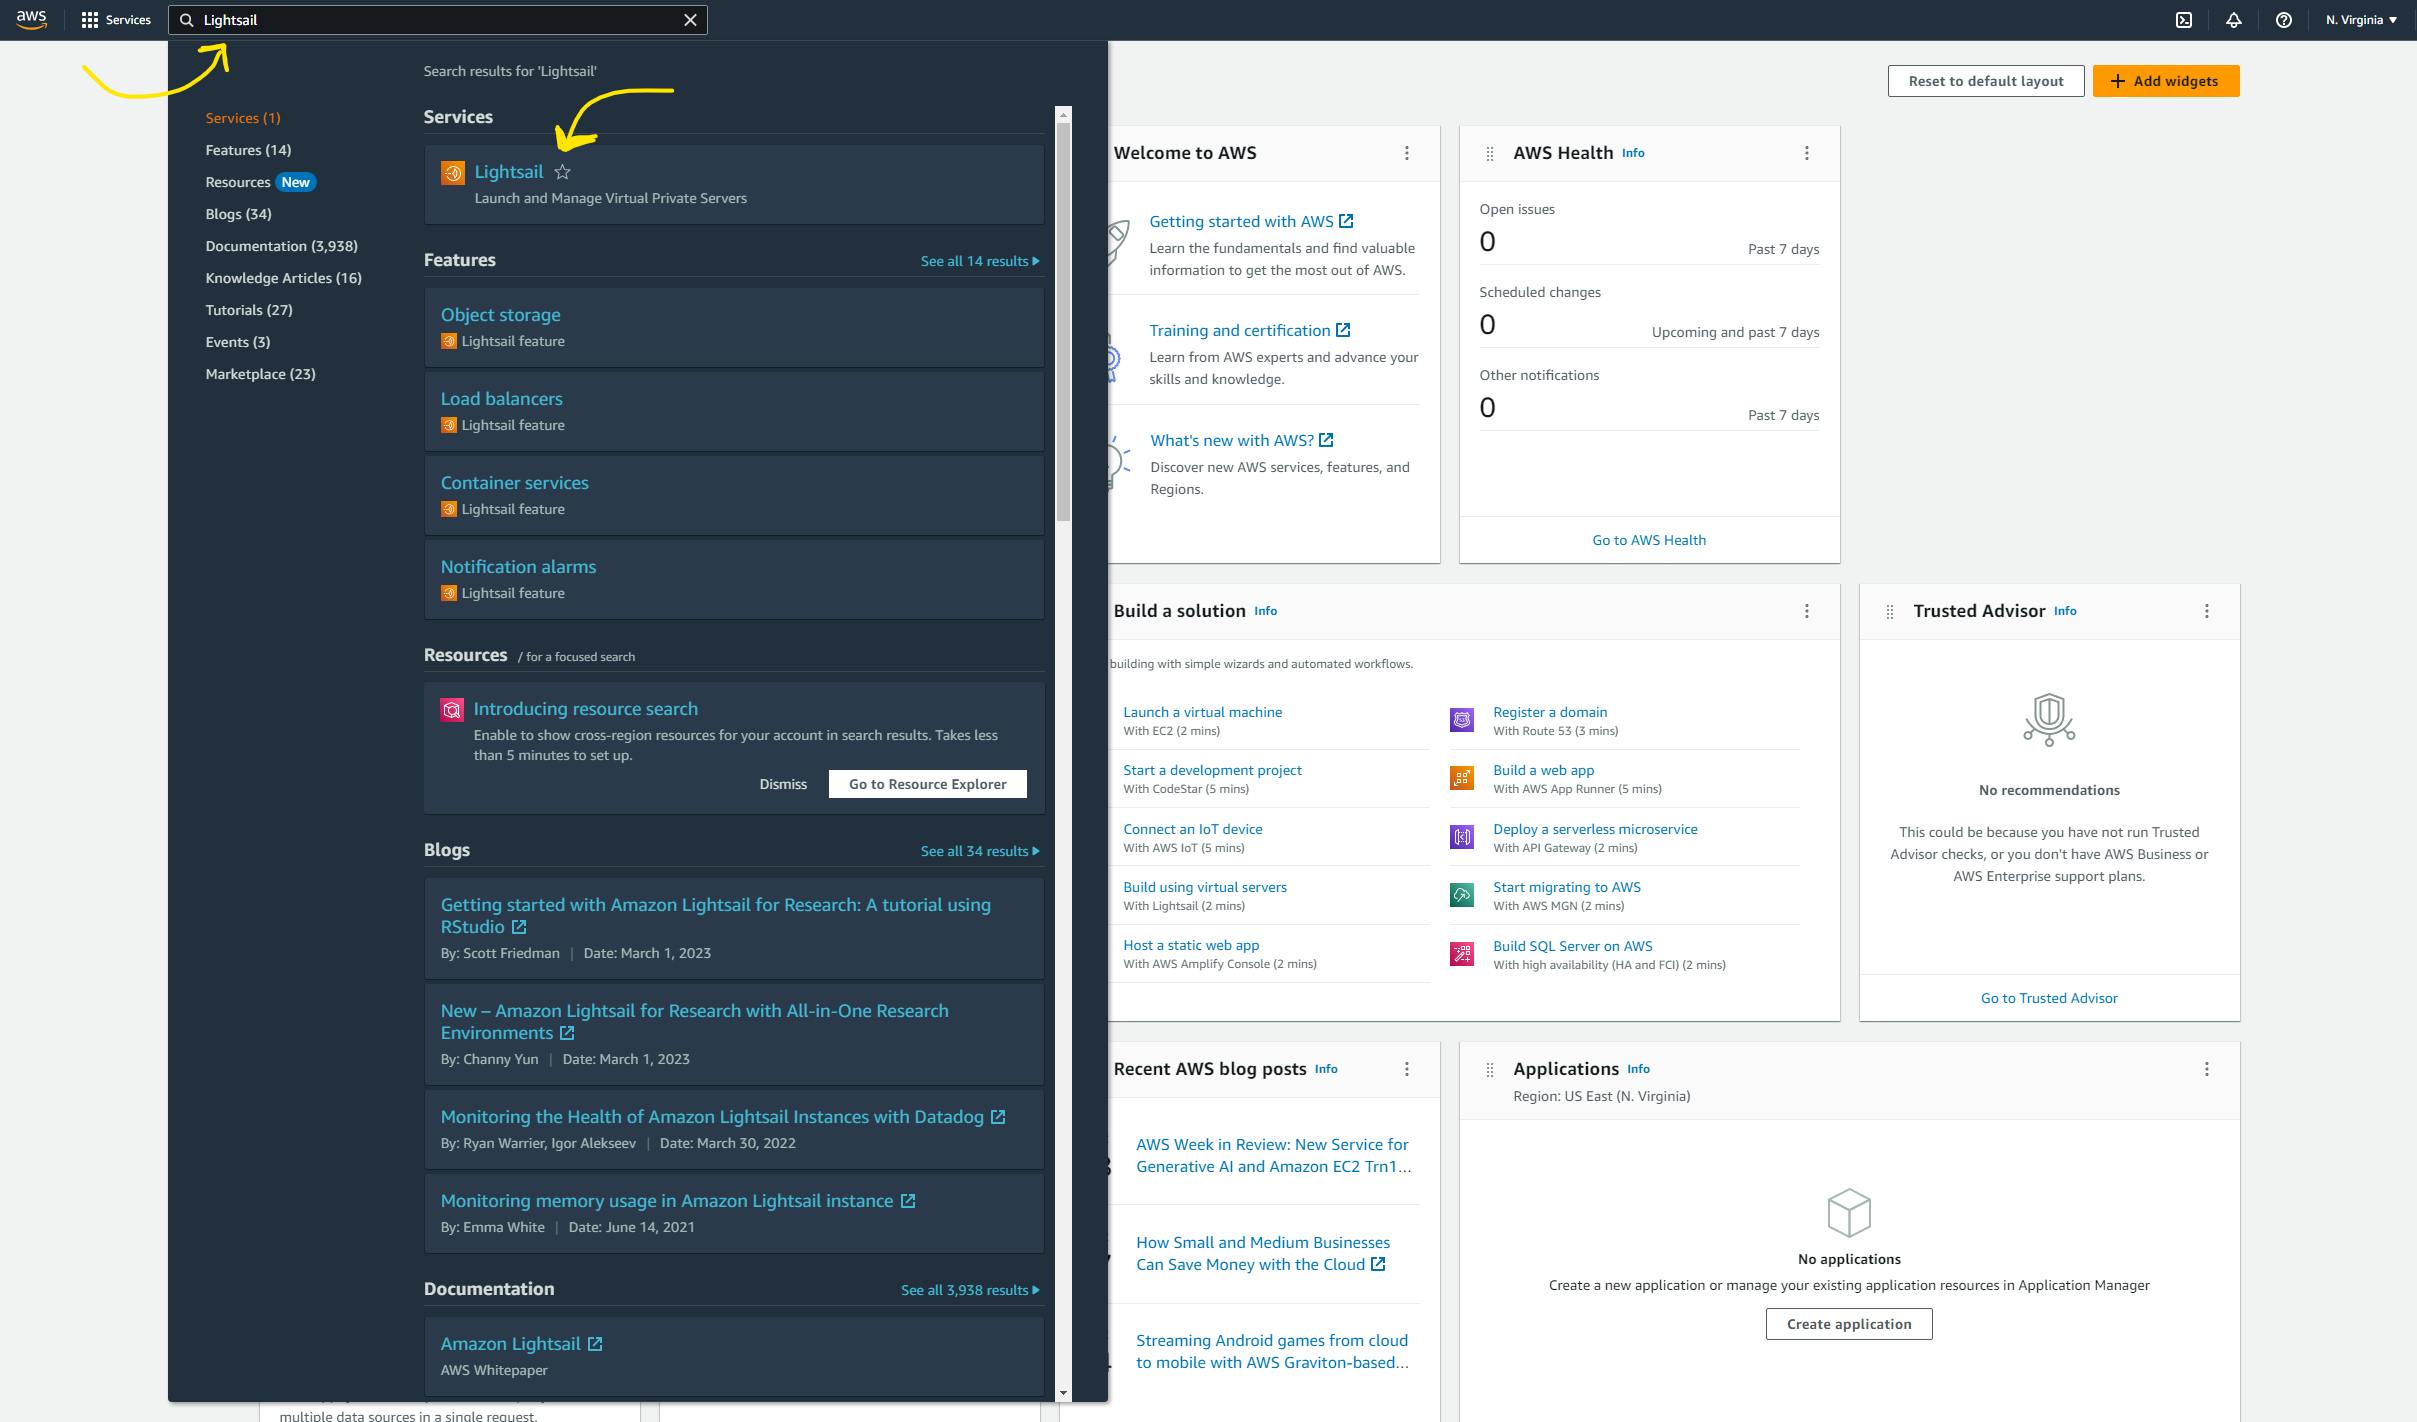
step 3 : Click on Lightsail service and you'll see the Lightsail dashboard.
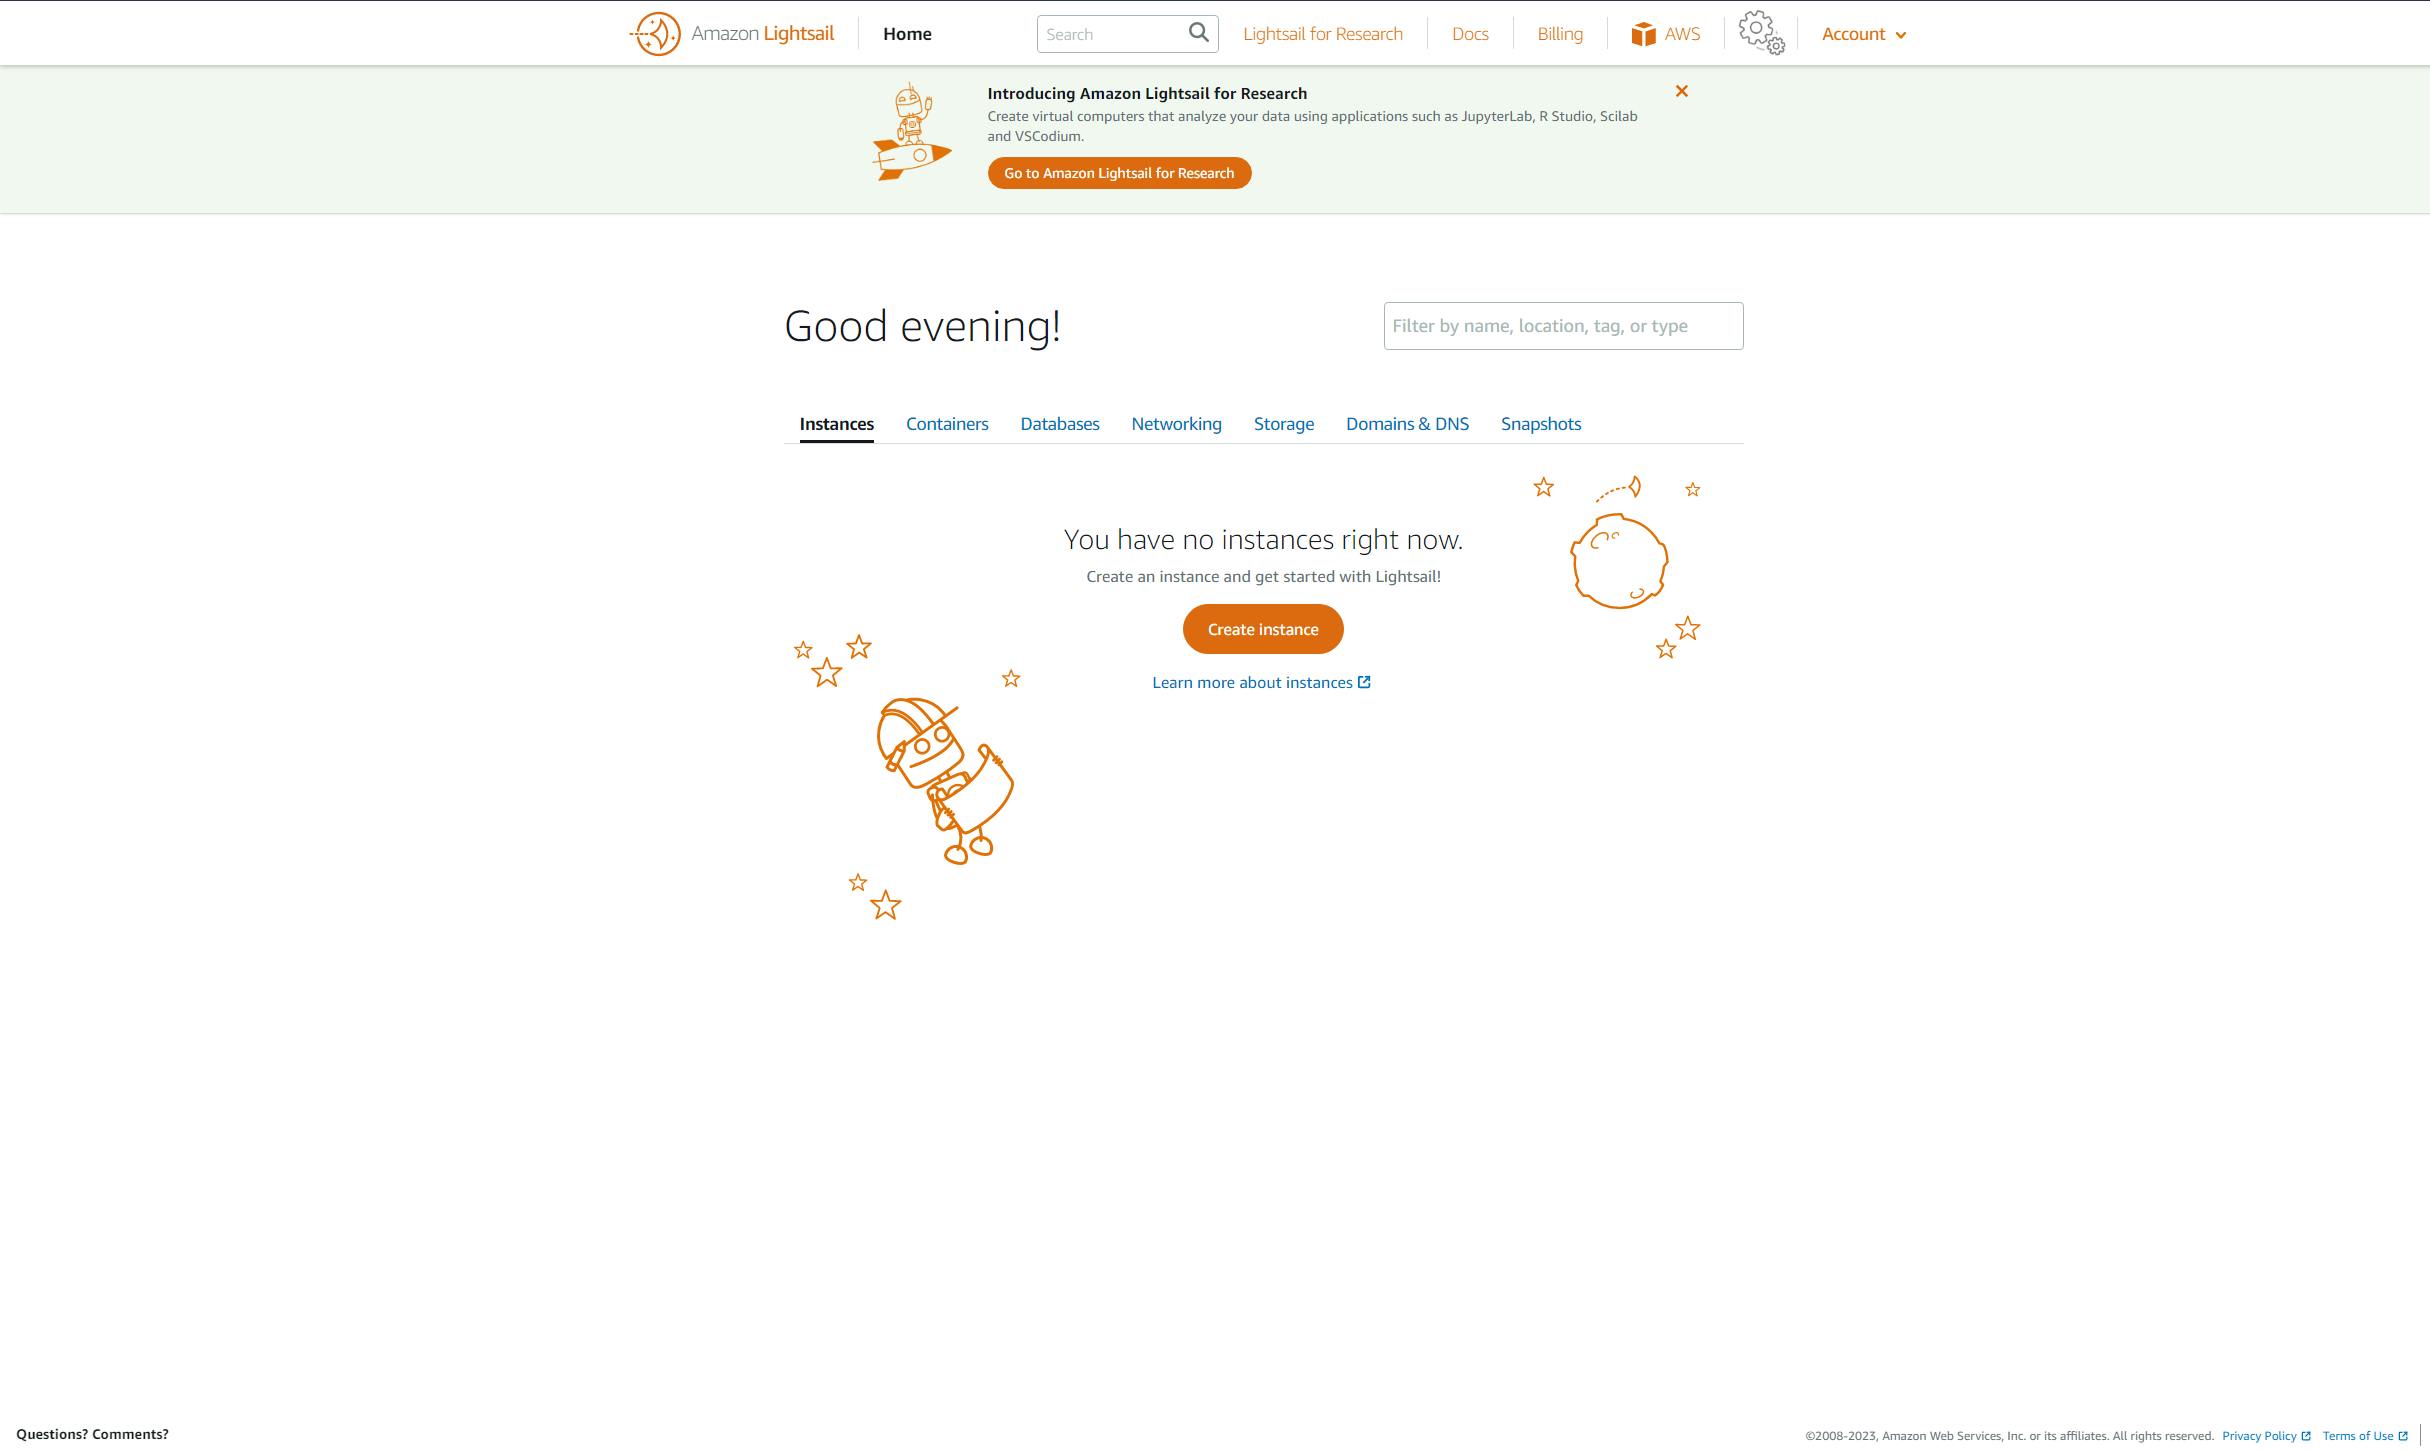
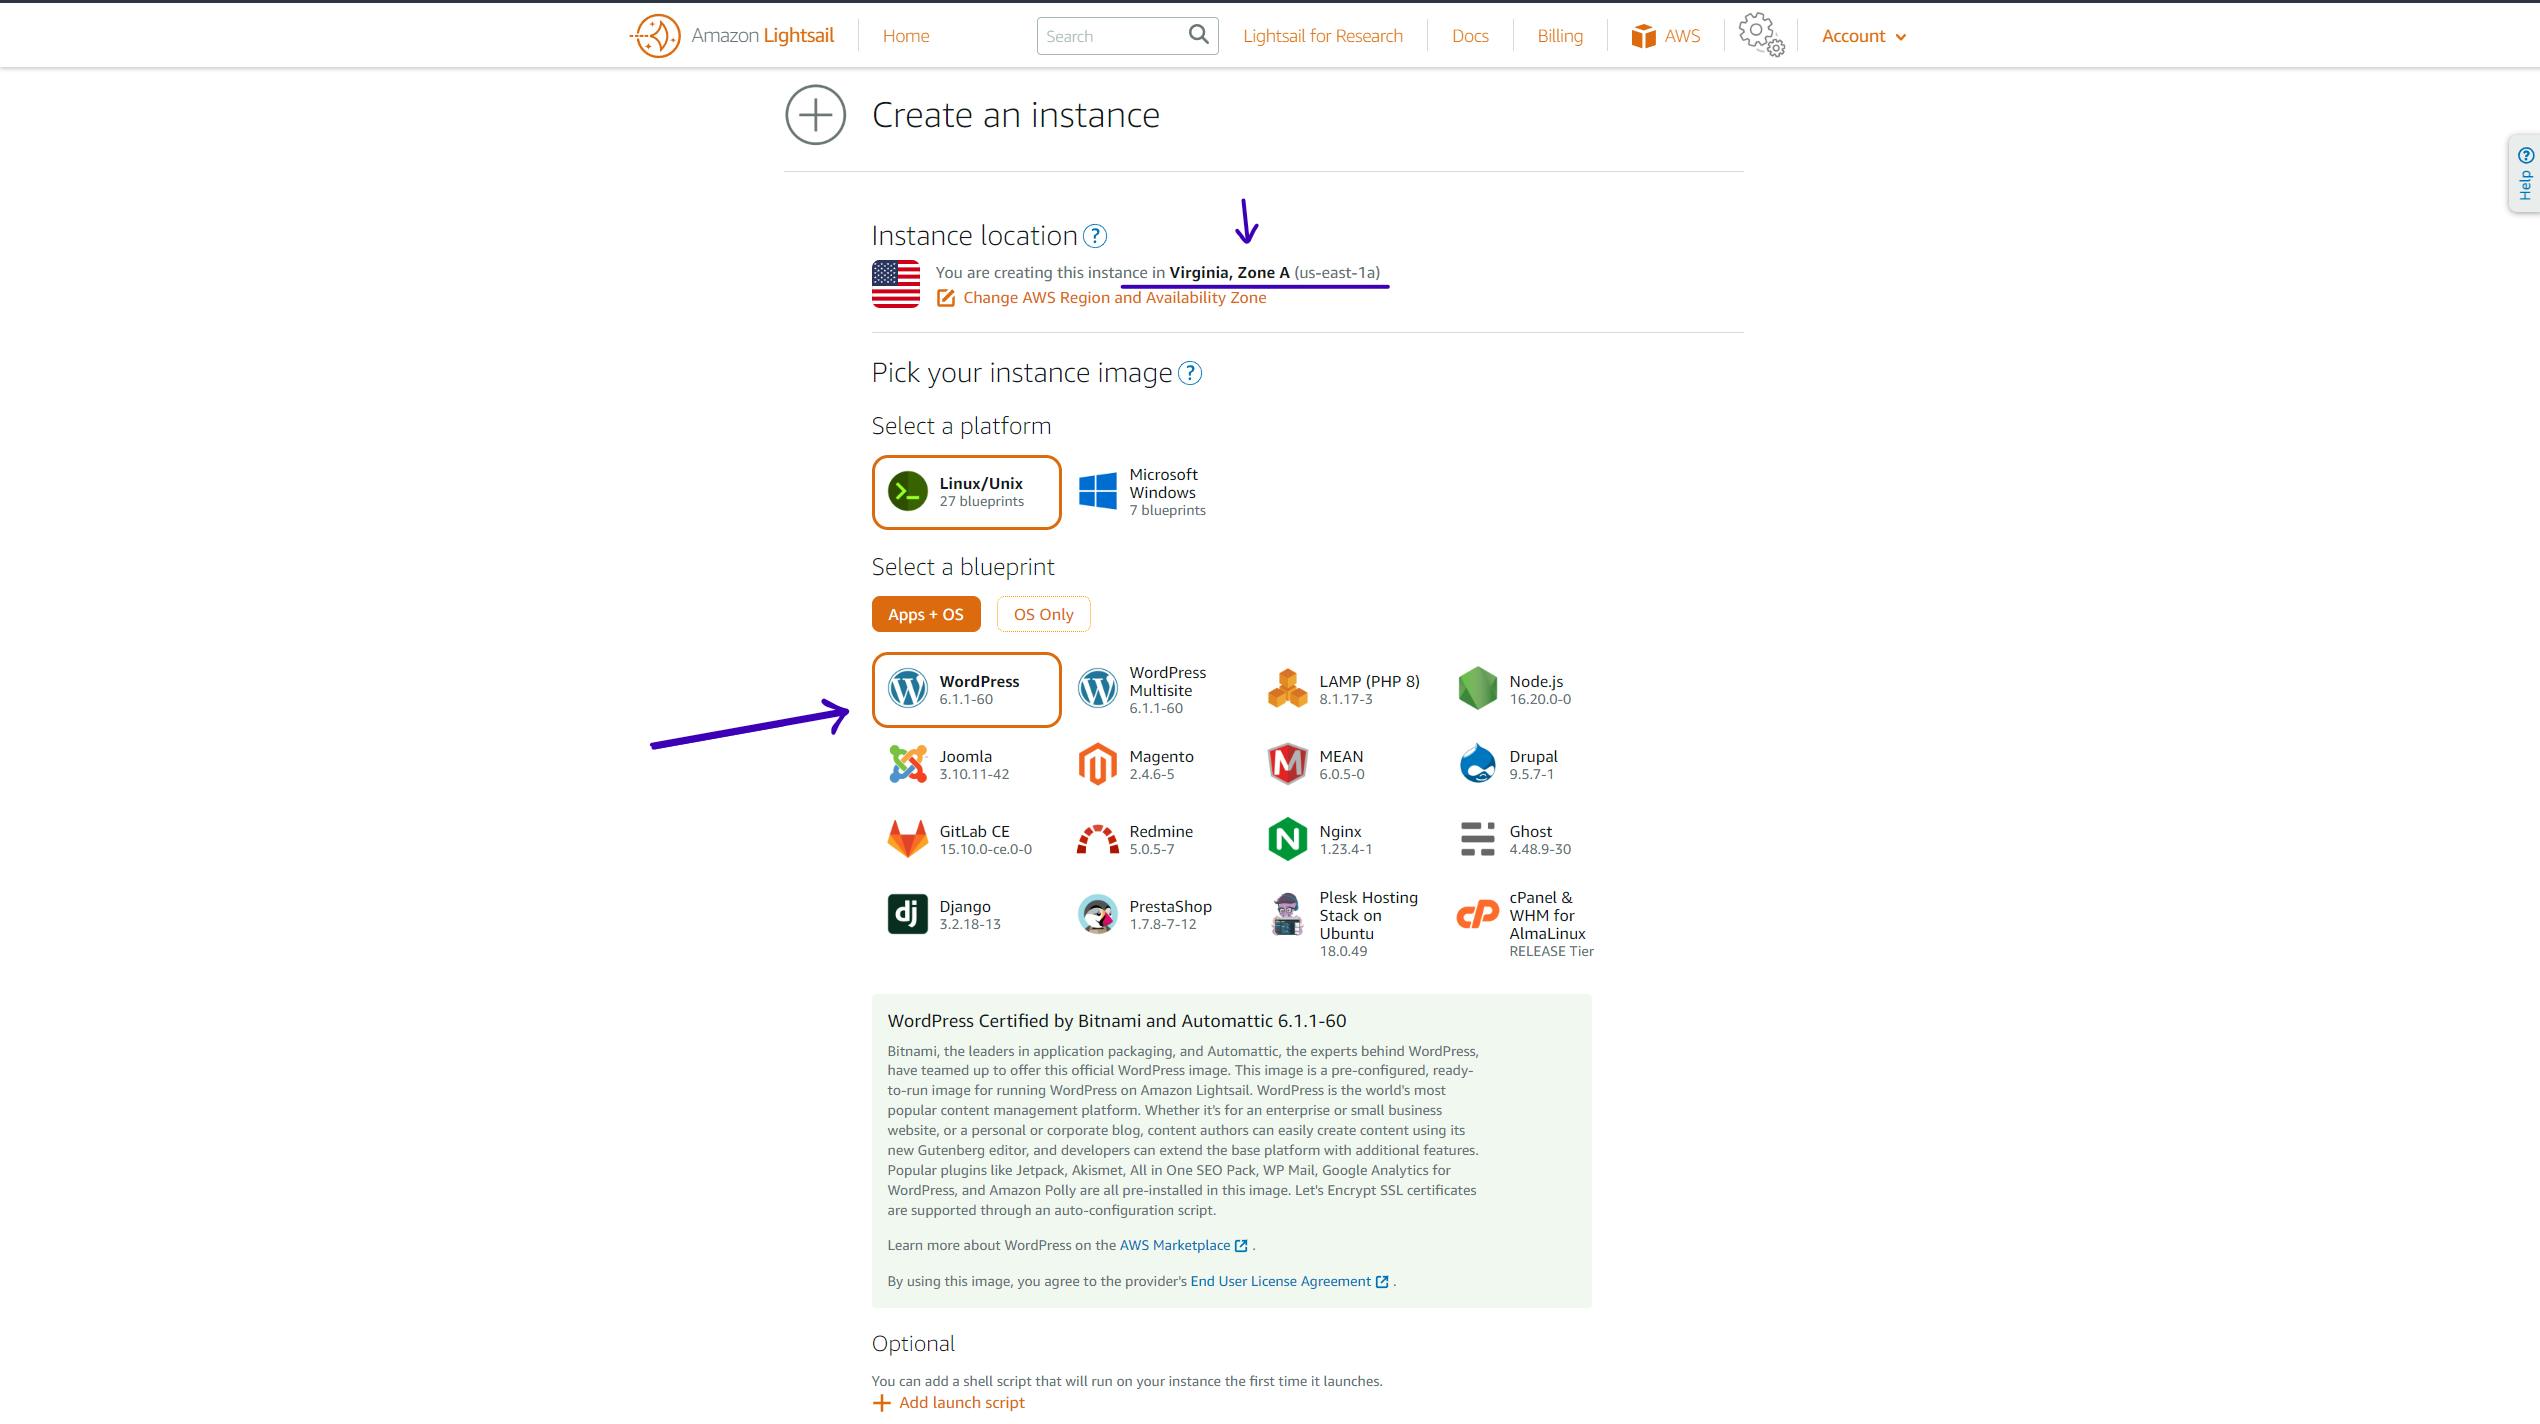
step 4: Click on the create instance button which you can see in the middle of the page. Now you will see the page that decides all your server configurations. make sure that you will choose depending on your need.
note: You can follow the image below to proceed
select a region where you want to host your website. if you don't have an idea then select North Virginia (us-east-1)
choose Linux as a platform because it's free
select WordPress as shown in the figure so you don't need to install it separately.
scroll down you'll see some more options and follow step 5.
step 5: select the correct plan as par you need. or you can try for a smaller plan now and depending on the traffic that you get you can increase in the future. give some name to your instance and click on Create instance button.

step 6: Now you can see your instance on your Lightsail dashboard. take the IP address of your instance and paste it into the browser and you will see a basic template created by WordPress.
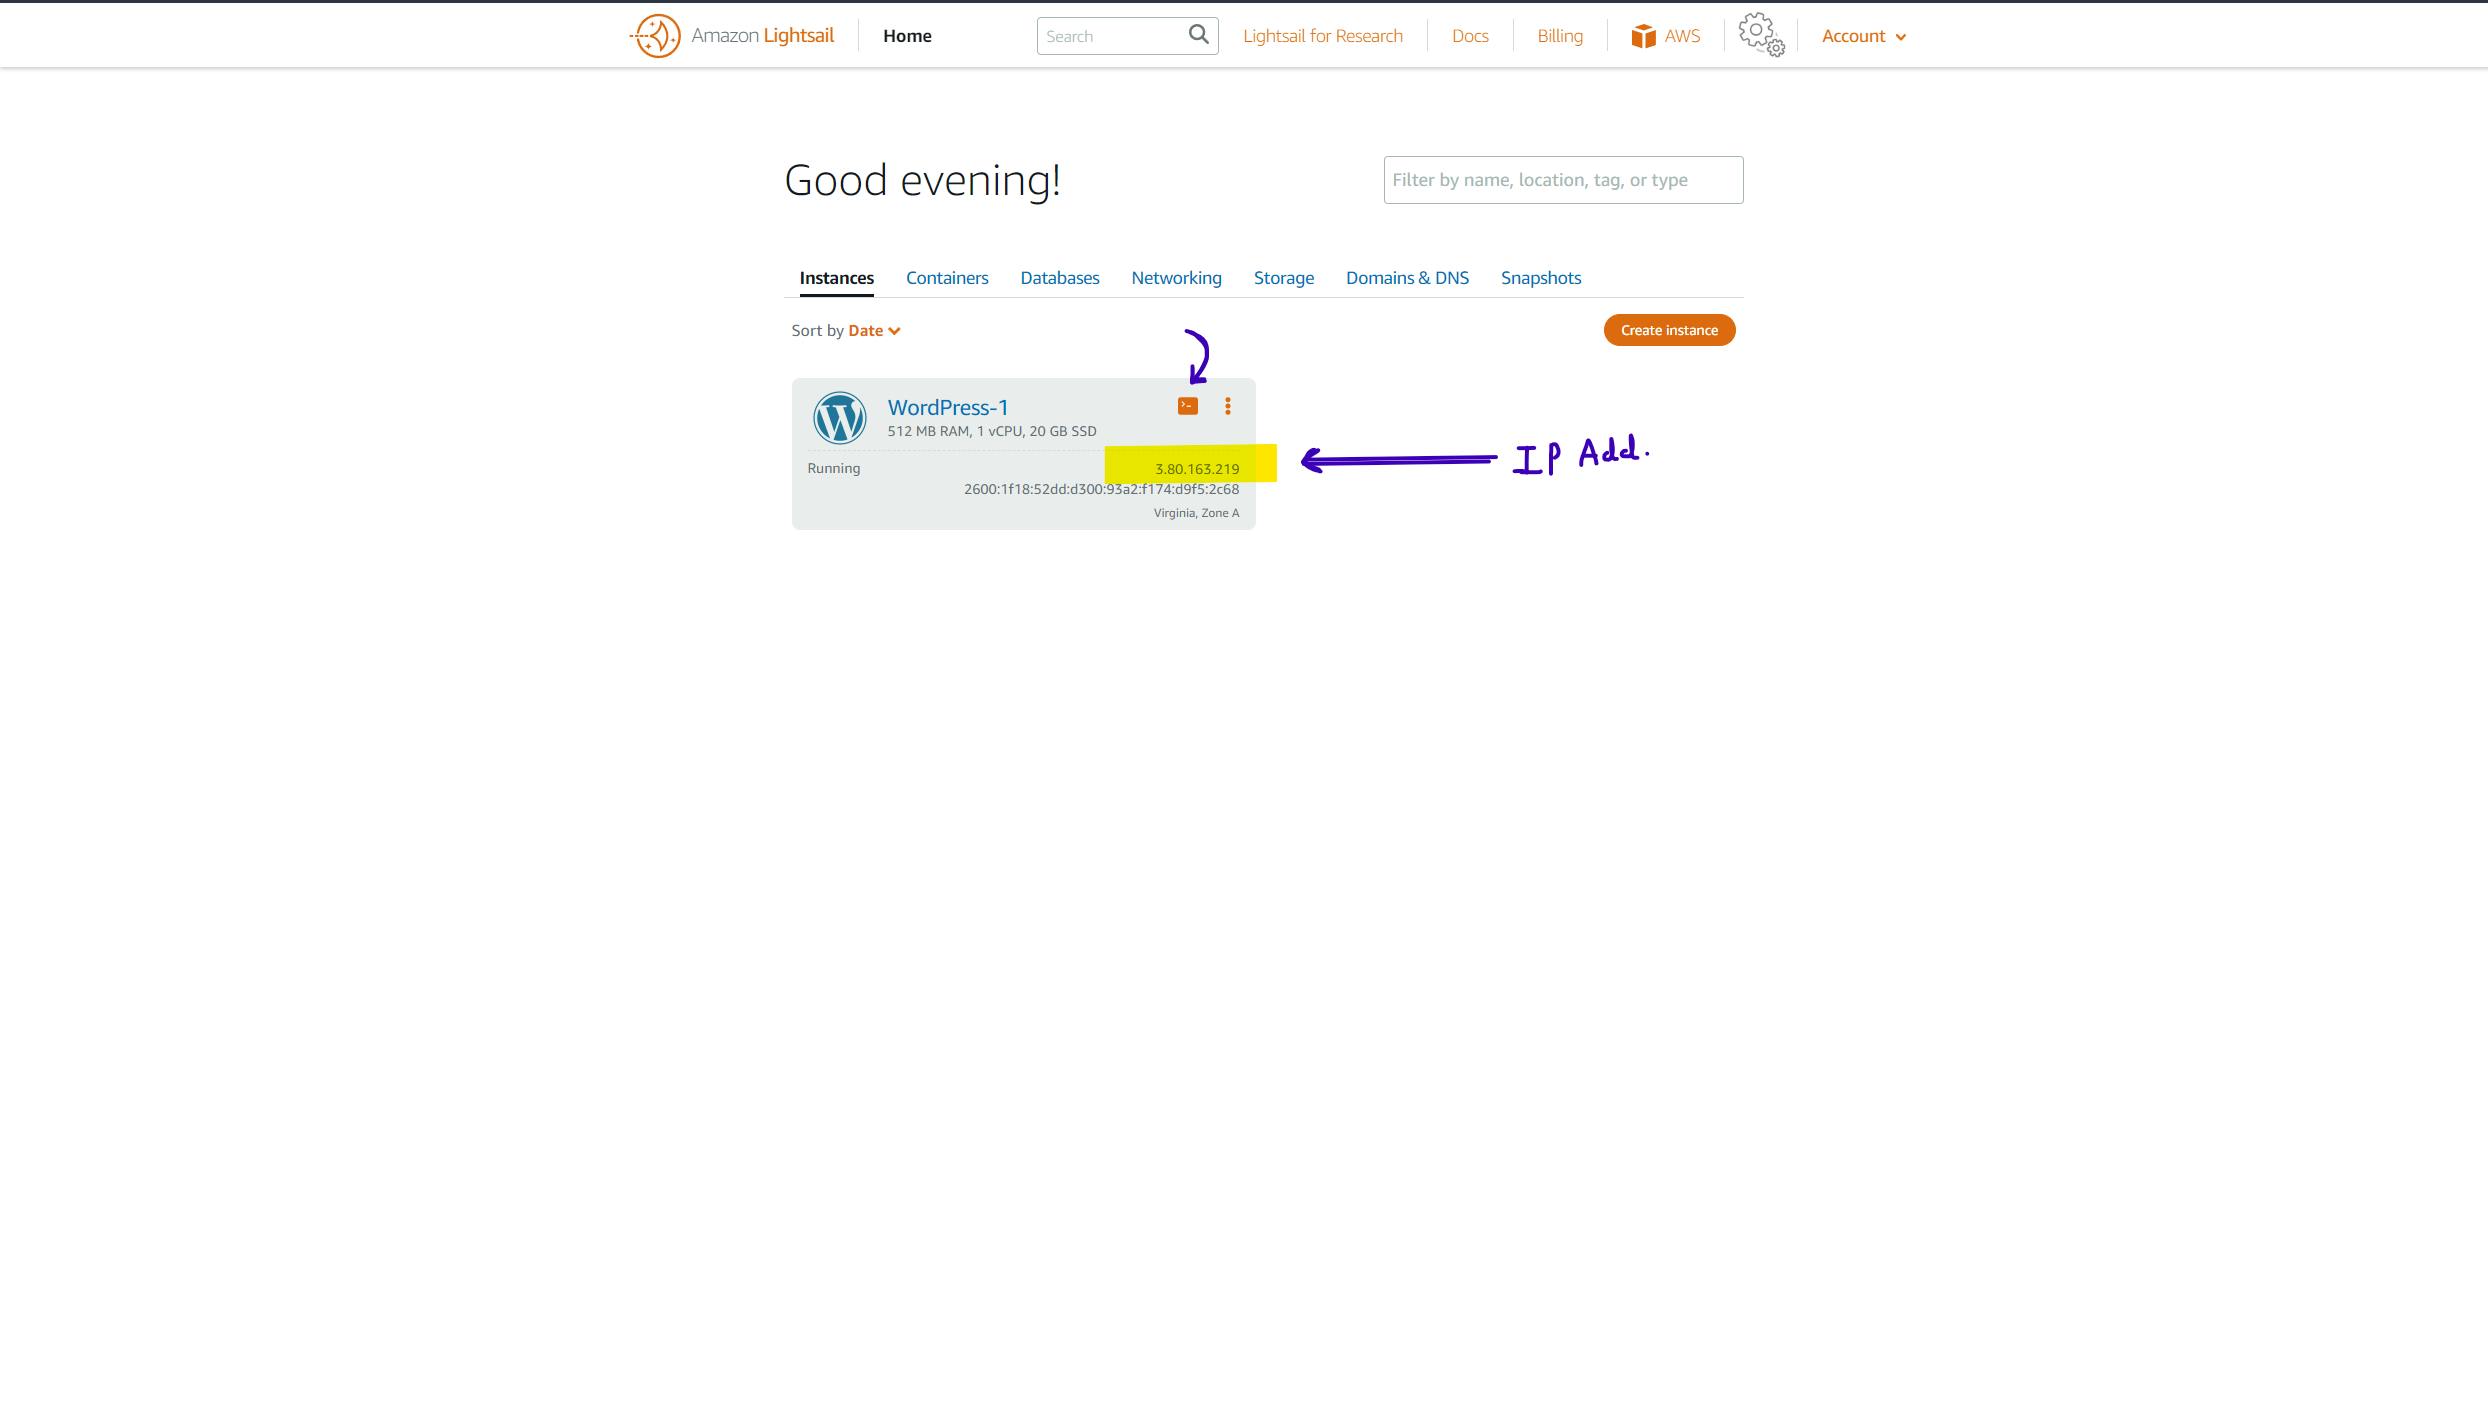
step 7: Now click on the terminal icon which you can find in the top right corner of your instance. shown in the above image. it will open the terminal in a new small window so you don't have to worry about the SSH key etc...
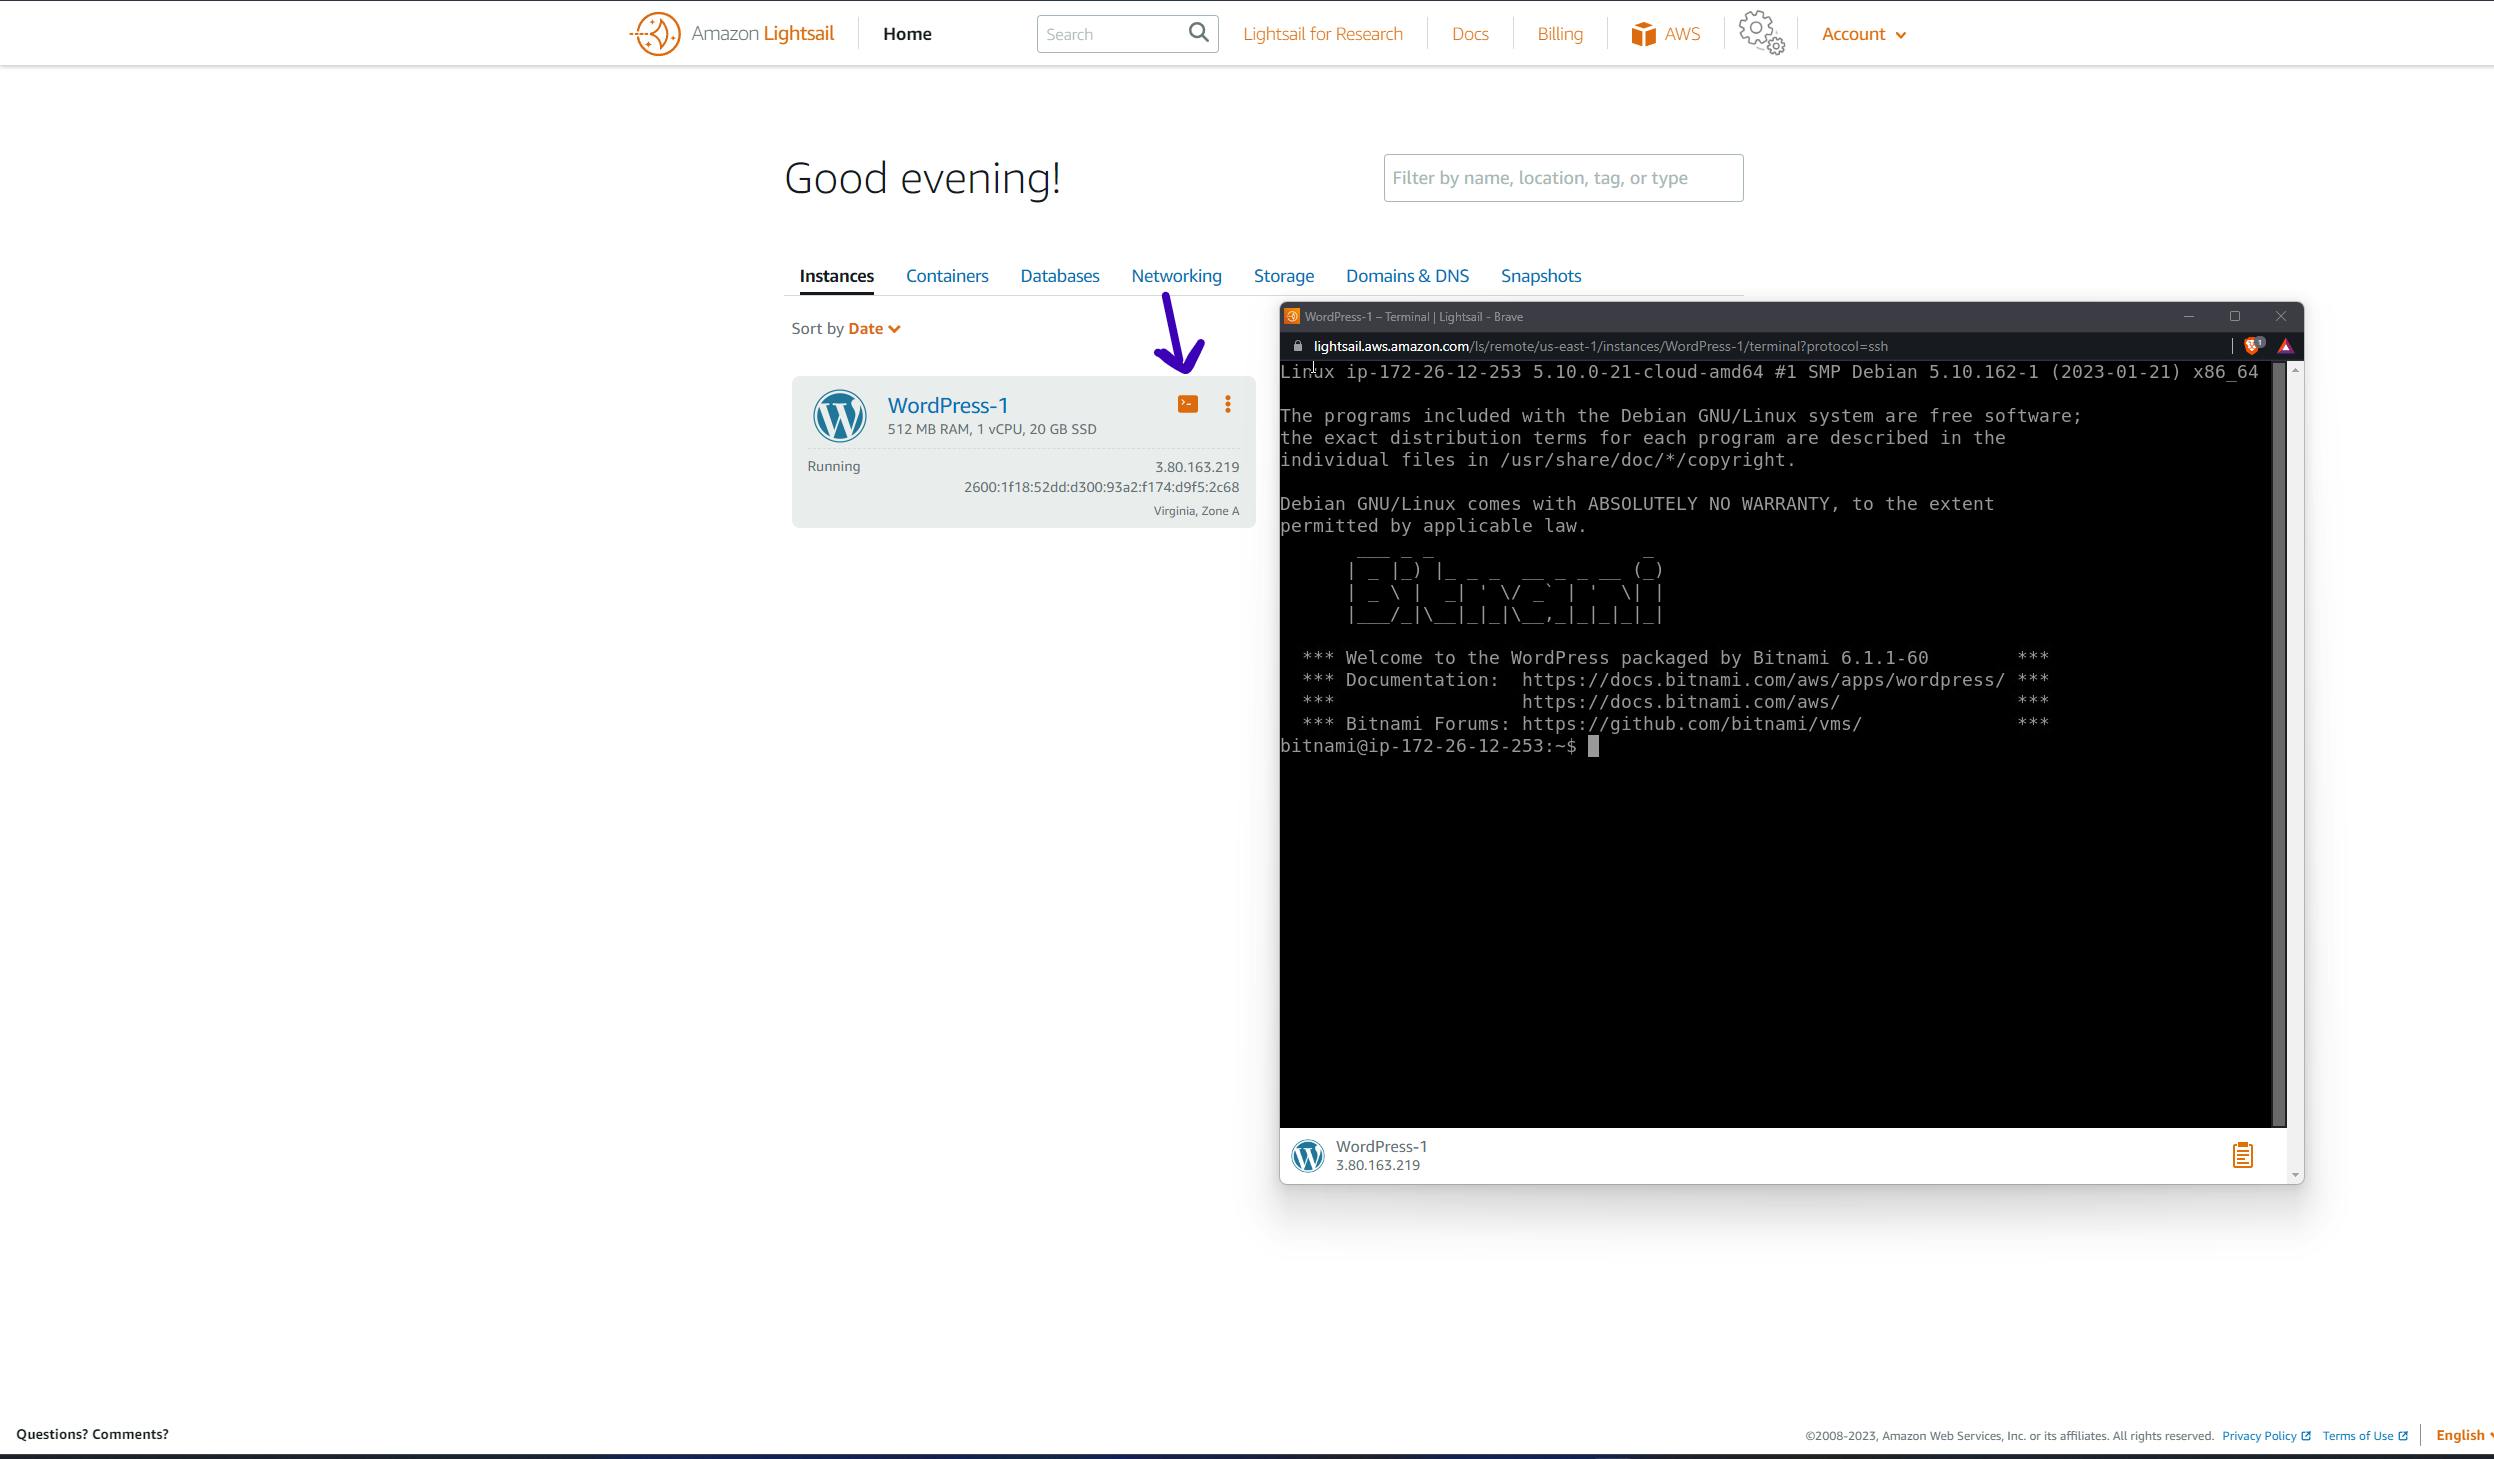
step 8: now follow the below steps properly.
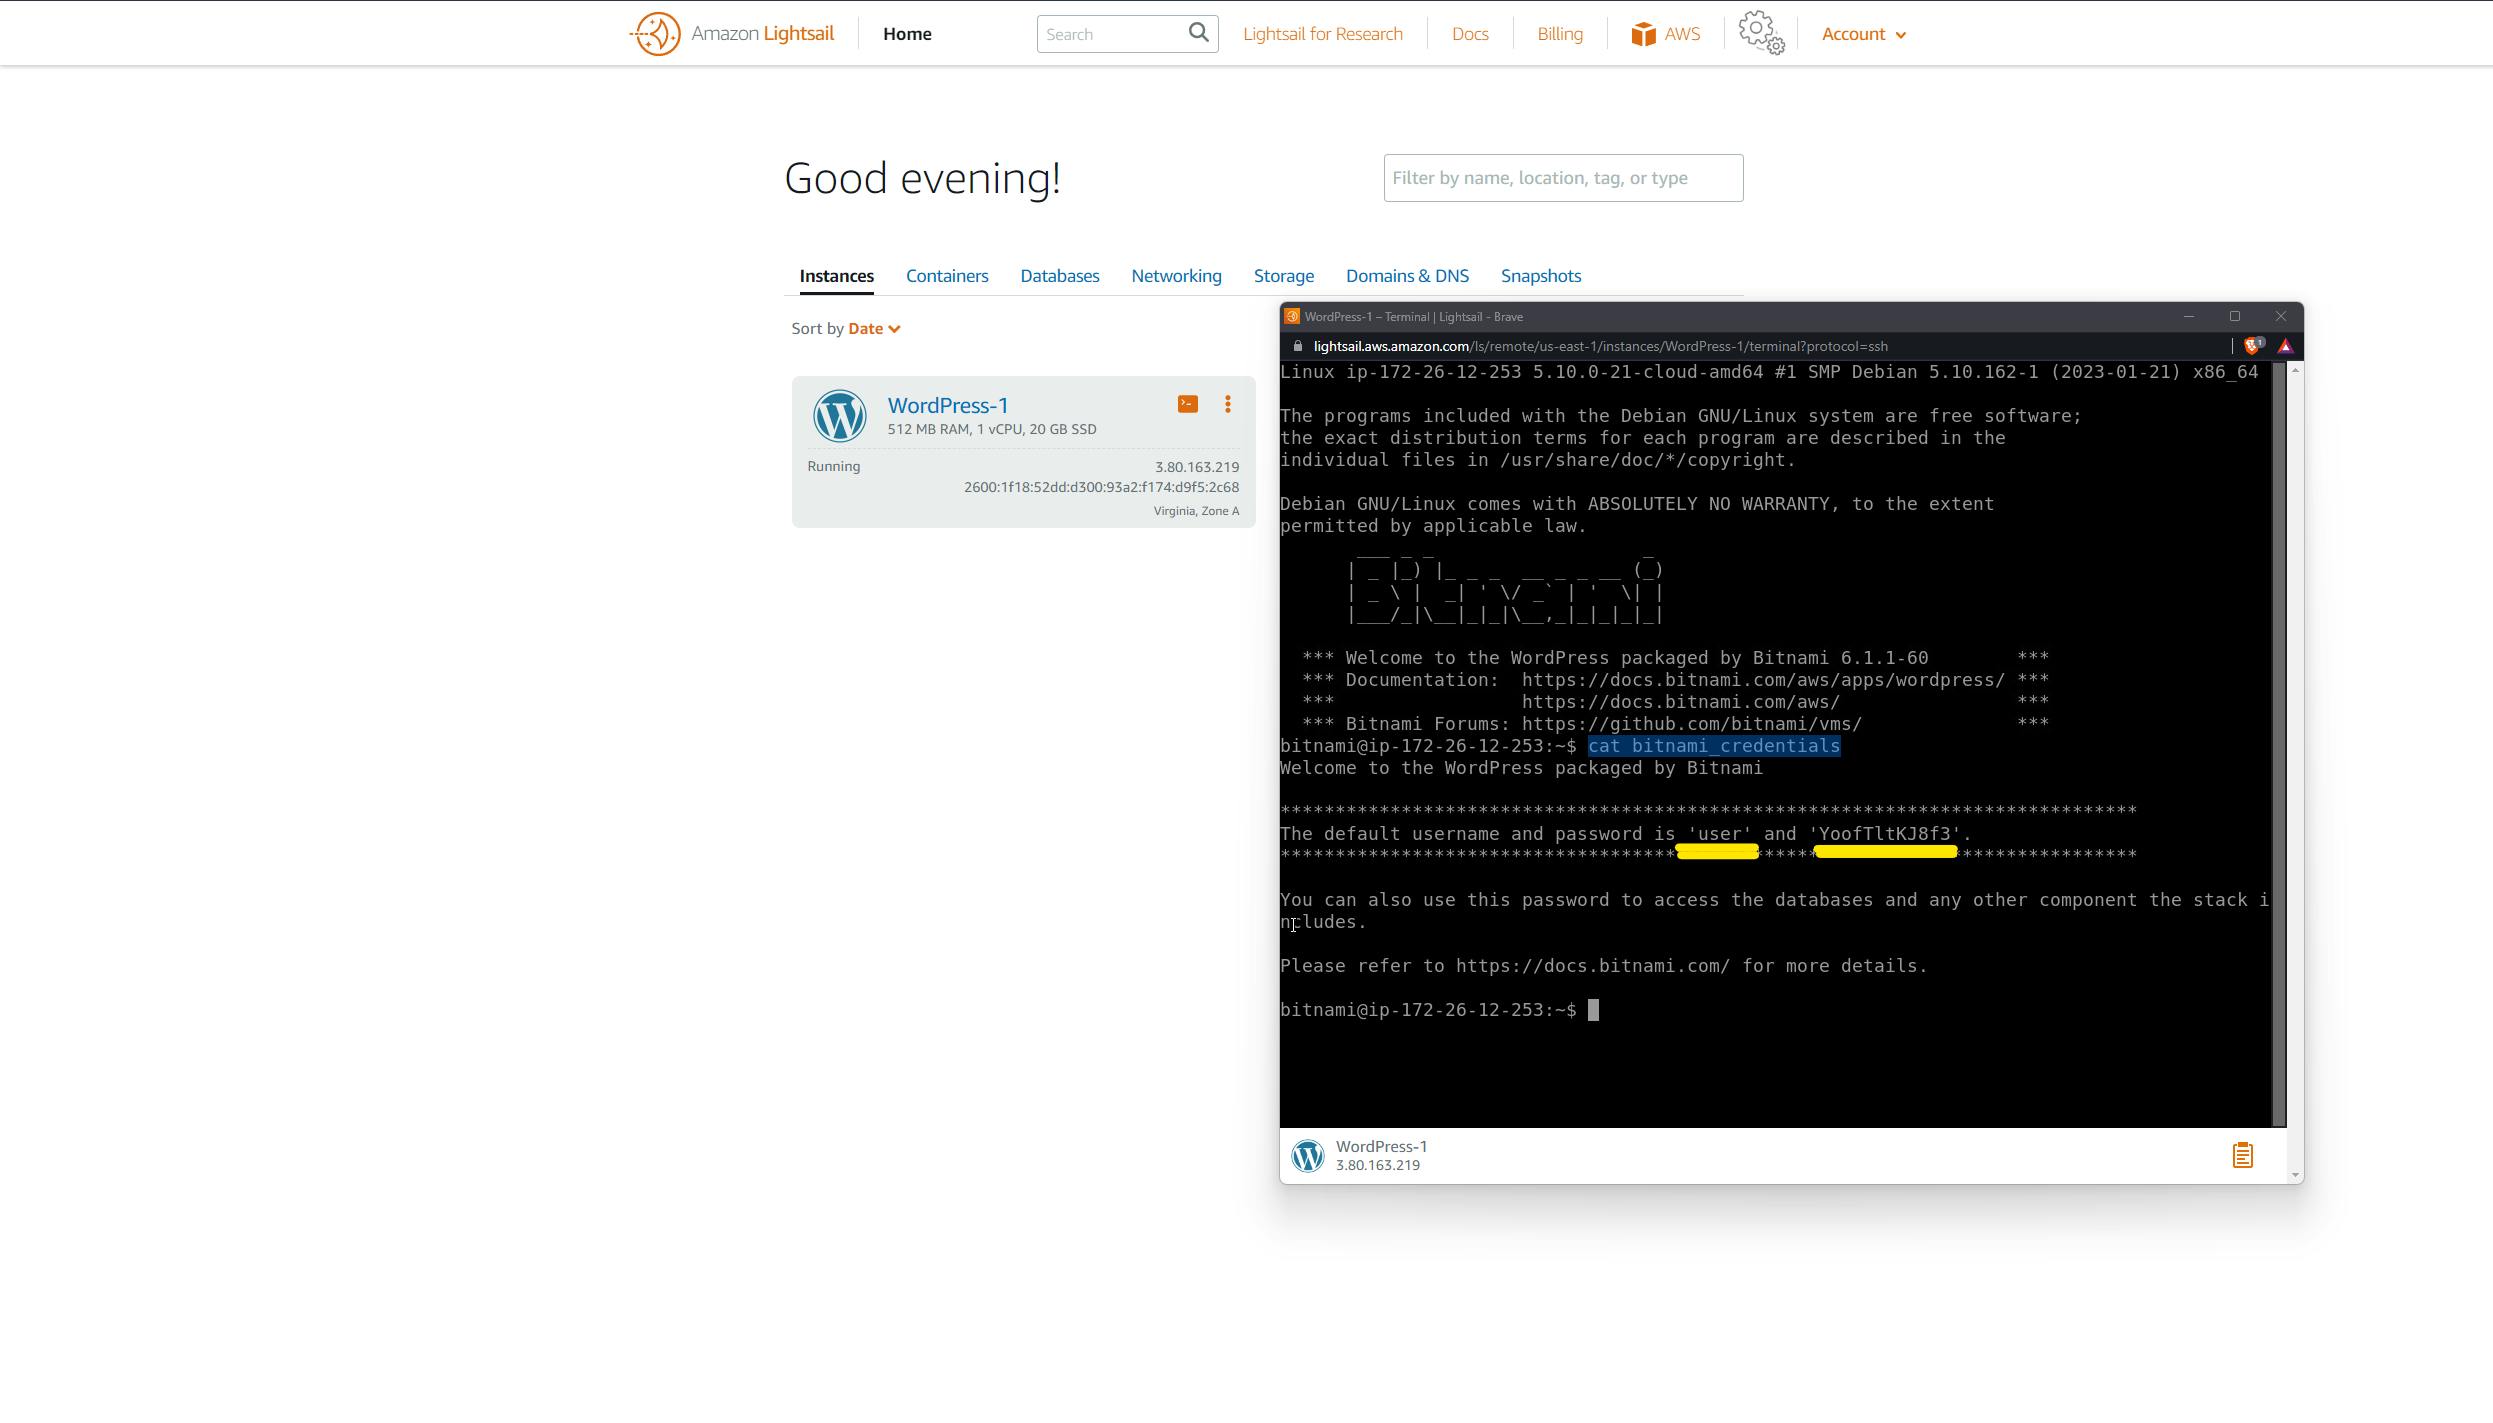
type the below command in your terminal to see the username and password of your WordPress.
$ cat bitnami_credentialsThe above command shows us the default username and password that you can copy from your terminal. you can see the output in the below image
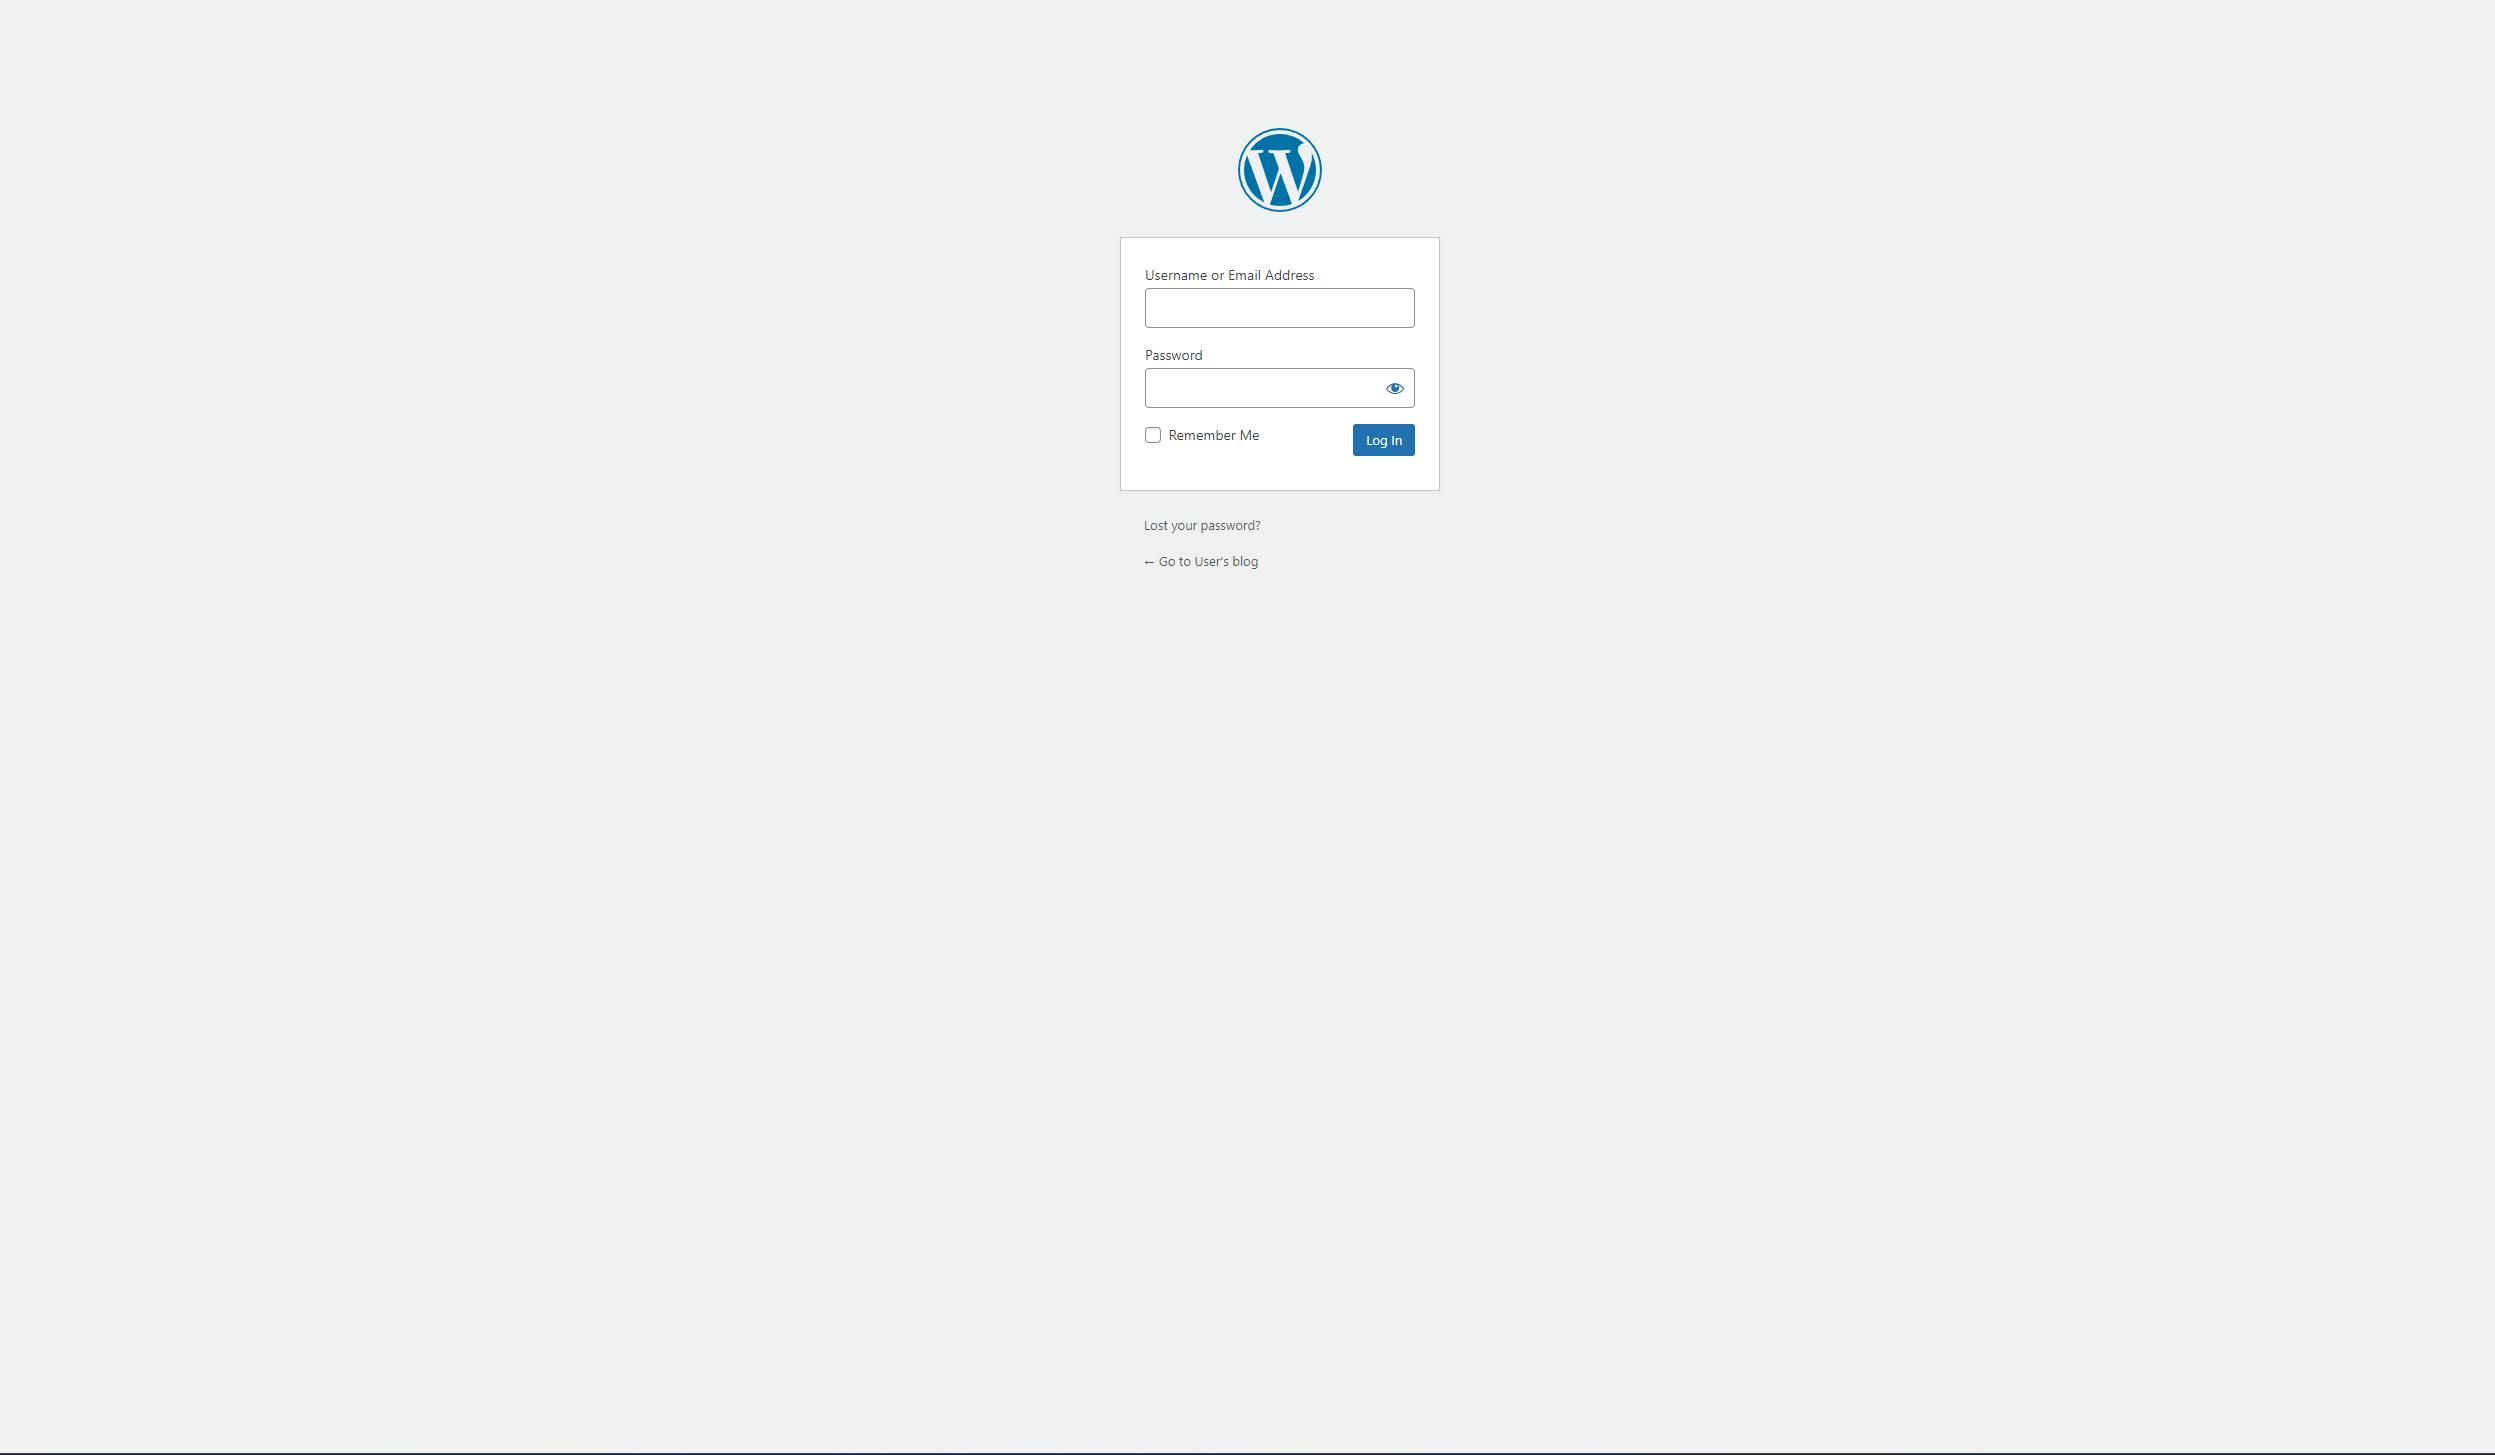
step 9: Now you have the username and password of WordPress you can log in. To login into Wordpress just take IP address of your instance and write /wp-admin and hit that URL in the browser and you'll land on the Wordpress login page. use the credential that we have got from the above steps and log in. and create a new website or add your existing backup if you have one.
note: your URL looks like this http://3.80.164.25/wp-admin. My IP and your IP can not be same so use your IP address.
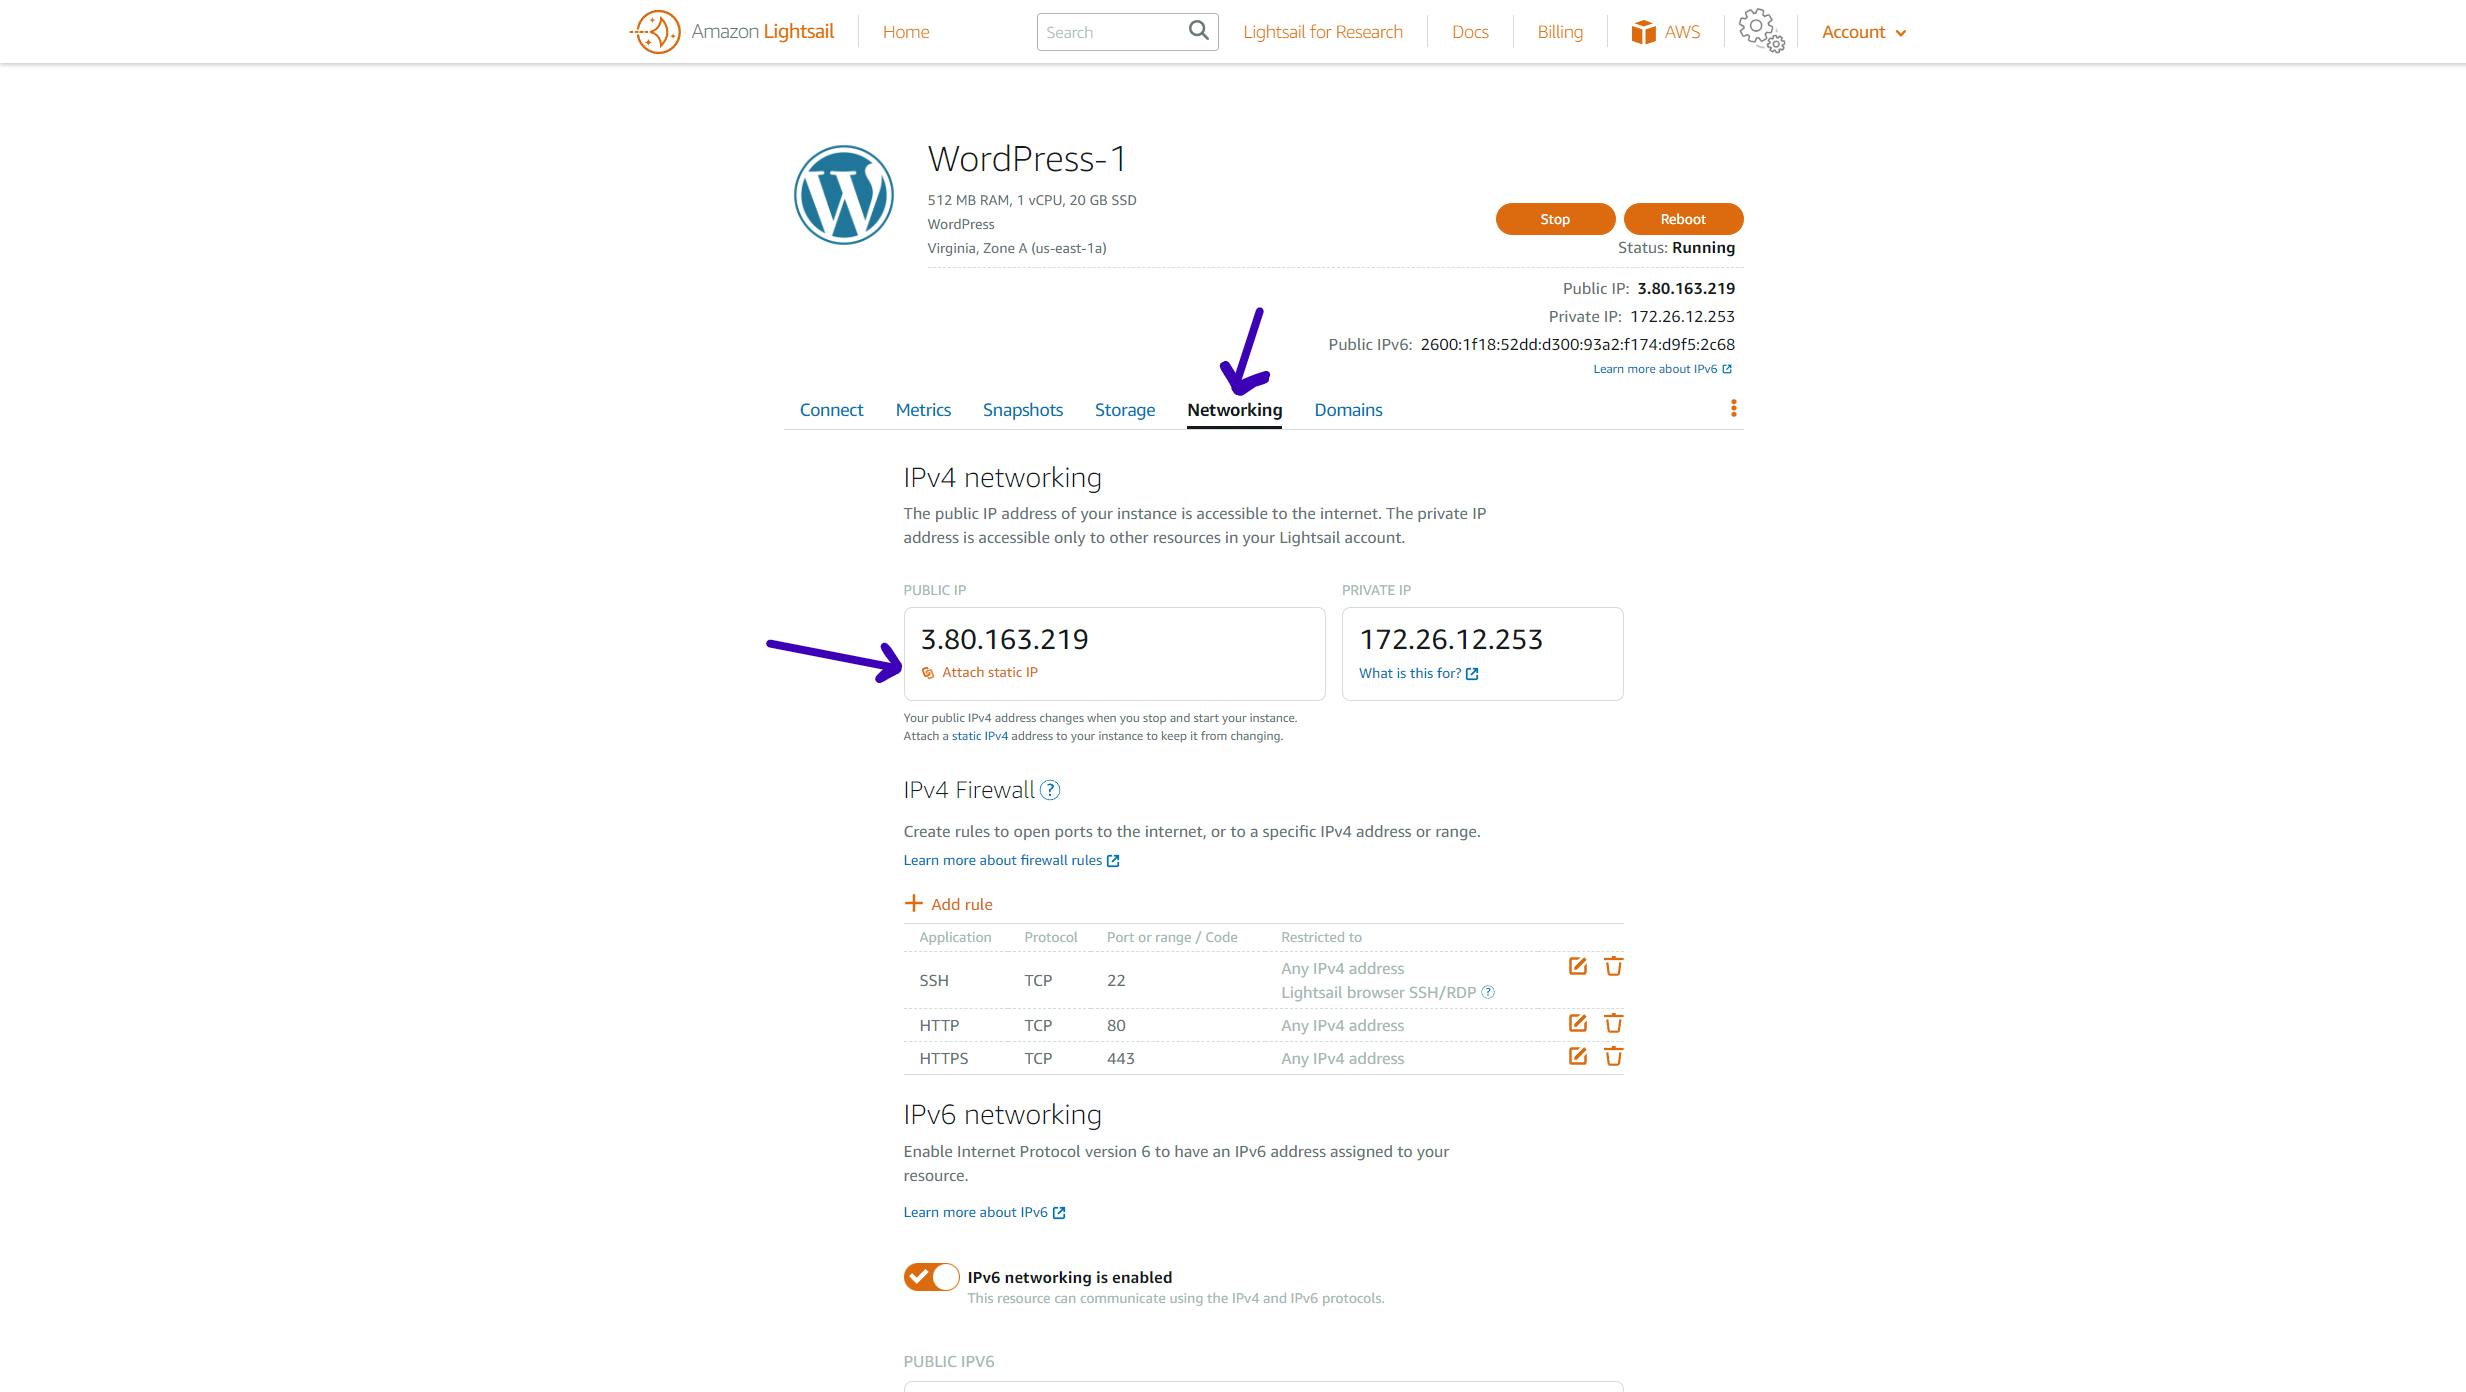
step 10: Now we need to attach a static IP address. whatever IP address your instance has right now is dynamic so when you restart your instance you will lose this IP address. to attach static IP follow the simple steps shown below
Go on the Lightsail dashboard
click on your instance
click on the network tab
click on the text "Attach static IP"
give the name to your IP so that you can differentiate when you have more than one server or instance.
So now you have a static IP address. (AWS may charge for static IP)
step 11: Now it's time to add the DNS record in your domain registar. it can be Godaddy, Namecheap etc..
Go to your domain registar page
go on DNS management
we need to add one record so that your domain name can point to your website.
create a new record type "A" and put the static IP as value to it.
wait for some minutes and your domain name will start pointing to your static IP address.
step 12: Last step but not least. we also need to set up an SSL certificate for our new website. follow the steps shown below and you'll get an SSL certificate easily.
go to Lightsail's dashboard
and click on the terminal icon just as we did before.
copy the command from below and paste inside the terminal
$ sudo -i
$ /opt/bitnami/bncert-tool
the last command will ask you about the list of the domain name make sure you separate by space
just enter your domain name. (eg. example.com example.com)
it will ask a basic question and email id. provide the necessary details and hit the Enter button.
and in just a second you will get an SSL certificate on your website.
Thank you 👍 so much everybody for following this blog till the END.
Ankit Jodhani 😄.