

Host your static website on Amazon S3 services + CICD pipeline with the domain name and SSL certificate. #10WeeksOfCloudOps


Table of contents
Synopsis
Hello everybody, My name is Ankit Jodhani and currently I'm learning DevOps with #AWS. I have participated in the #10WeeksOfCloudOps challenge launched by Piyush Sachdeva. He is an amazing person and a very good teacher I personally learned many things from him. so this is our first challenge to host a static website on Amazon S3 using one of the CI/CD tools (in my case it is Cirrcleci) with the Domain name and SSL certificate. It mentions in the challenge that we have to use CDN so in my case I have used CloudFront service to distribute our website all over the world and it also helps people to access the website quickly. so let's get started.
Prerequisite
AWS Account
Circle Account
Static website or Download anyone from tooplate.com
Domain name
Time to learn and build 😄
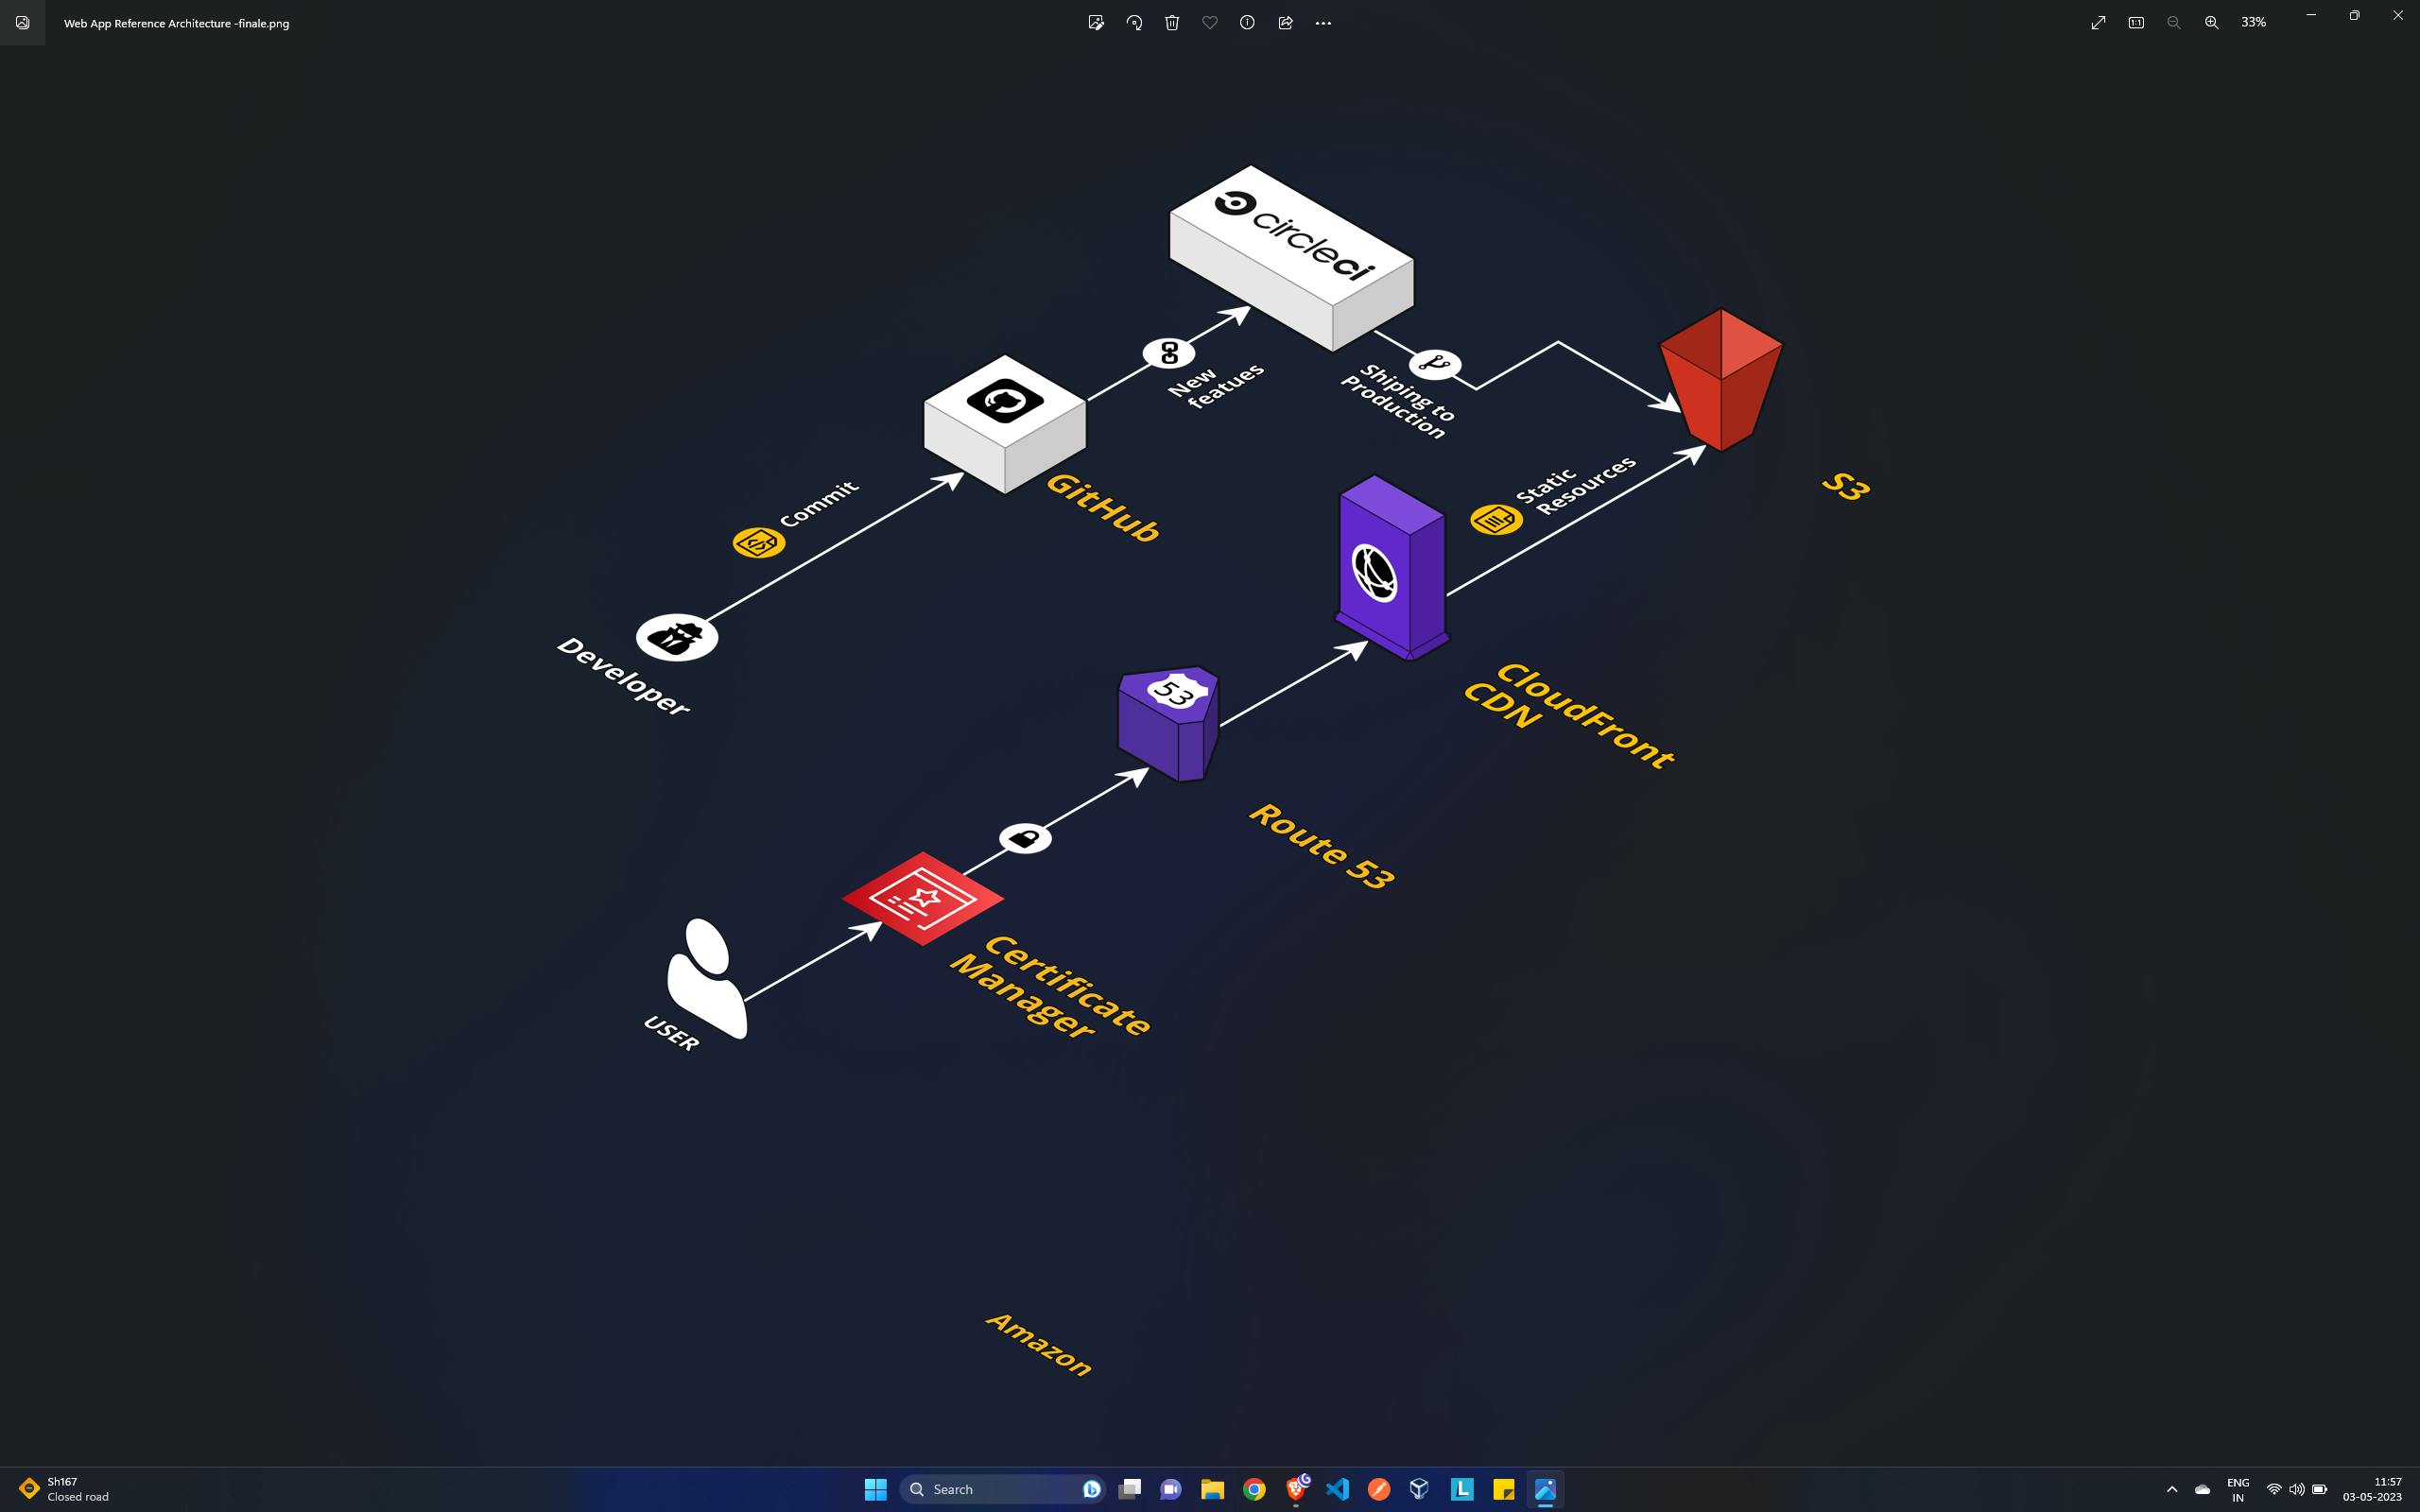
Architecture
I'm sure this architecture will help a lot to understand what we are going to do. Please try to understand it.
Steps:
Login to your AWS Account and search for S3 services.
Now click on Create Bucket button. and give the name of your bucket.
NOTE: your bucket name should be
www.<your_domain_name>.an example(www.ankitjodhnai.club)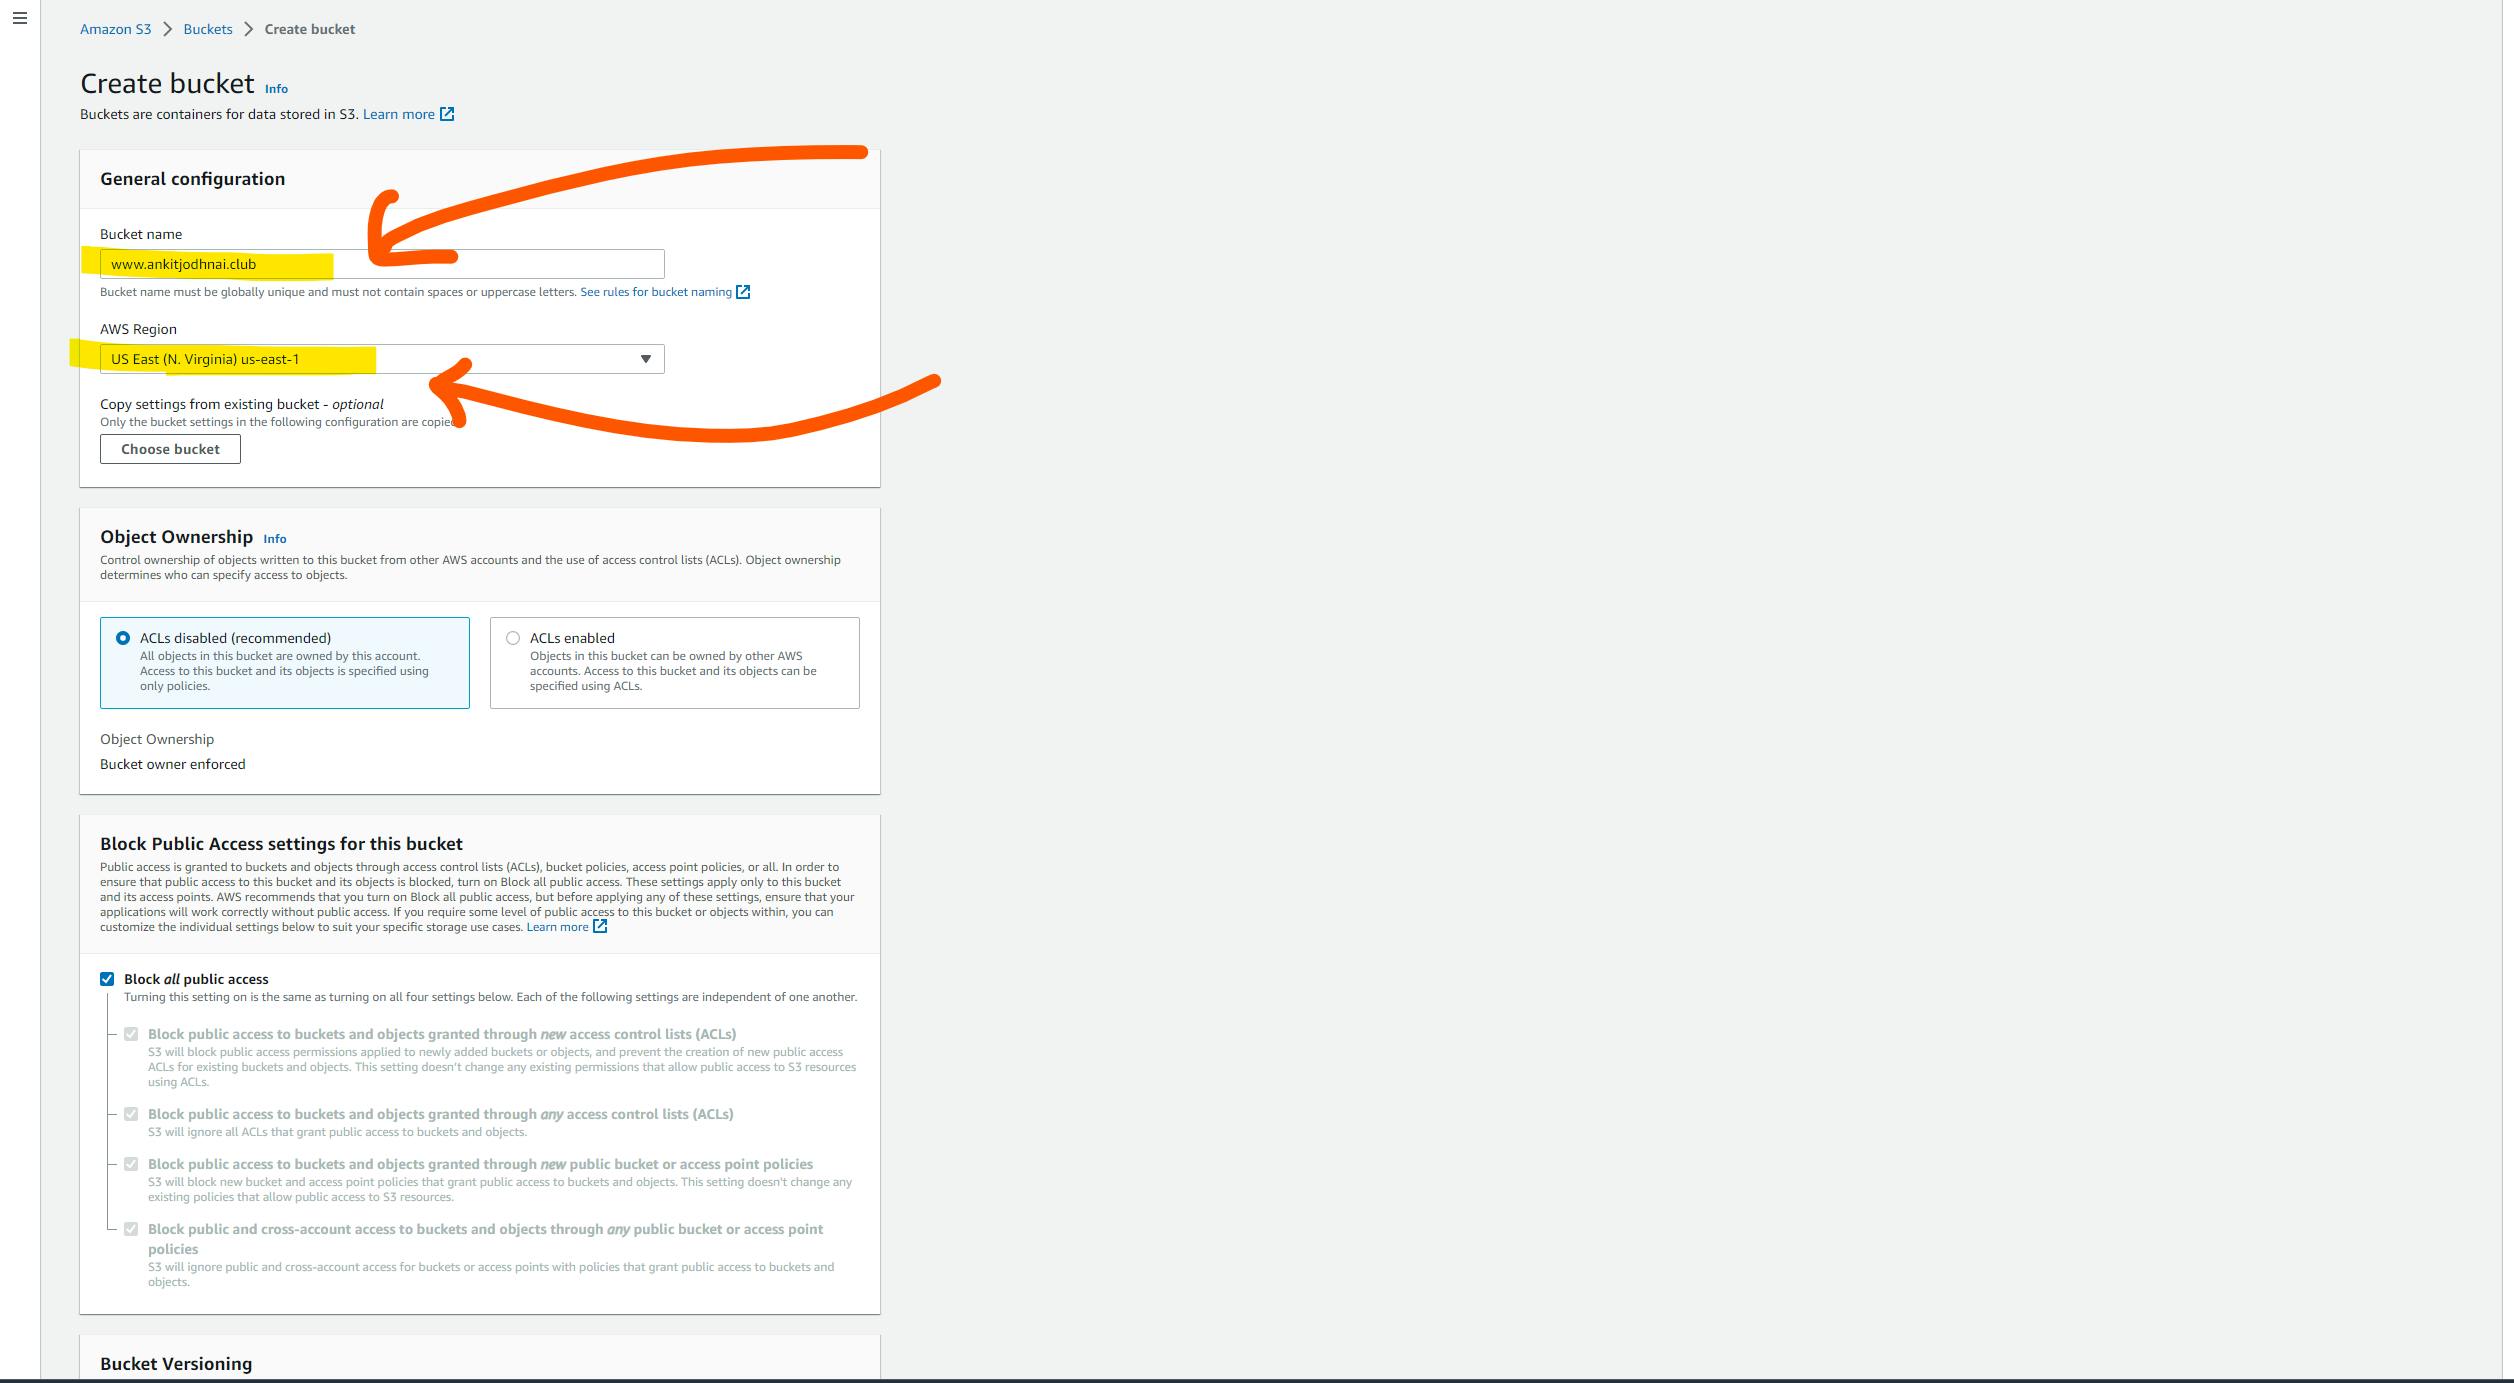
Now leave all option as it is. and scroll down and click on the create bucket button.
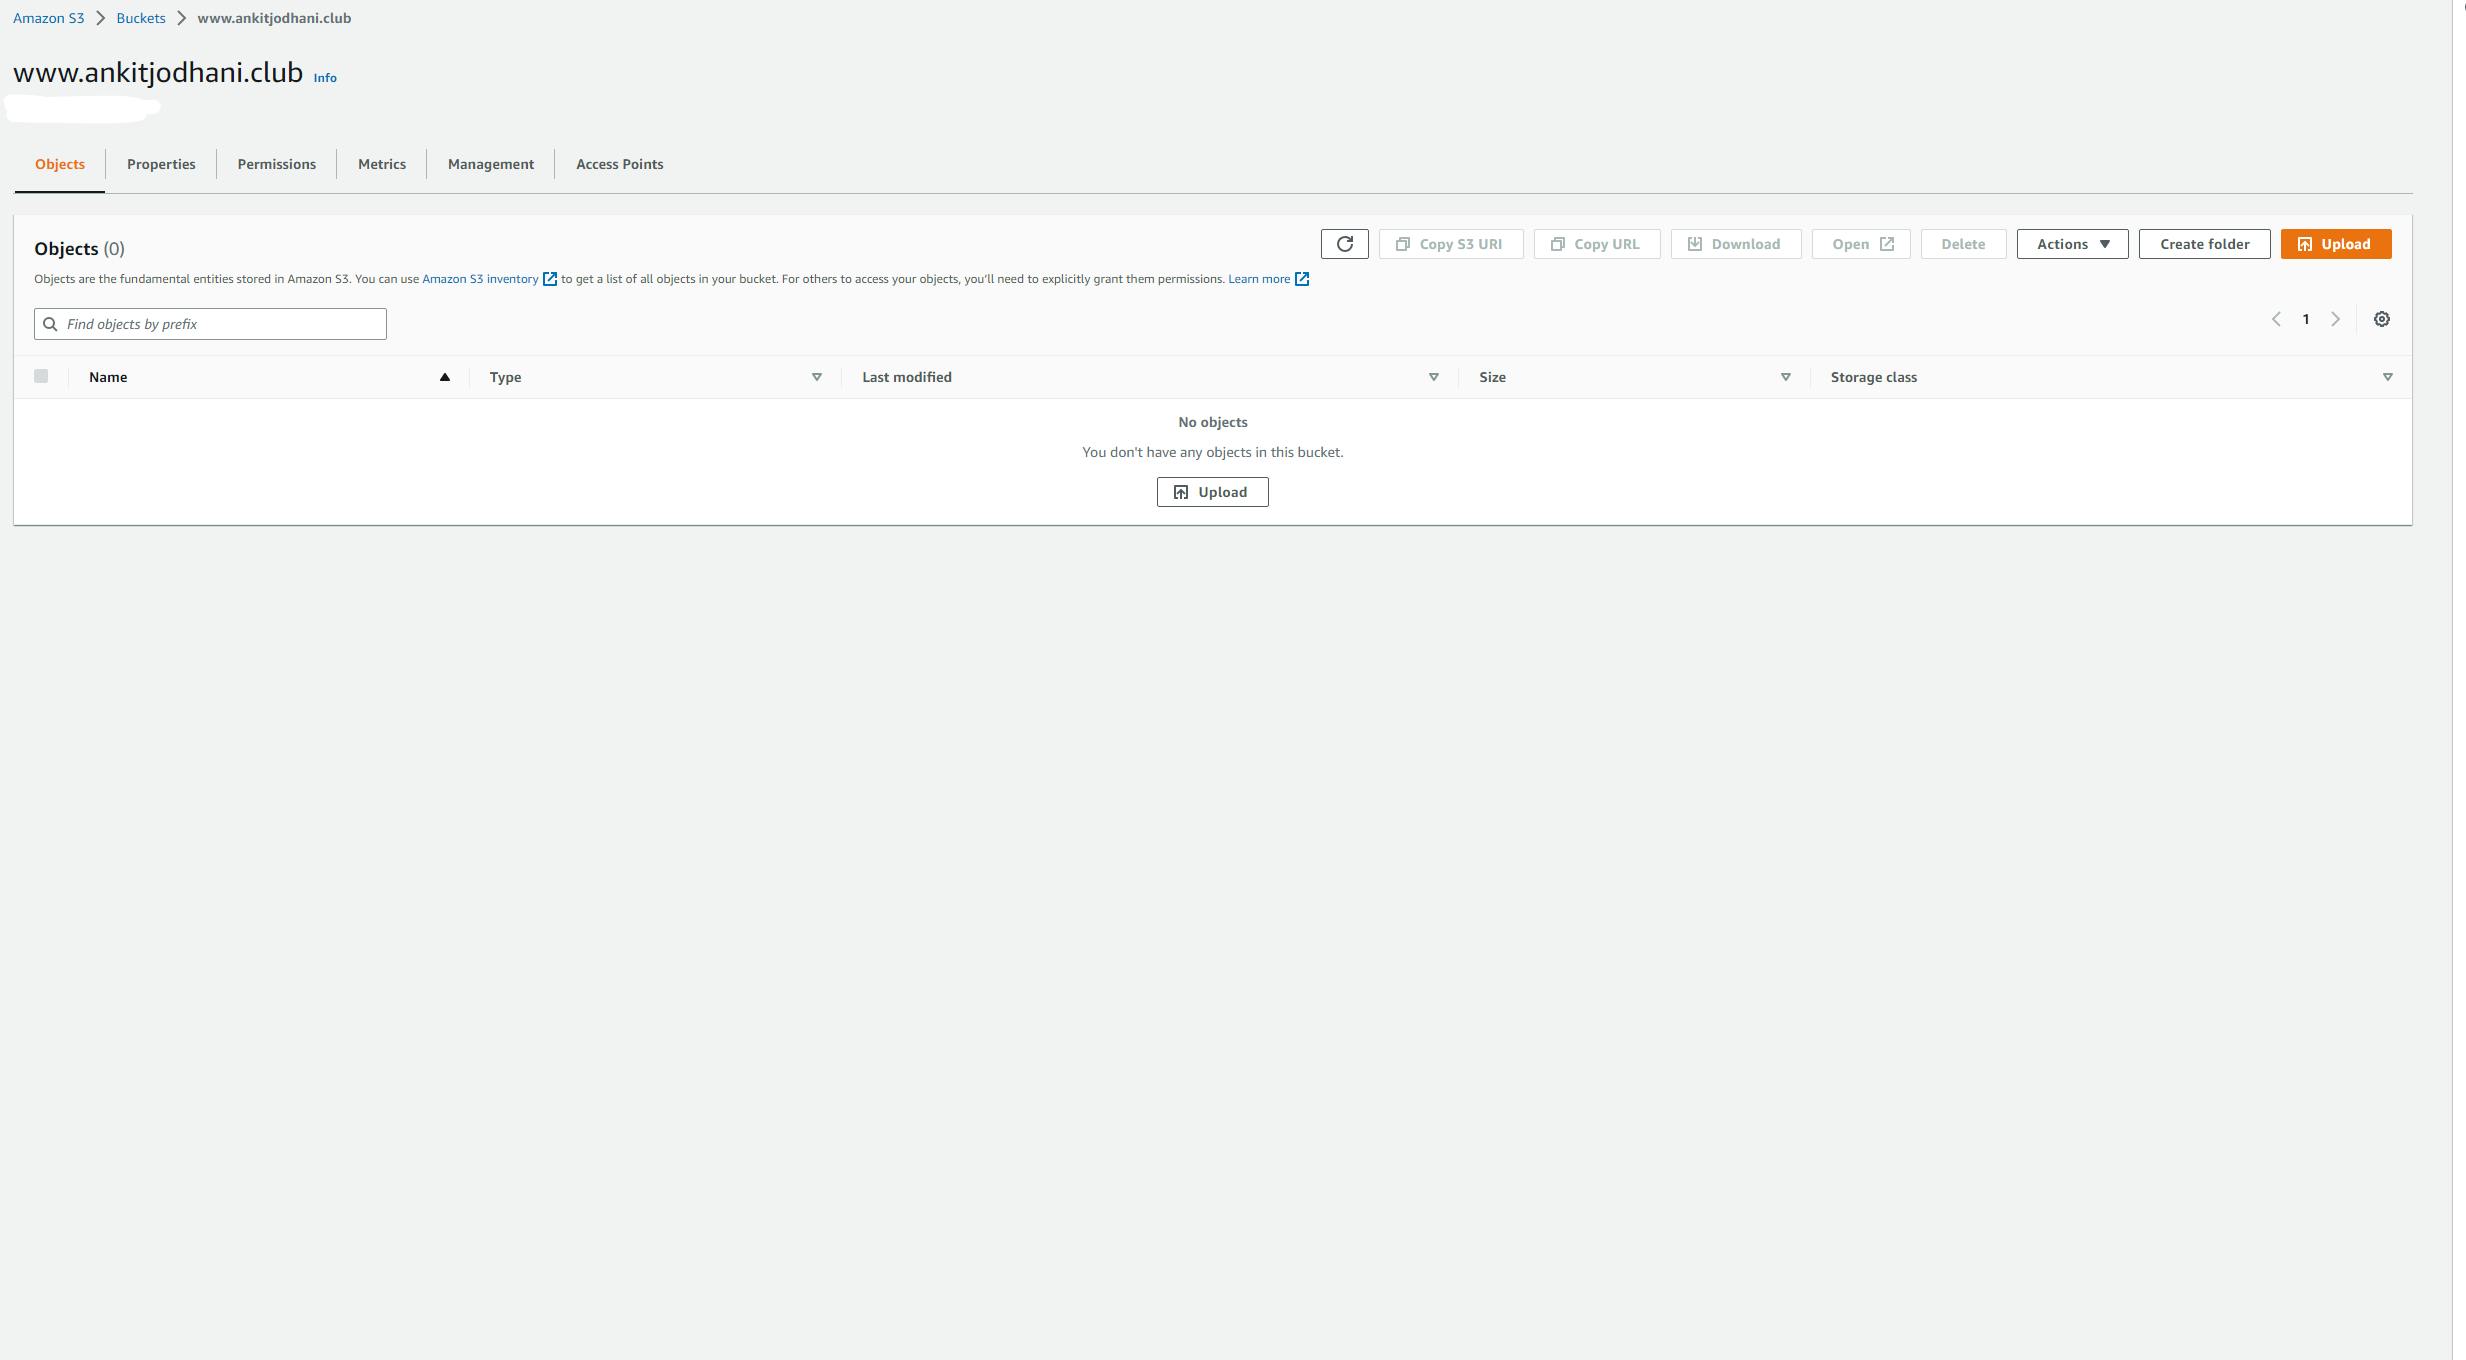
Now you can see your bucket in the s3 dashboard.
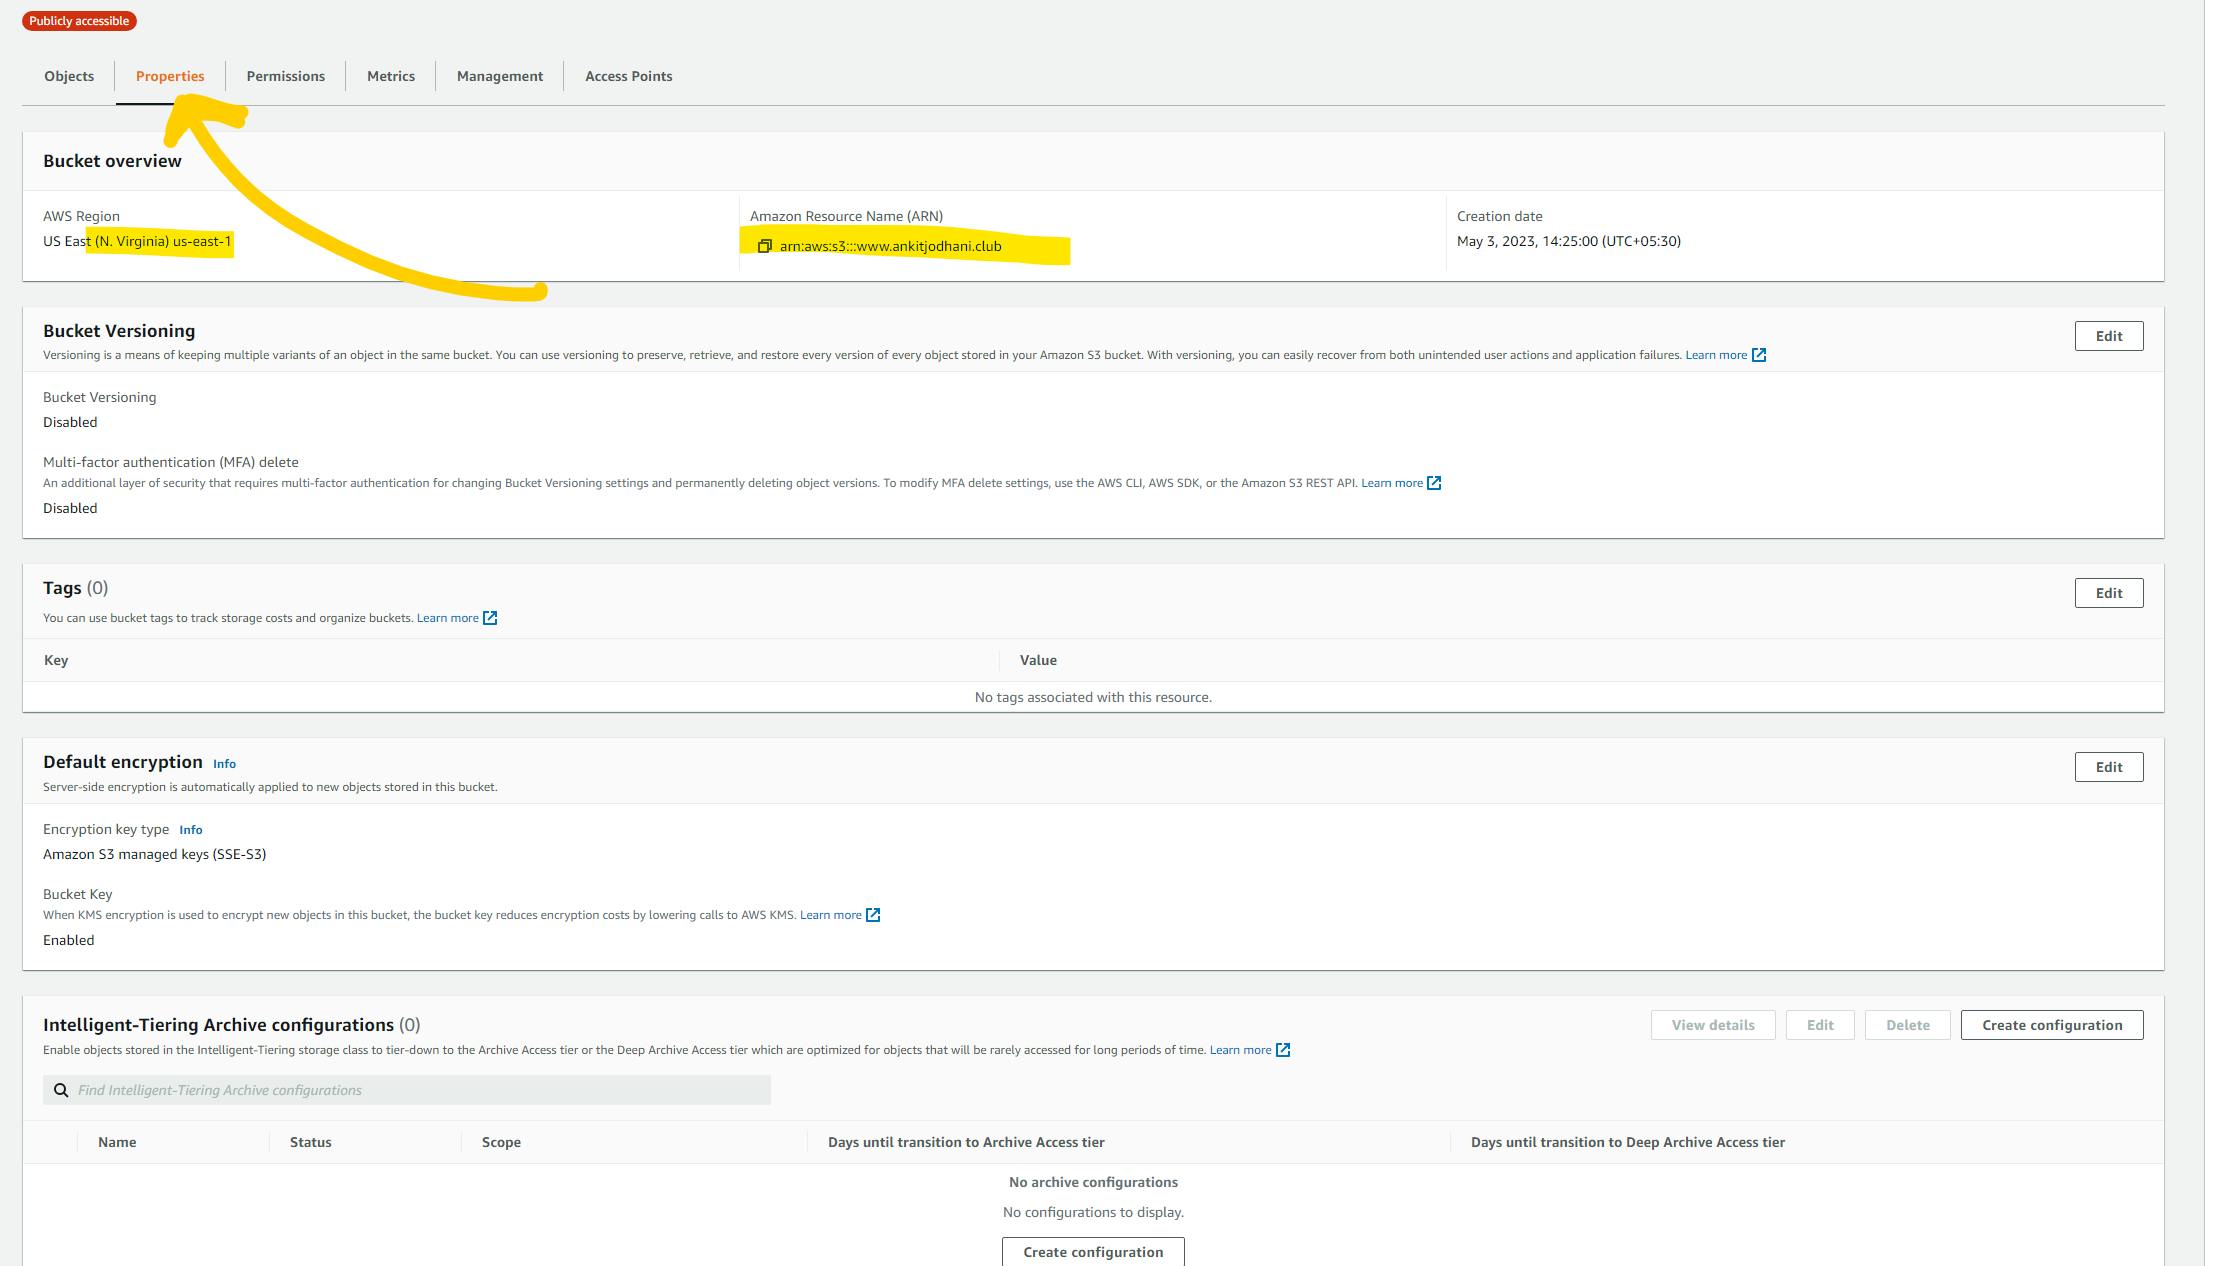
Click on your Bucket name and go inside the bucket. you will see your bucket-like below image.
Now Click on the properties tab on the top bar. and scroll down to the option Static Website Hosting. and click on EDIT button which will be there on right side of your window.
Now click on
EnableStatic website hosting button. Now in the index document text box write the name of the file which you want to serve as the HOME page, in my case it isindex.html(in most cases it is index.html). now if you have any specific file which handles the error then you can write the name of that file in the error document text box. otherwise, leave it as it is. and click on the Save Changes button. ( as you might have guessed seeing the below image is far easy )
Now you will see the endpoint or URL to access your website.
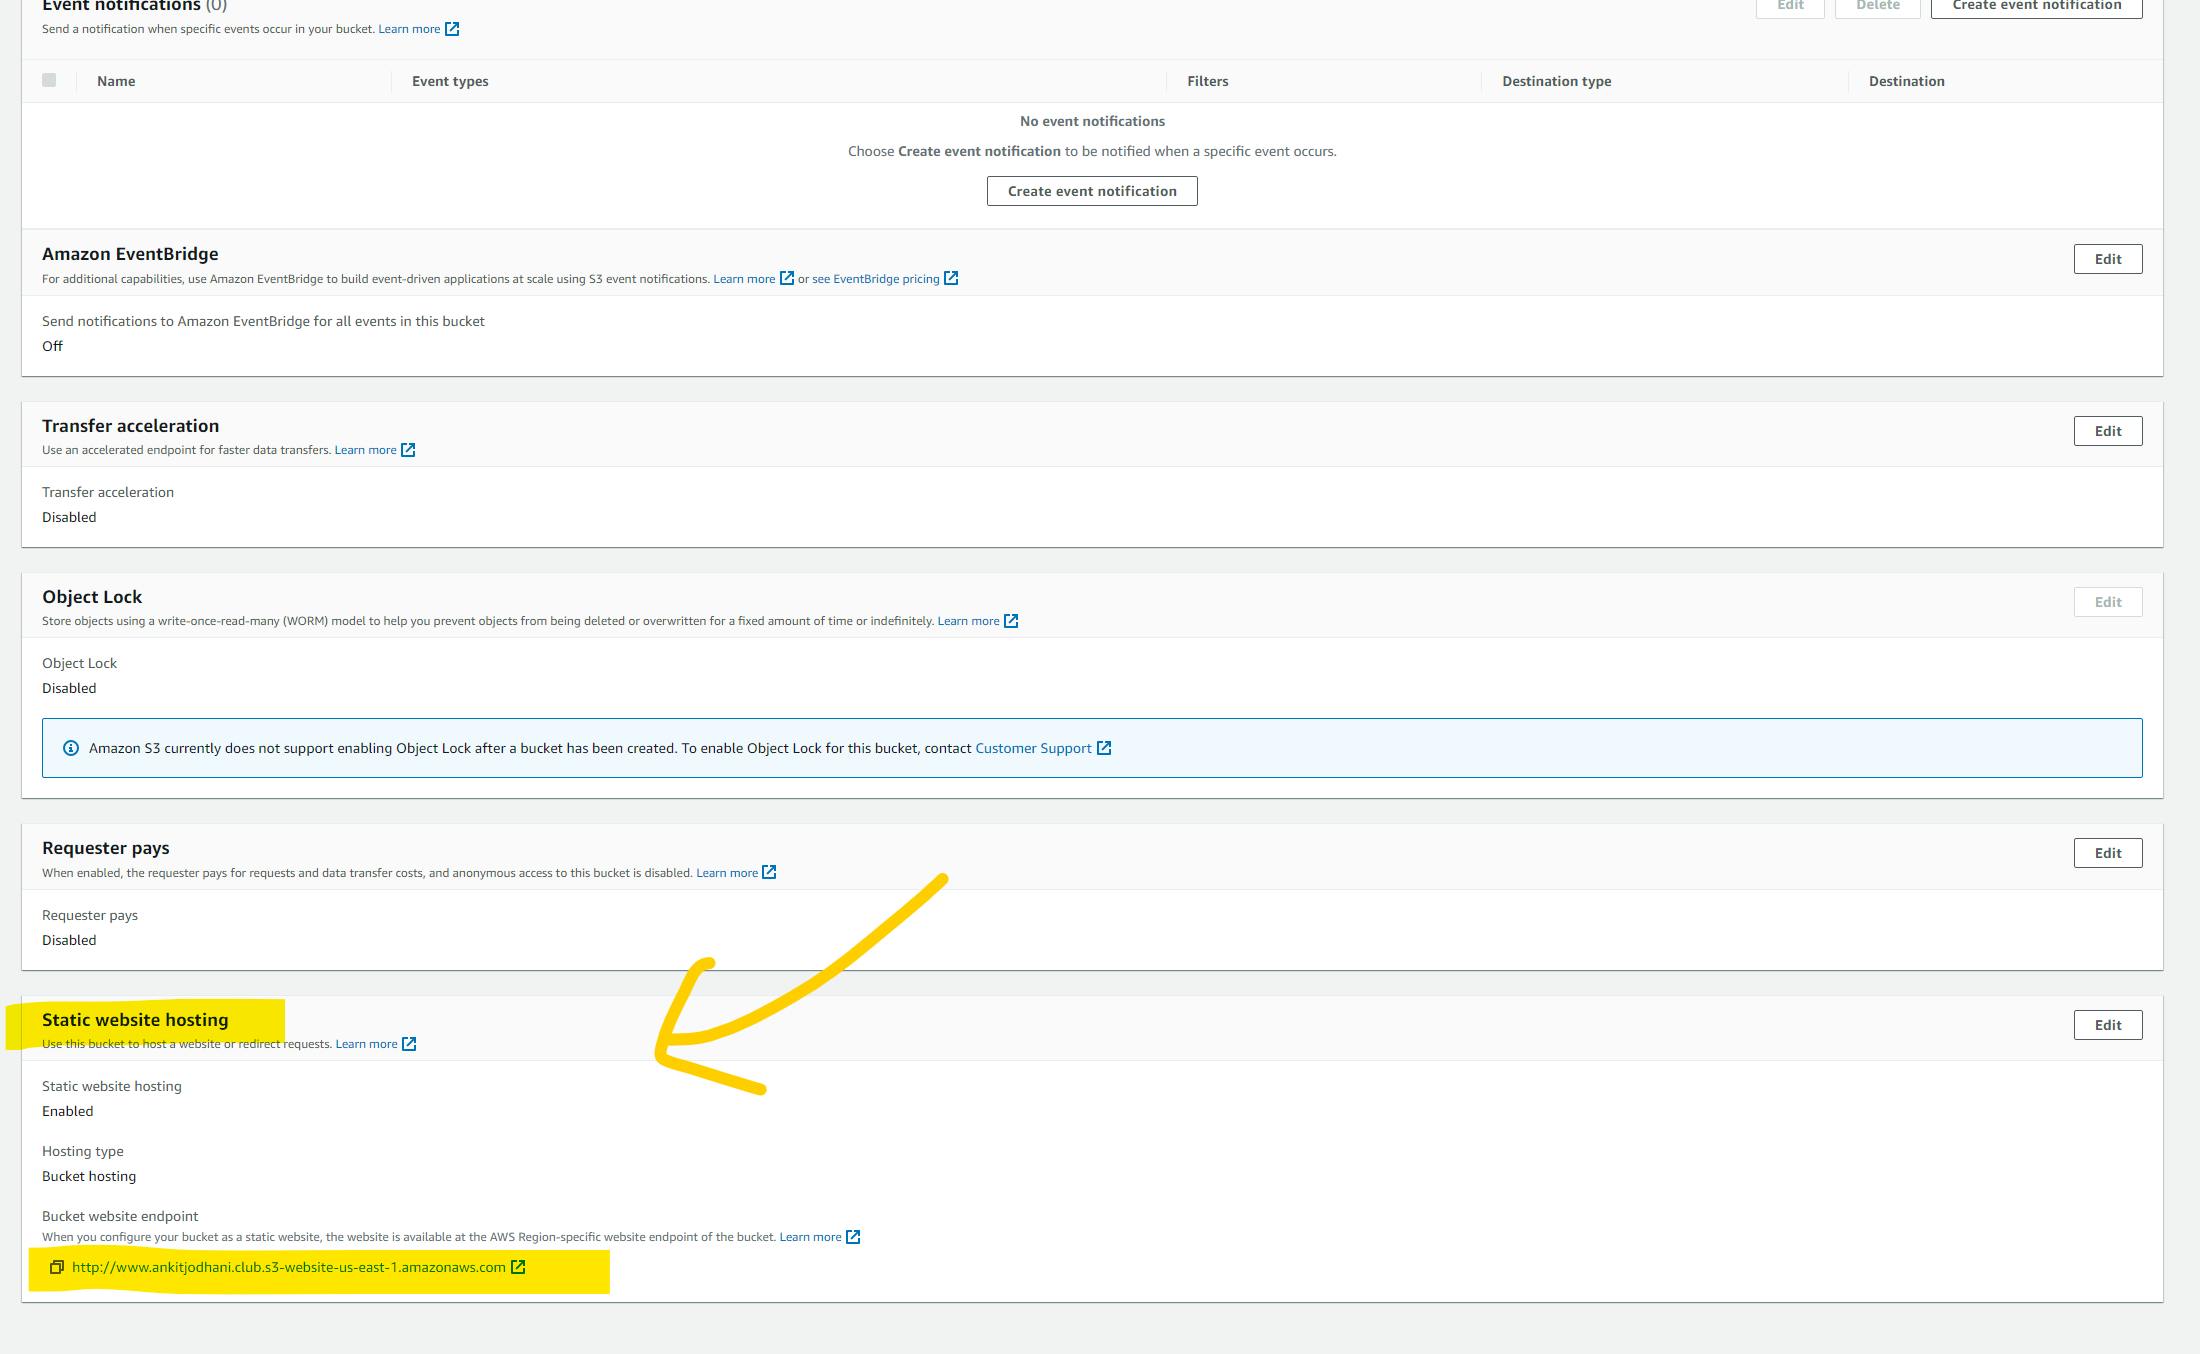
you can manually upload your website file and Amazon s3 will serve that webpages isn't is Amazing. we can go live in just seconds 😂. but we are tech-savvy people we will do this in a professional way. using CI/CD pipeline.
Now just upload your website code on Github (if you don't have a website then you can use my repository. To fork it Click here)
Now create one directory with the name .circleci and create a new file with the name config.yml in the .circleci directory. In YMLfile we are going to write a configuration for deploying our cod to the s3 bucket. Please don't run away I'll give you the code of the YML file.
Please write the below code in your config.yml file
version: 2.1

jobs:
  deploy:
    docker:
      - image: cimg/aws:2023.04.1
    steps:
      - checkout
      - run:
          name: Lets deploy thsi application
          command: |
            ls
            aws s3 sync . s3://$AWS_S3_BUCKET/

workflows:
  Production:
    jobs:
      - deploy:
          filters:
            branches:
              only: main
Now it's time to Login to Circleci. and connect with the GitHub Account.
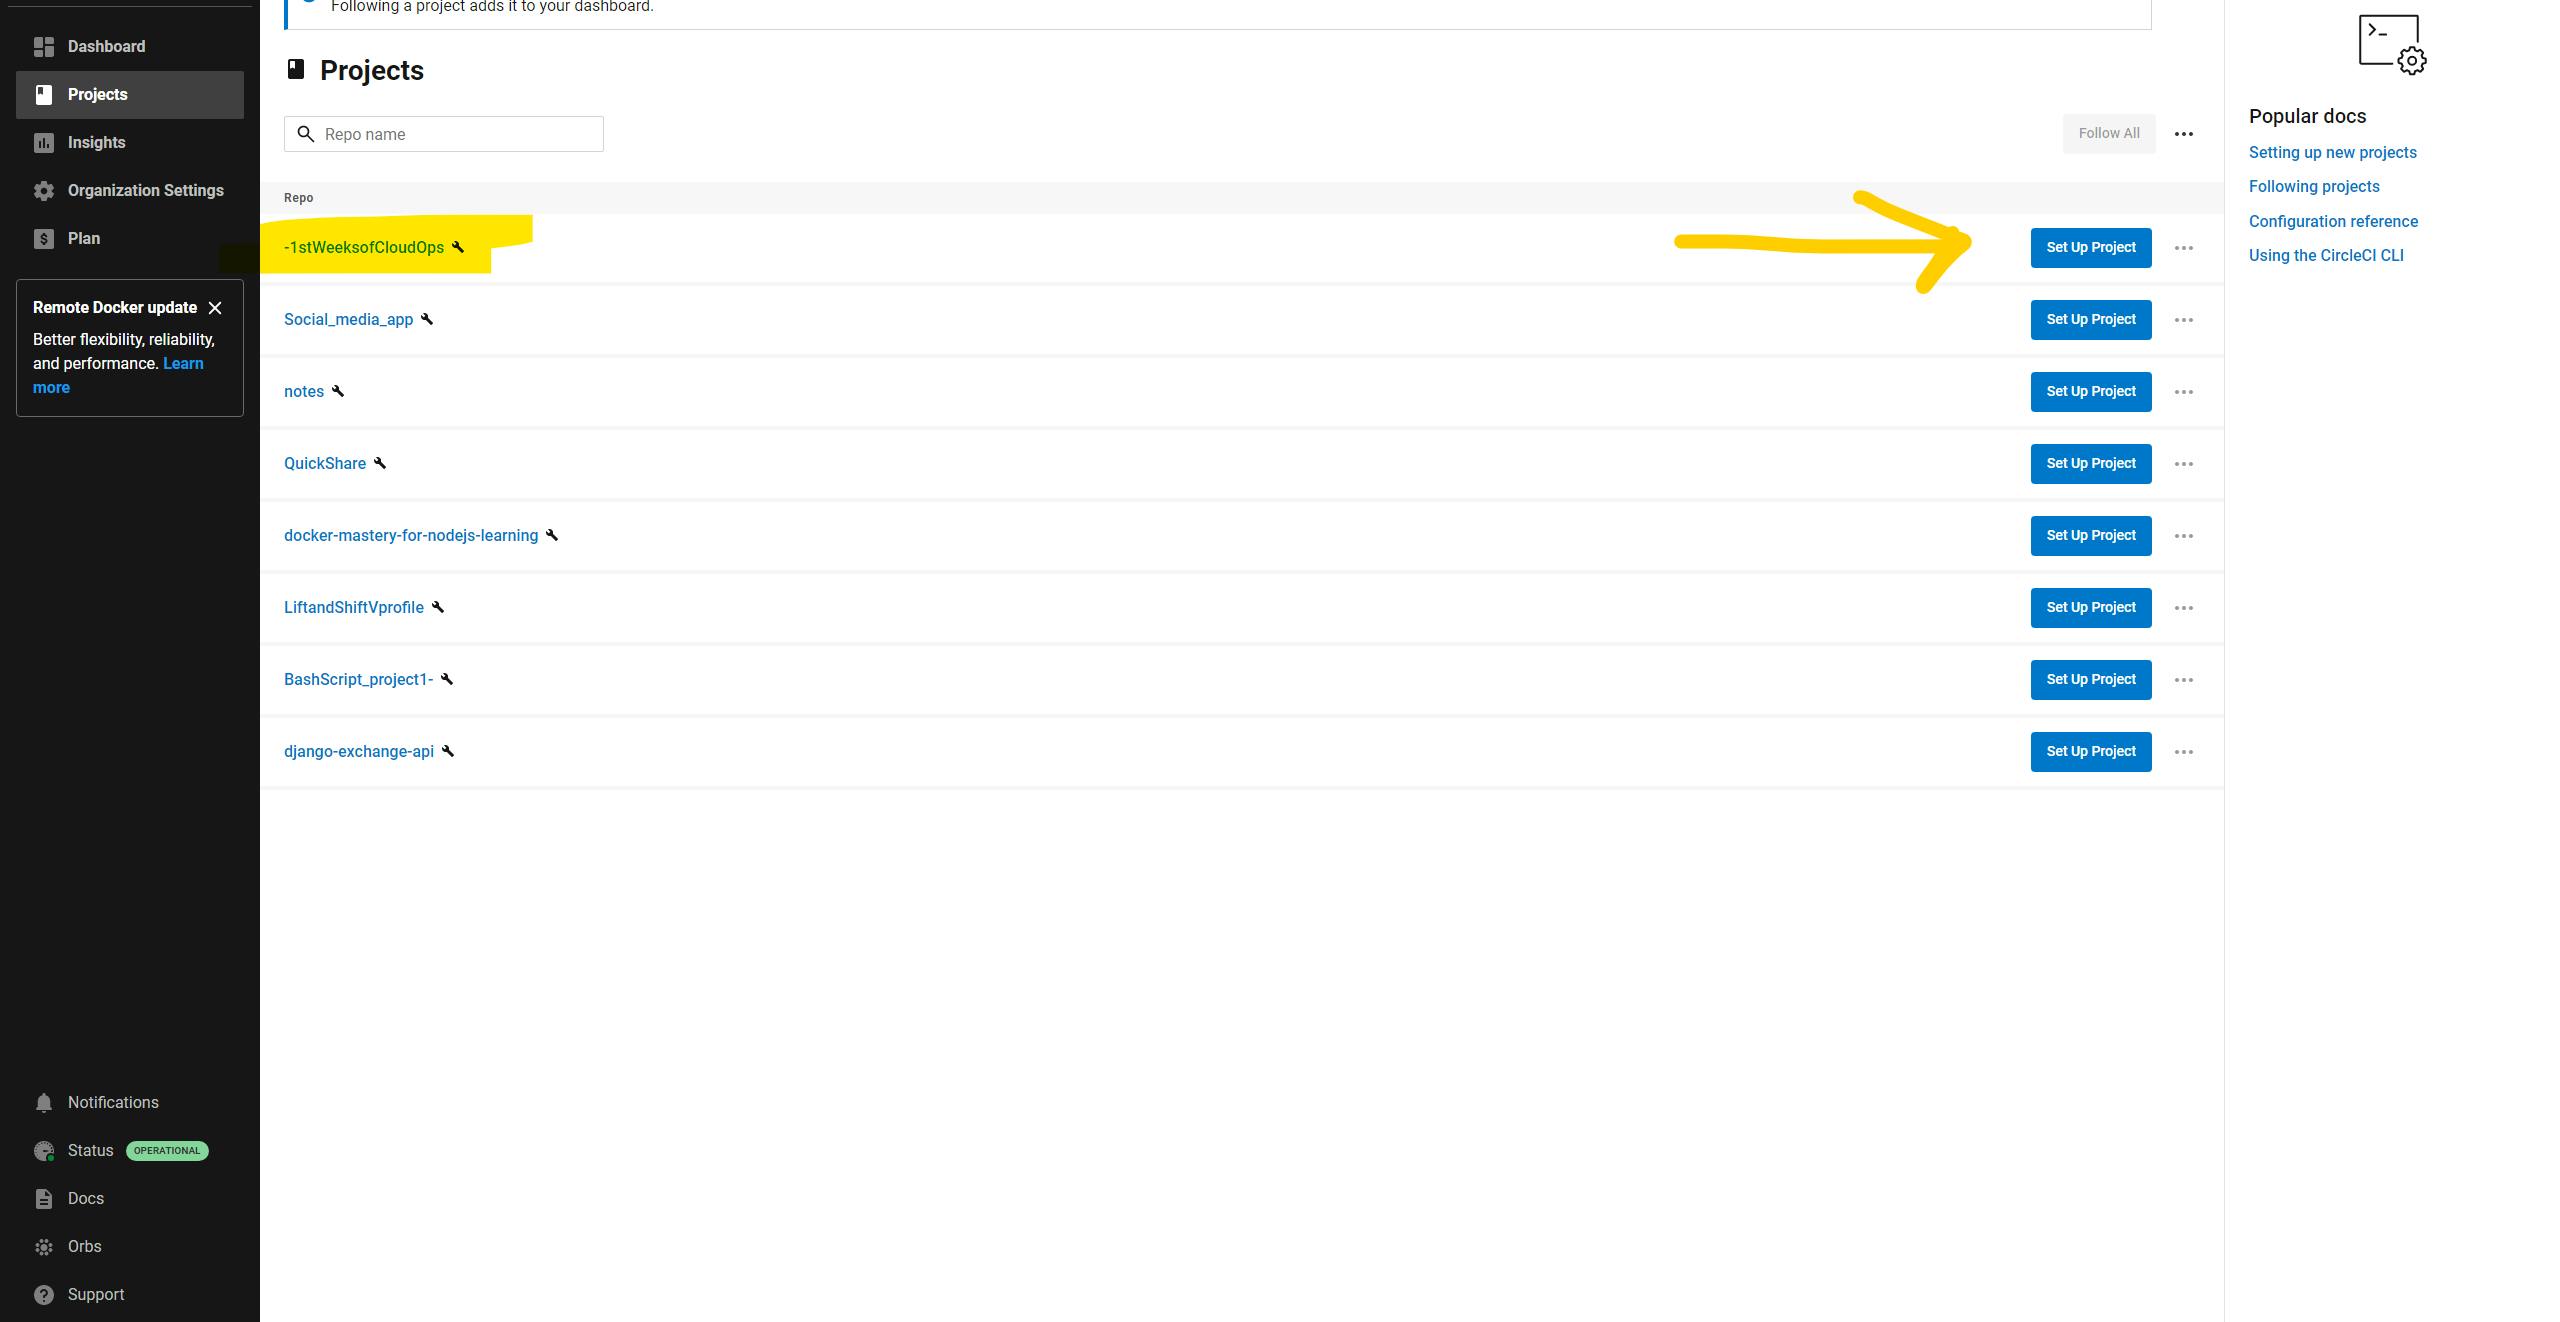
Now you can see all the listed repositories in your Circleci dashboard. click on the setup project button for the repository that you just push it on GitHub.
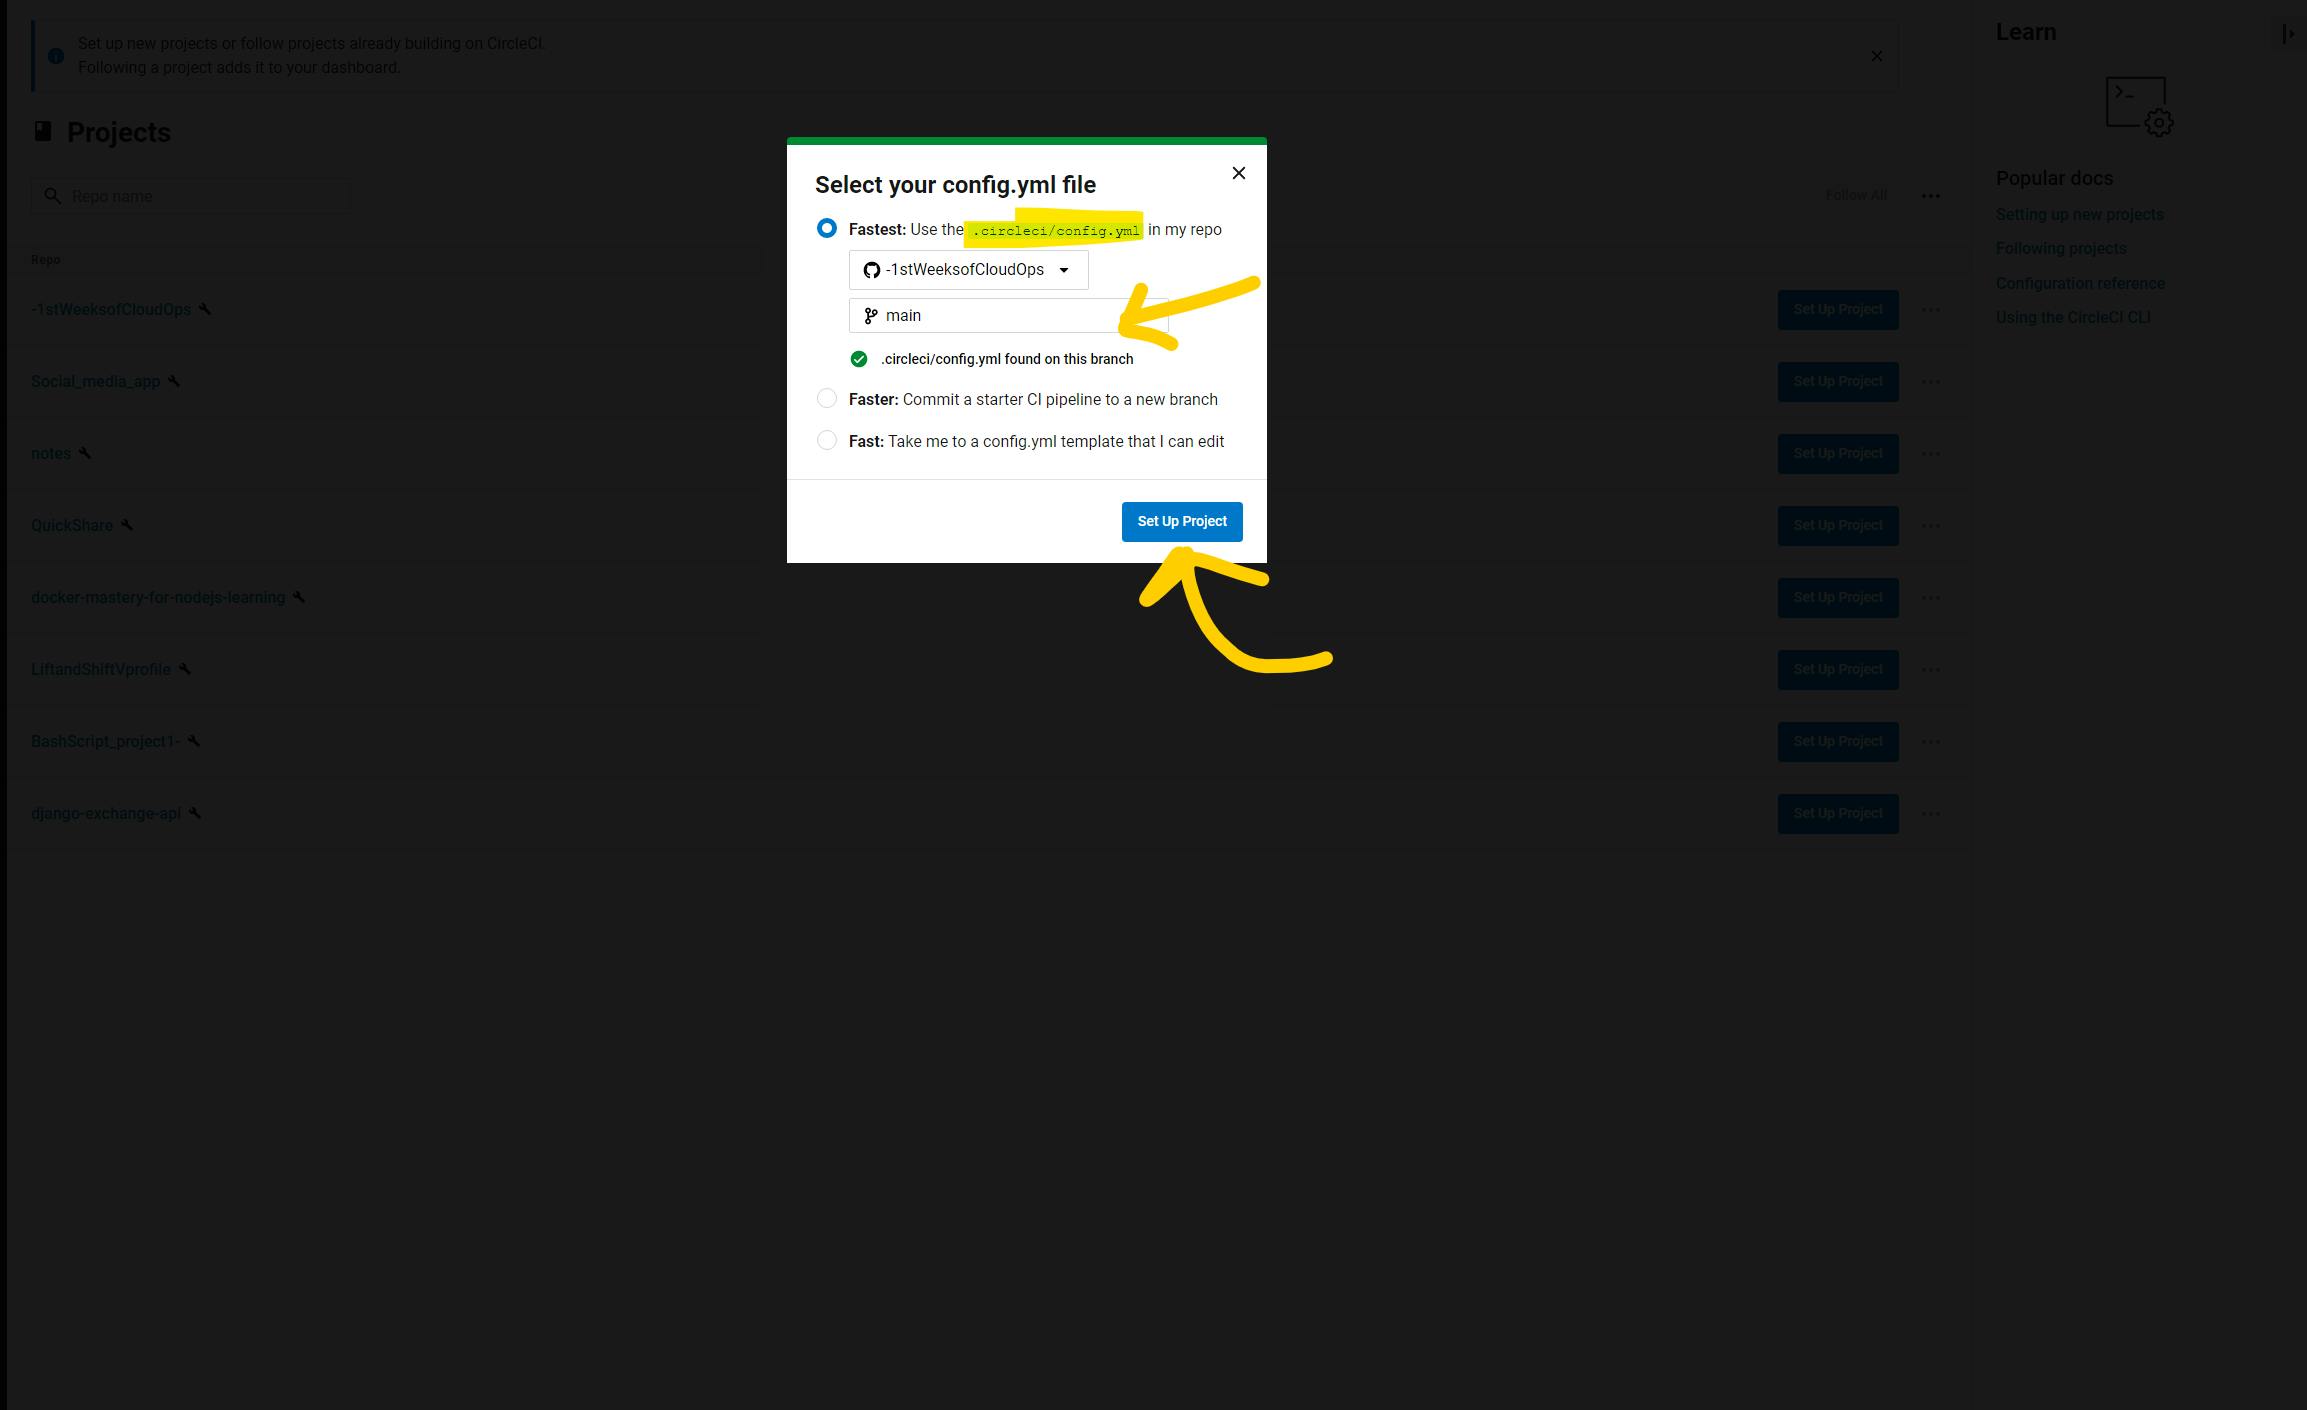
it will ask about the branch. just type main or if you want to setup for another branch you can type that as well. and click on the setup project button.
Go into your project and click on Project setup button which you can find top right corner.
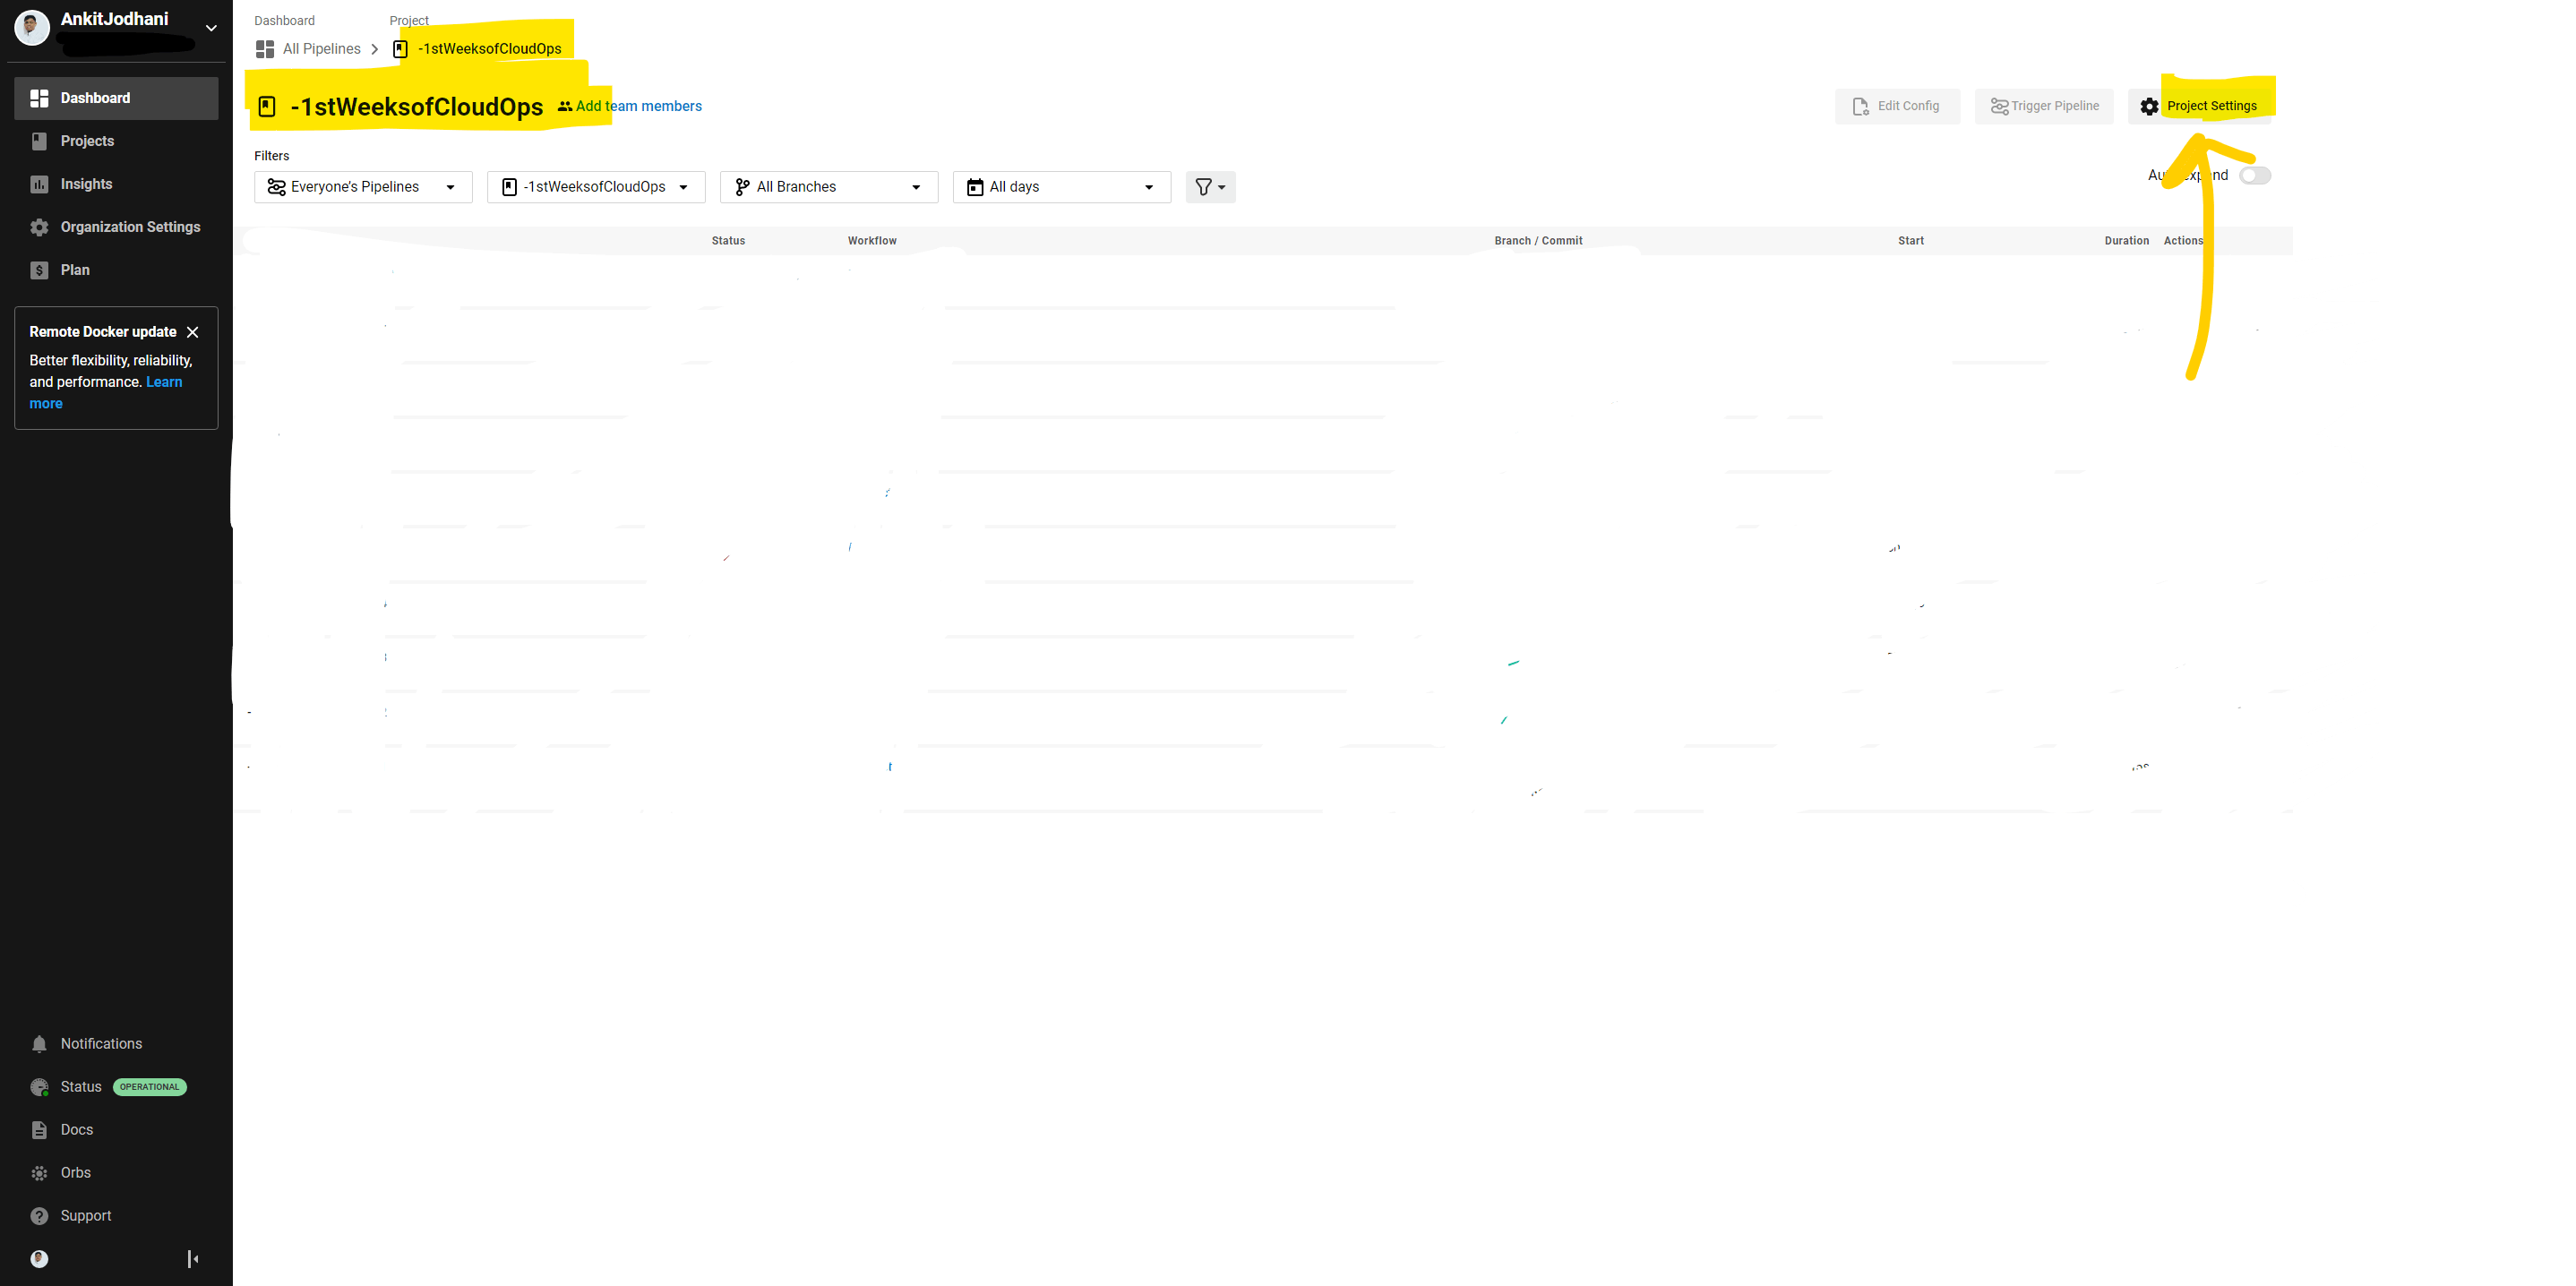
Now click on the Environment variable. Now here we have to add 4 environmental variables.
AWS_ACCESS_KEY_ID
your access key
AWS_DEFAULT_REGION
region of your s3 bucket
AWS_S3_BUCKET
name of your s3 bucket
AWS_SECRET_ACCESS_KEY
the secret key of the created user
Let's see how you can get the above variables
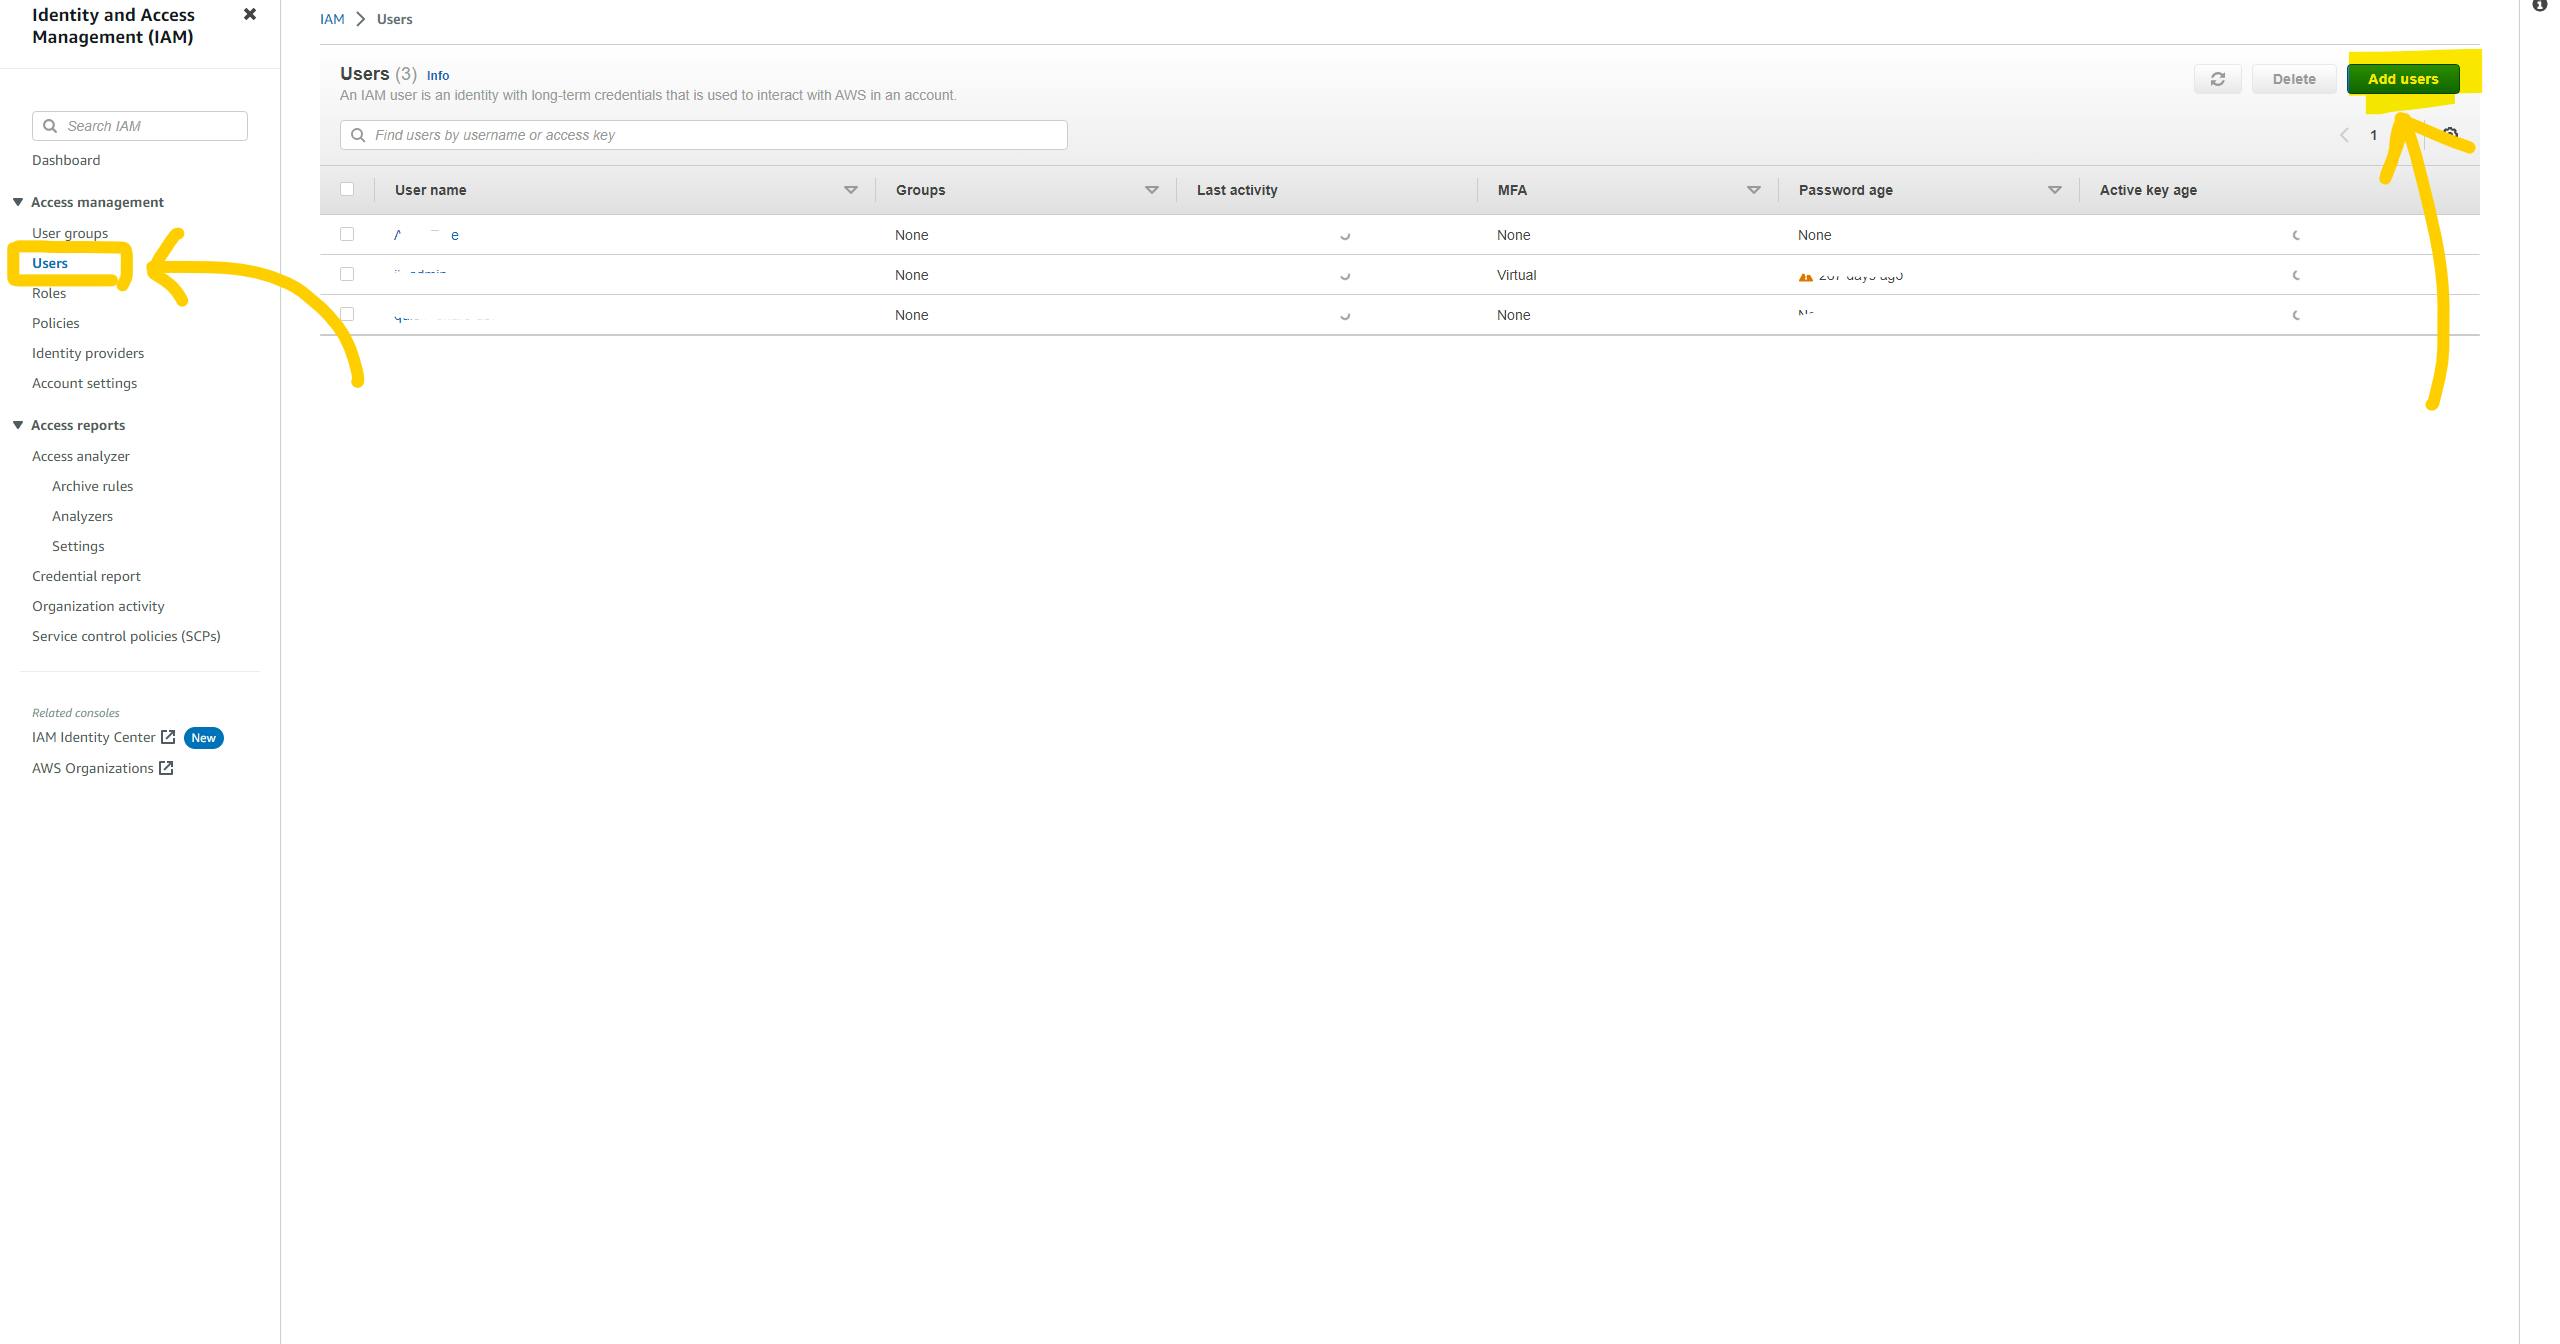
Go to the AWS console and search the IAM service.
create a new user with any name you want. and click next button.
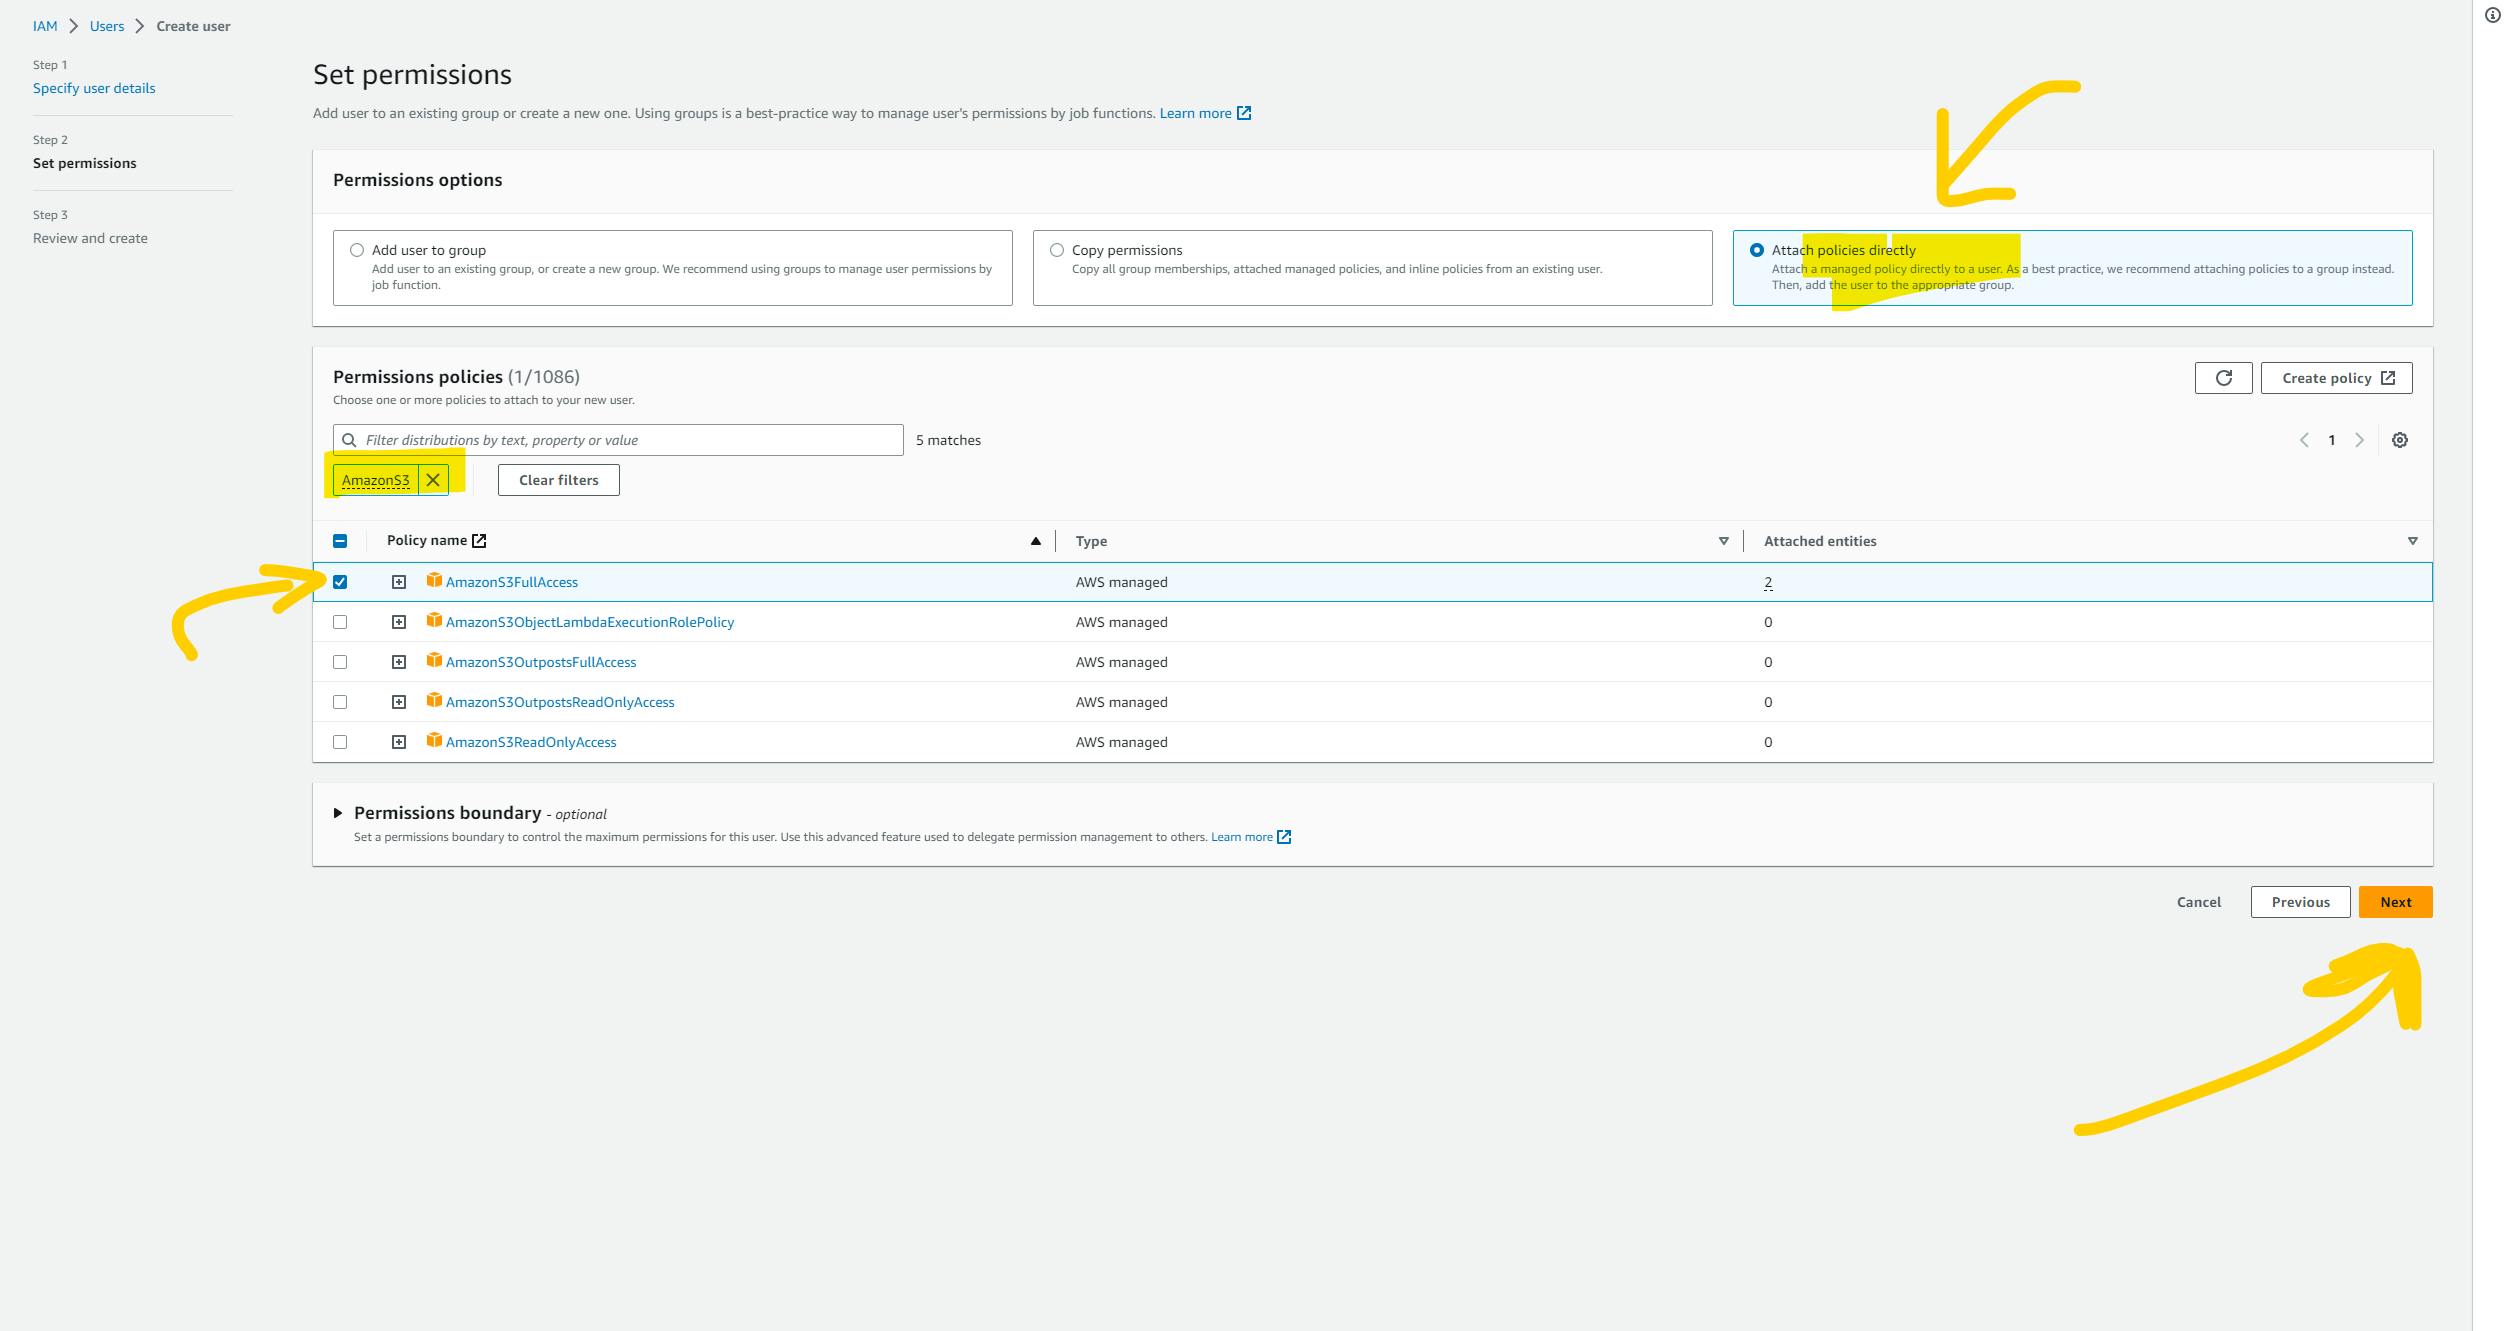
You need to select policy here. type AmazonS3 and enter. and click on AmazonS3Full Access. and then click on next button. and click on create user button.
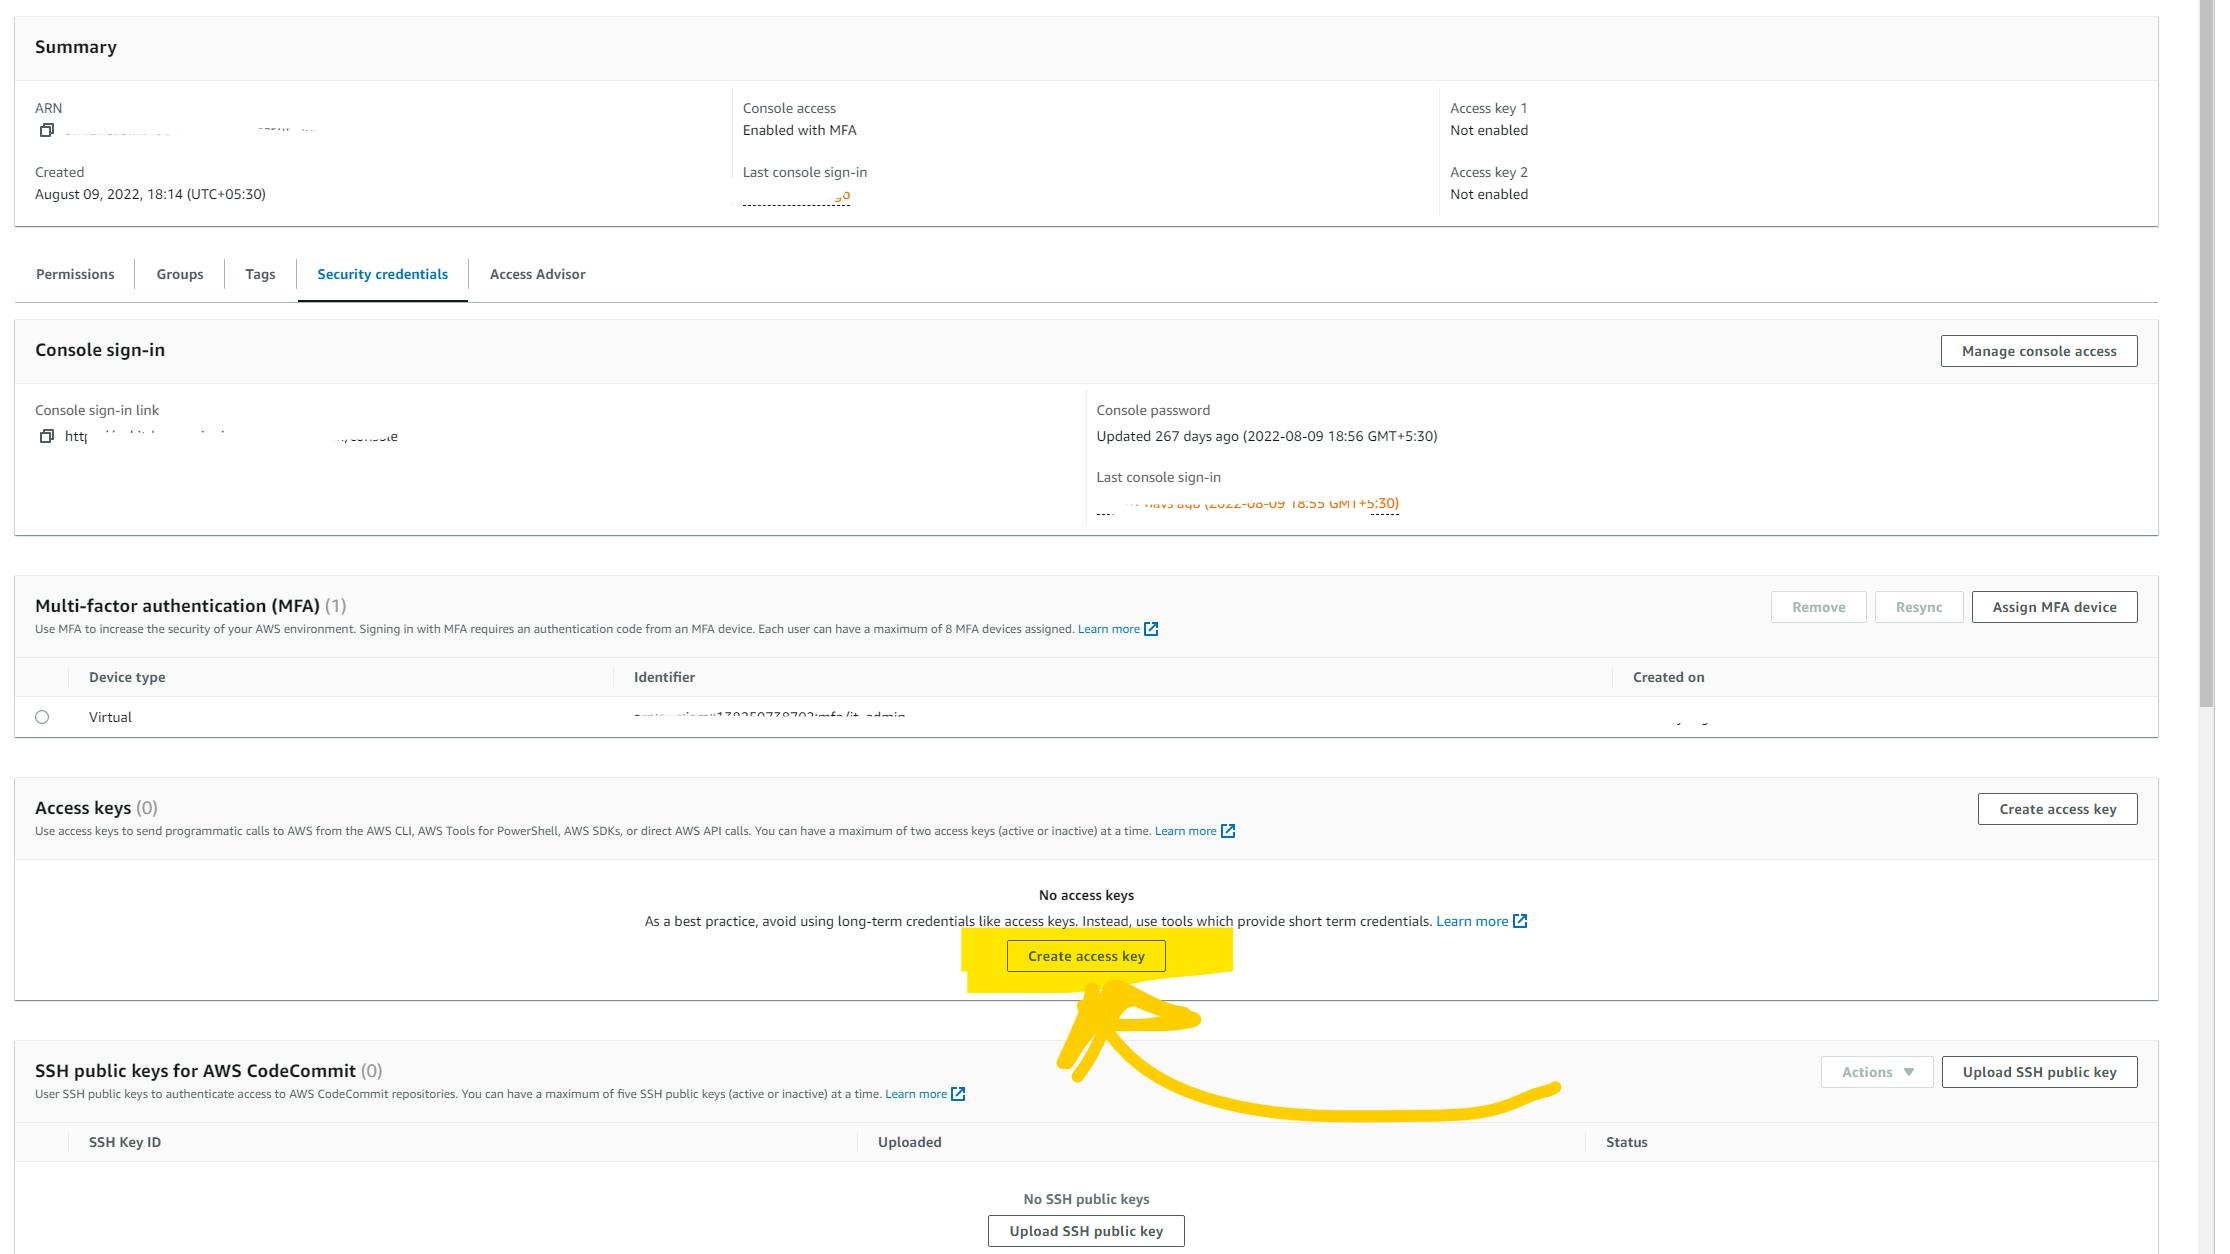
Now you can see the newly created user on the user tabs. and click on it. Now click on the Security Credential tab. and again click on Create Access key.
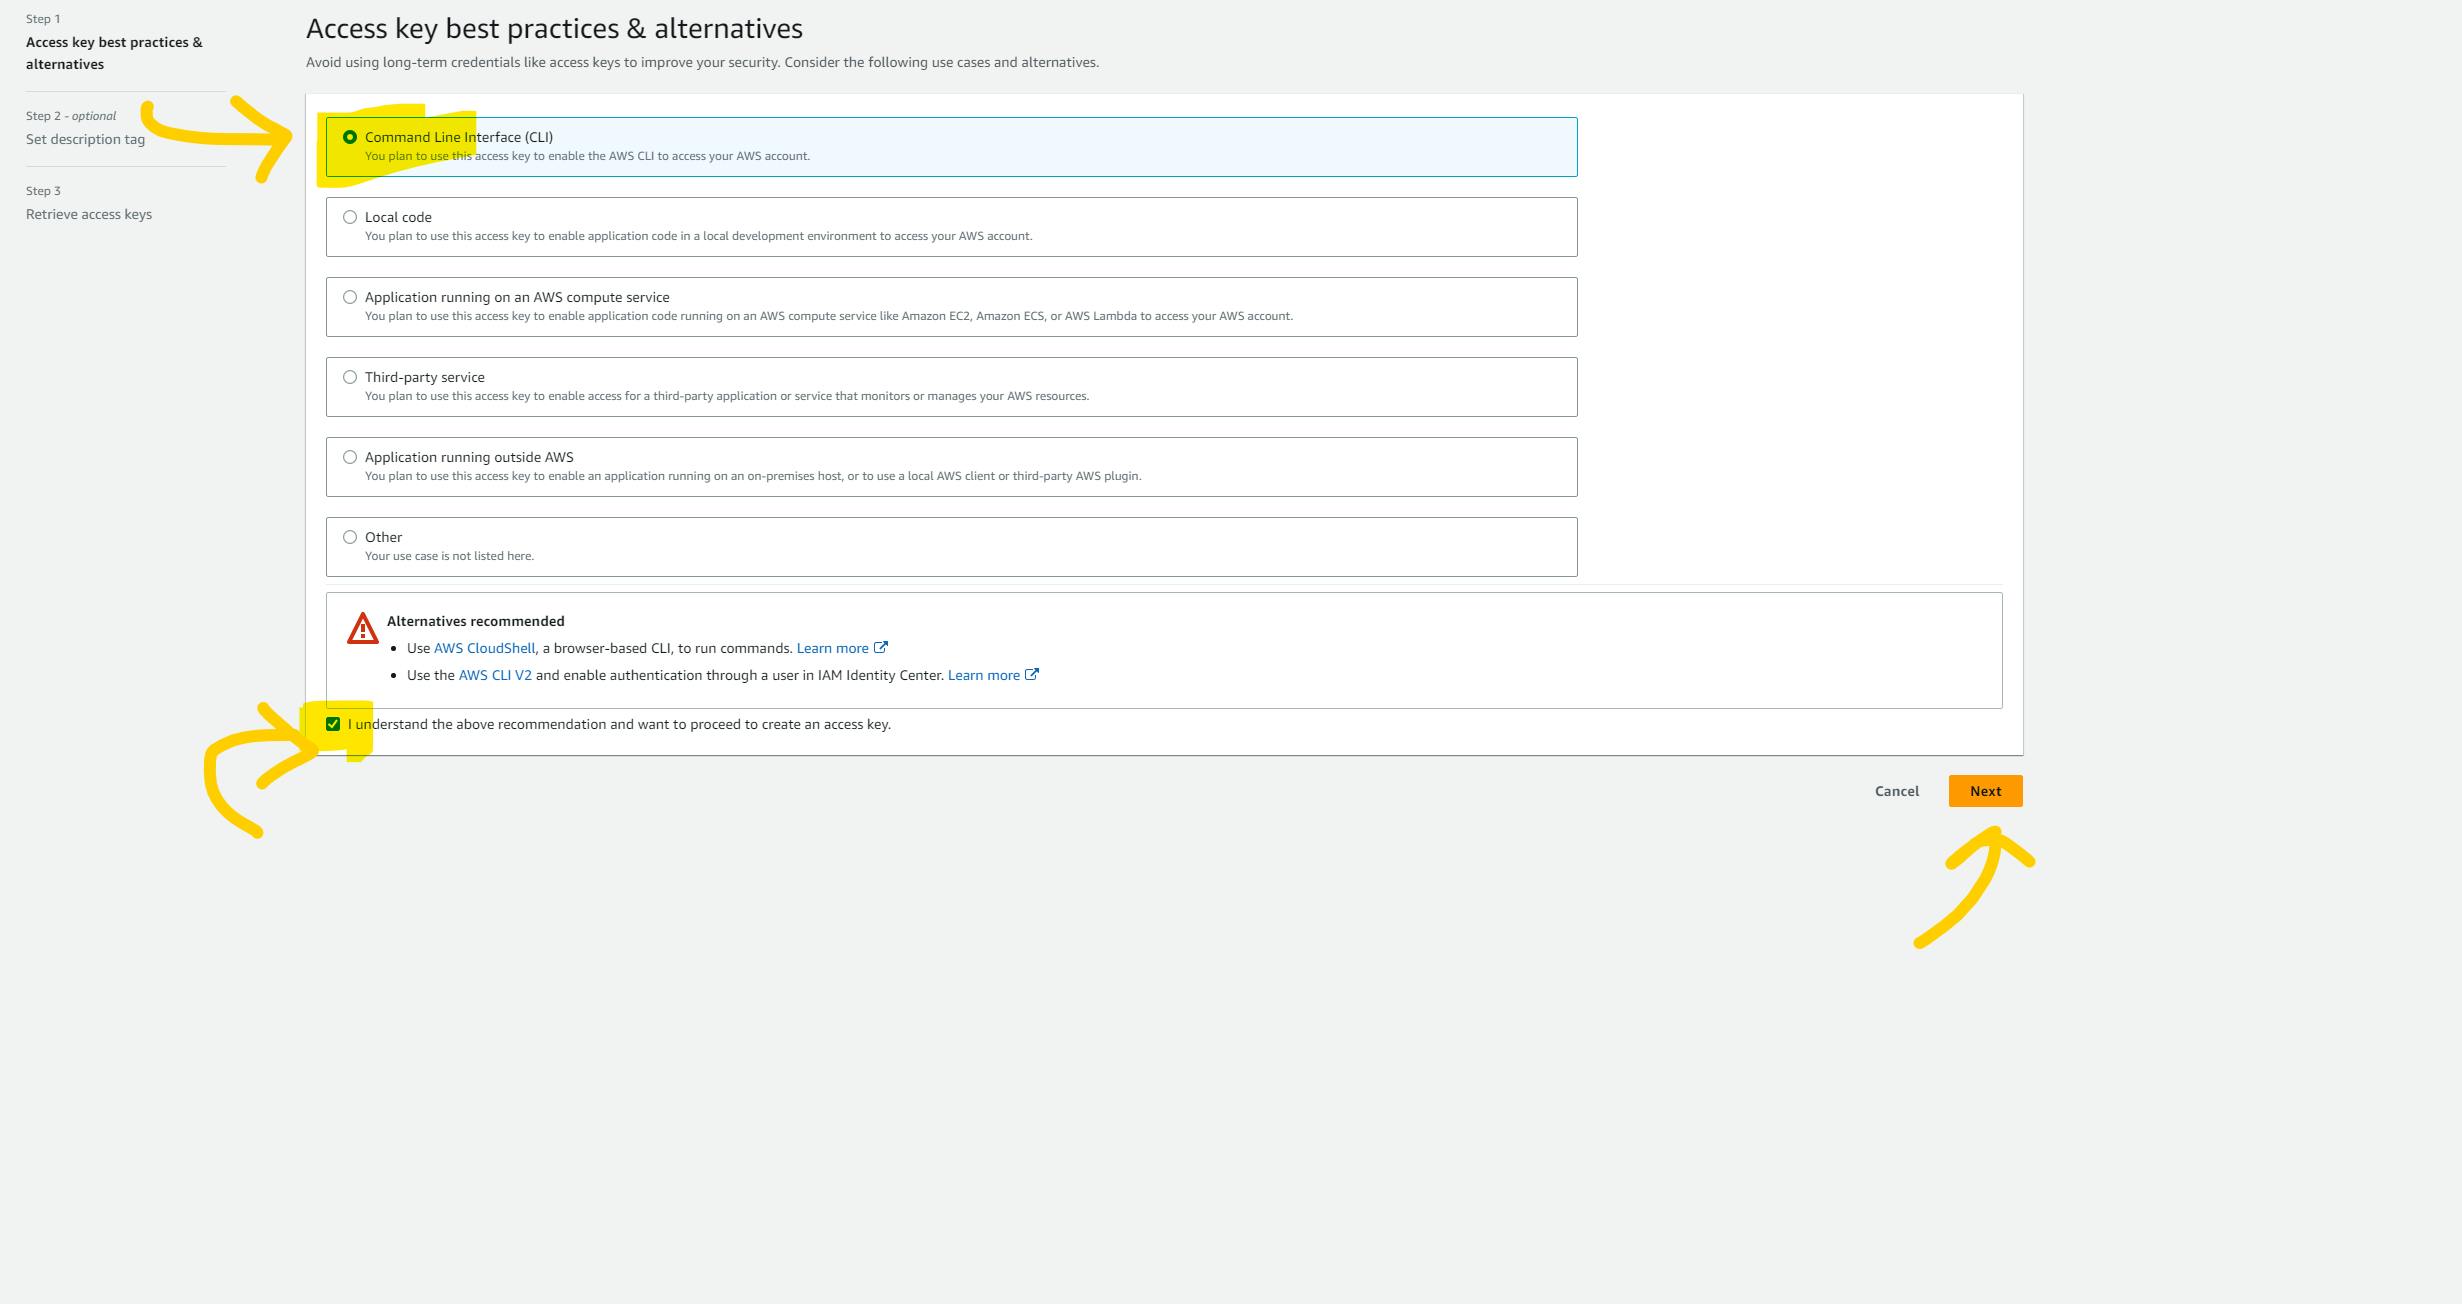
It will ask to see the options like this. click on Command Line Interface (CLI). and click below the check mark and click on the next button.
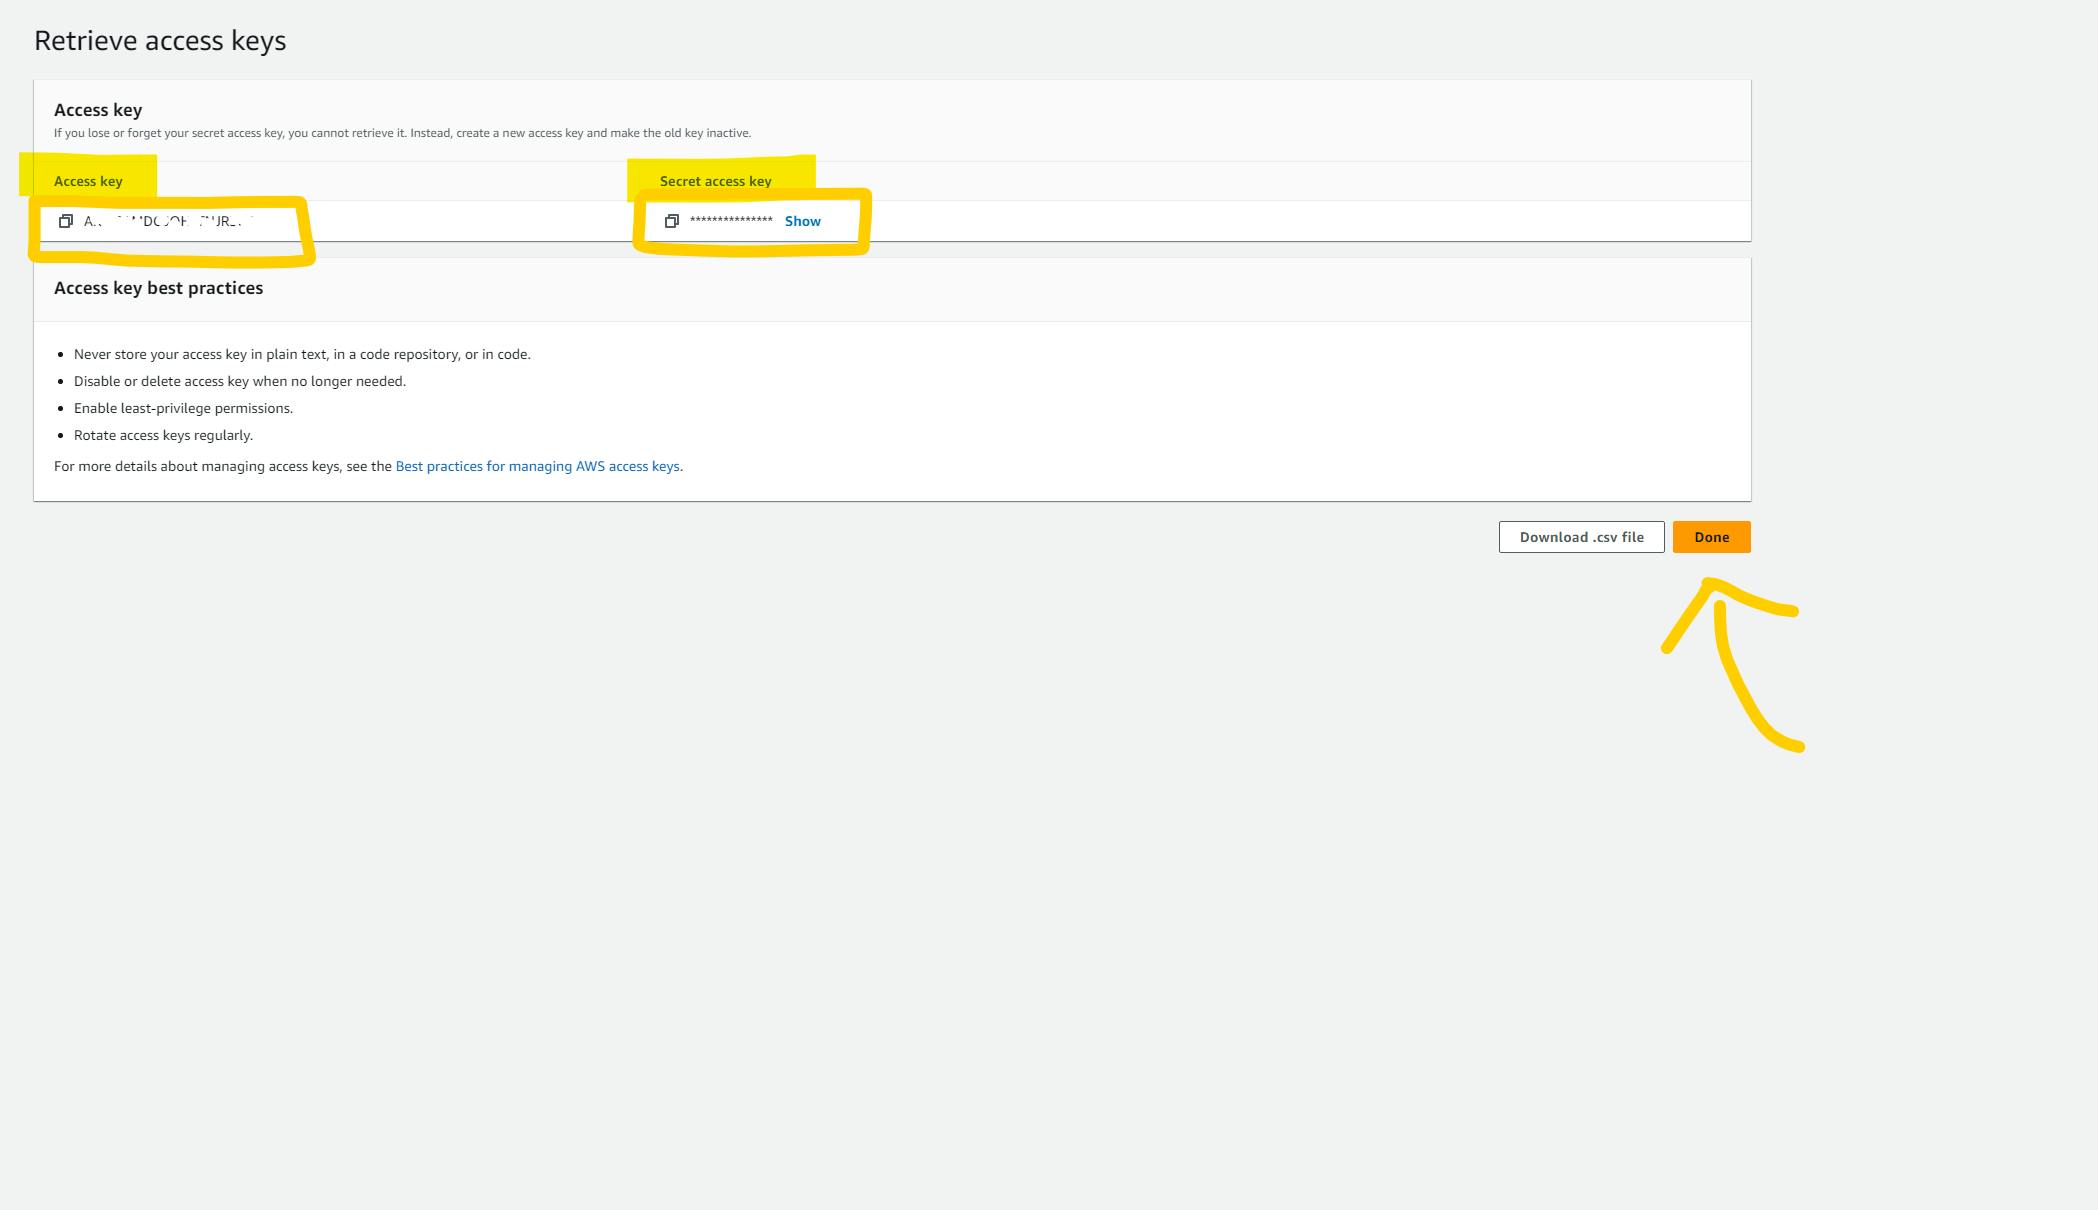
Now you will see the ACCESS KEY and SECRET KEY. make sure you save it. or you can download a .csv file. Please make sure to save key because you won't be able to see it again.
Now we need Region and Bucket name. but as I'm writing a blog on Hashnode I hope that you will get it by yourself.
Please create all the environment variables in the Circleci project setting.
AWS_ACCESS_KEY_ID
Add your access key here
AWS_DEFAULT_REGION
Add your region (eg: us-east-1)
AWS_S3_BUCKET
Add bucket name
AWS_SECRET_ACCESS_KEY
Add secret key of your project
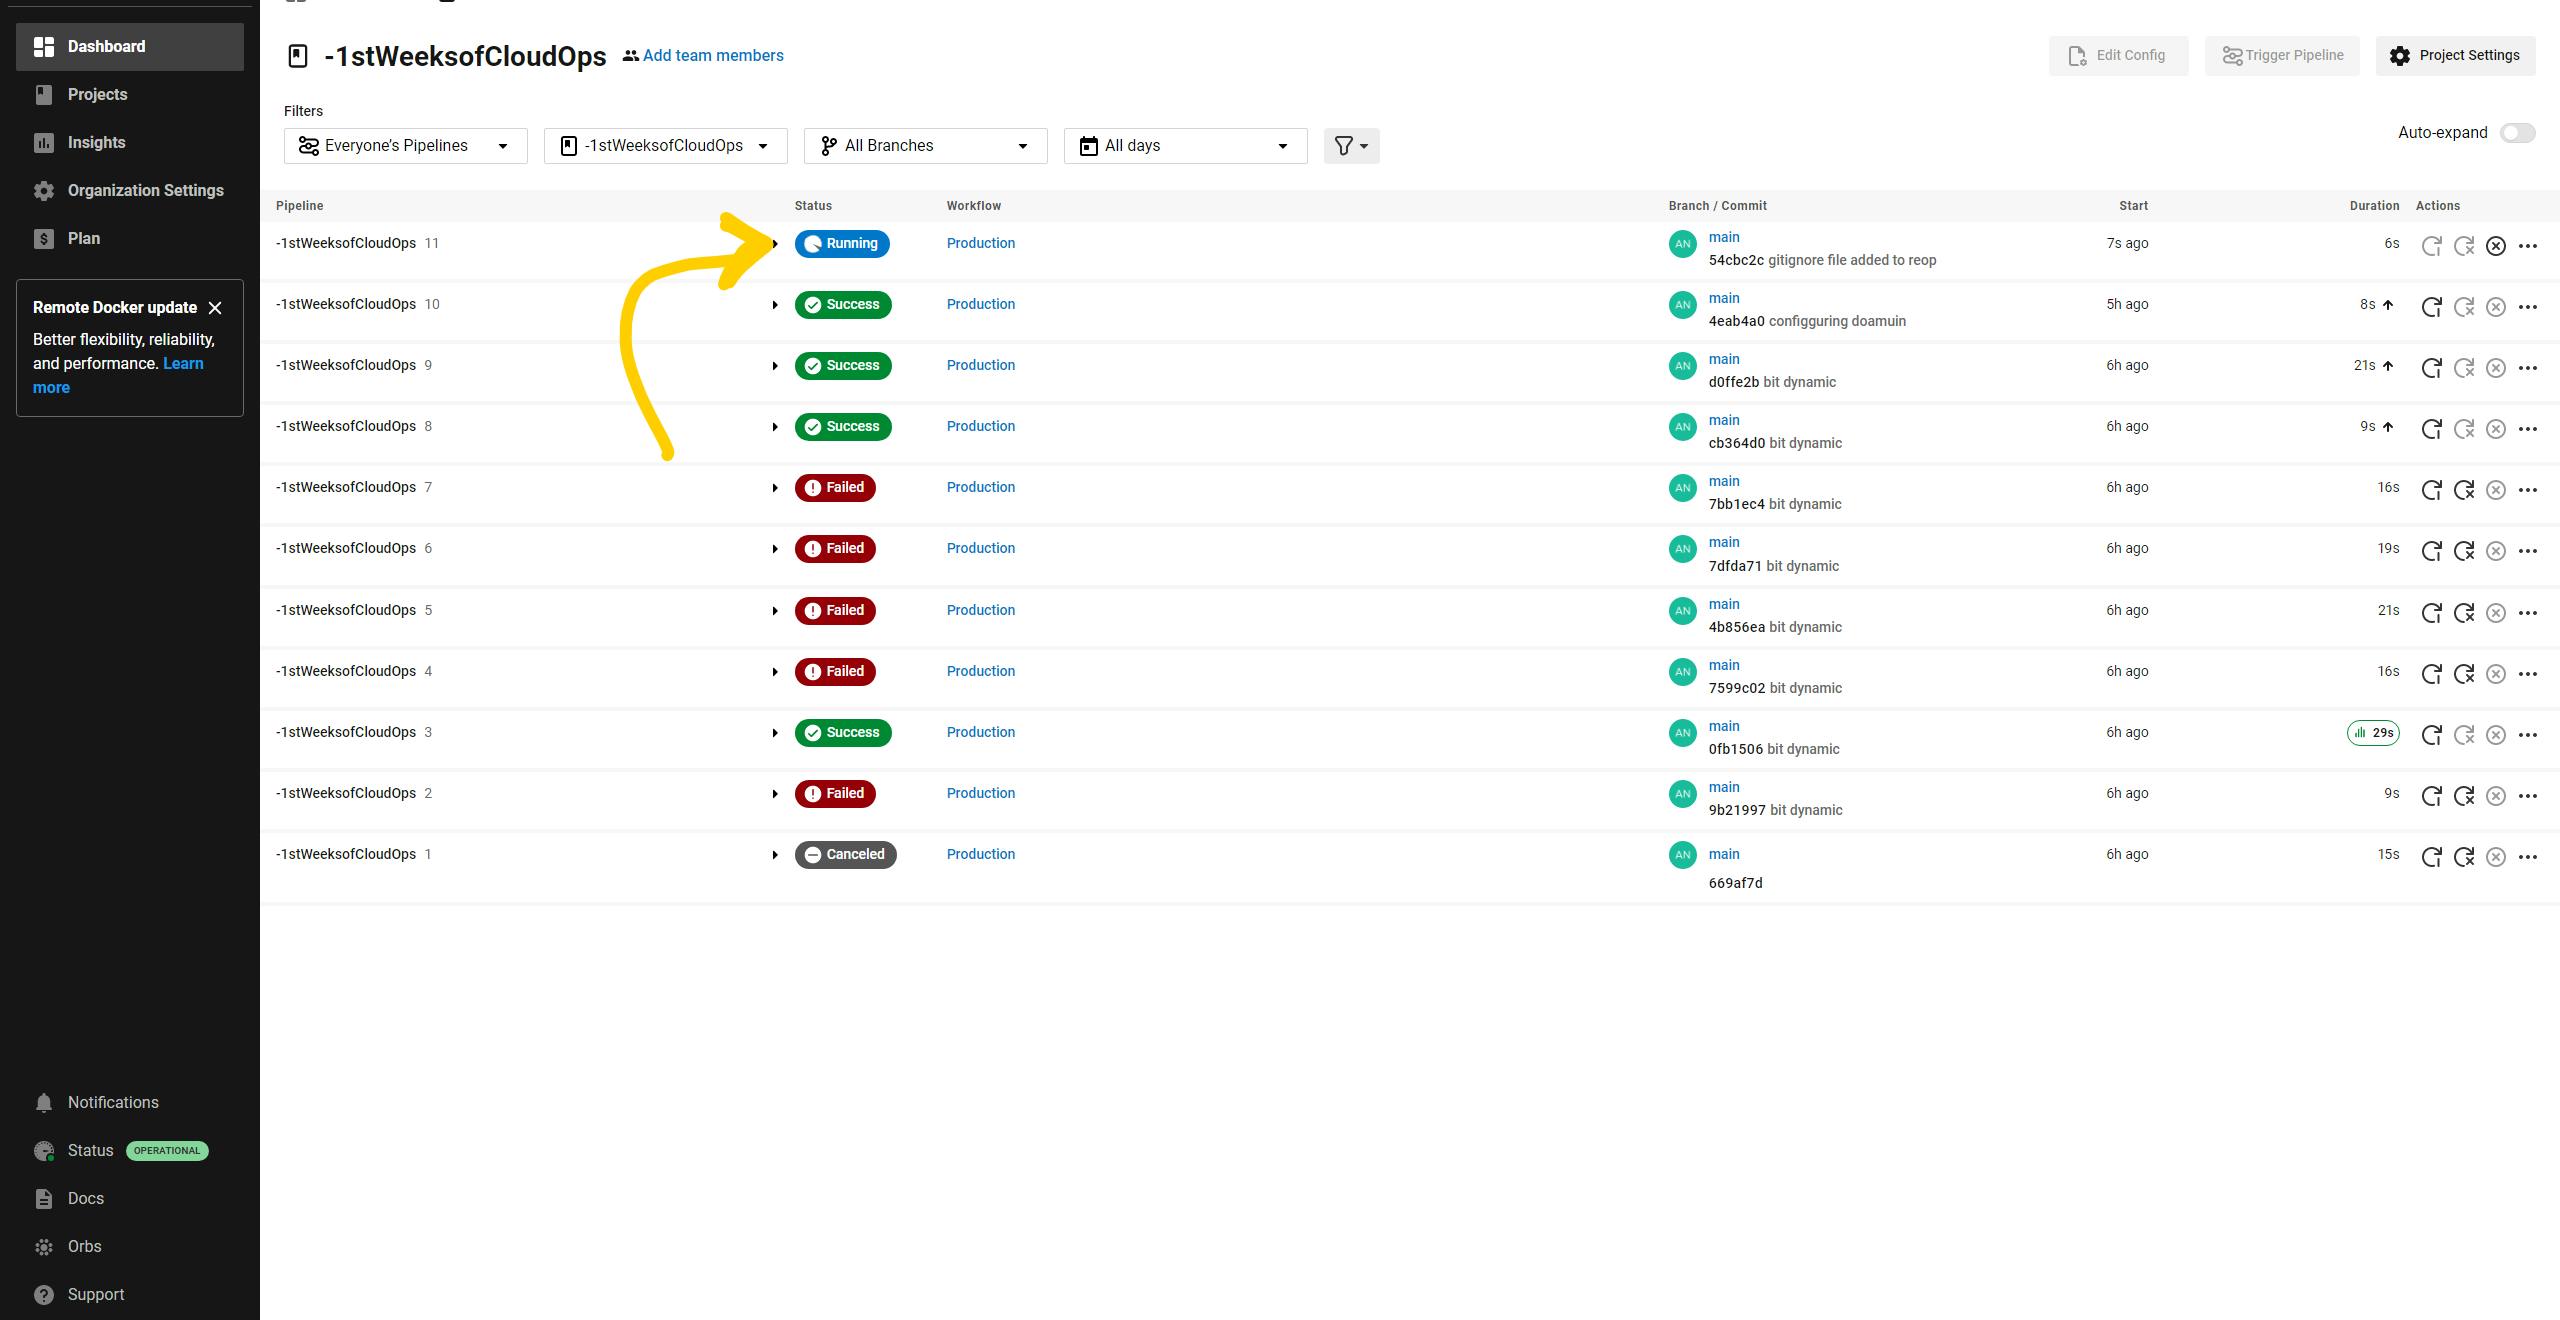
Now just add something in your repository and commit & push it. and your pipeline will detect that there is a change in the repository and it will run all the steps mentioned in the YML file and Pipeline will deploy our website automatically. so when you change anything in your website it will be directly reflected in the s3.
You will see pipeline execution like this.
Now you can see that your bucket looks like this.

you can now access your website with ENDPOINT or the URL that you got from S3.
Now it's time to add an SSL certificate.
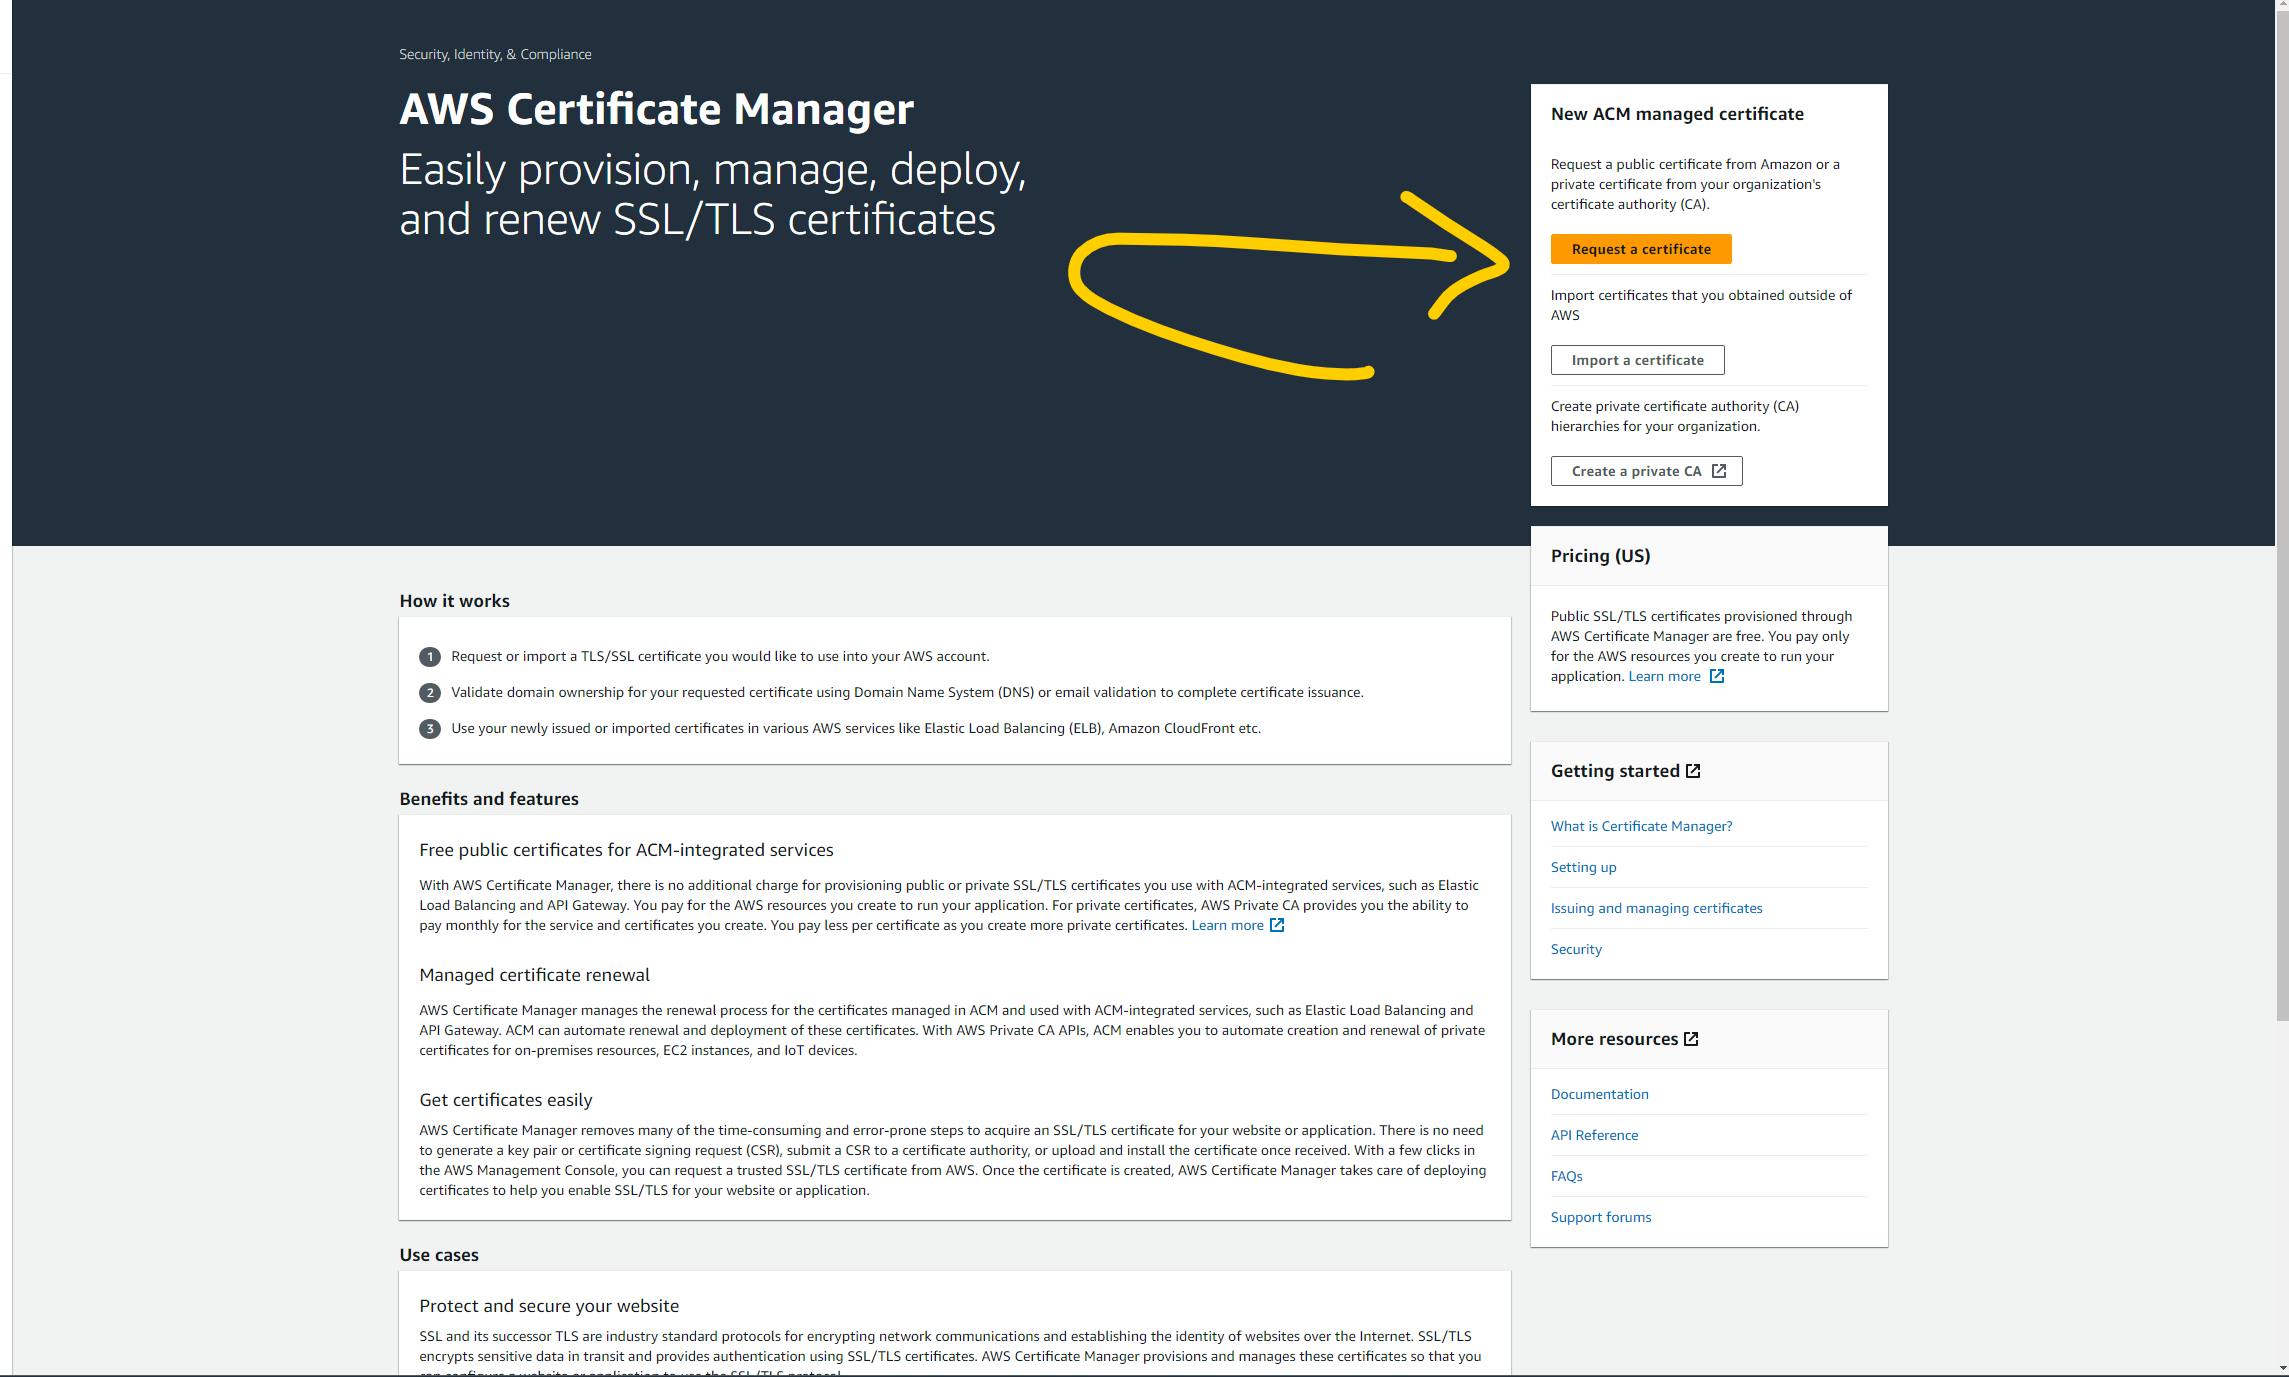
just search Certificate Manager in the search bar of the AWS console.
Open the dashboard of the Certificate Manager.
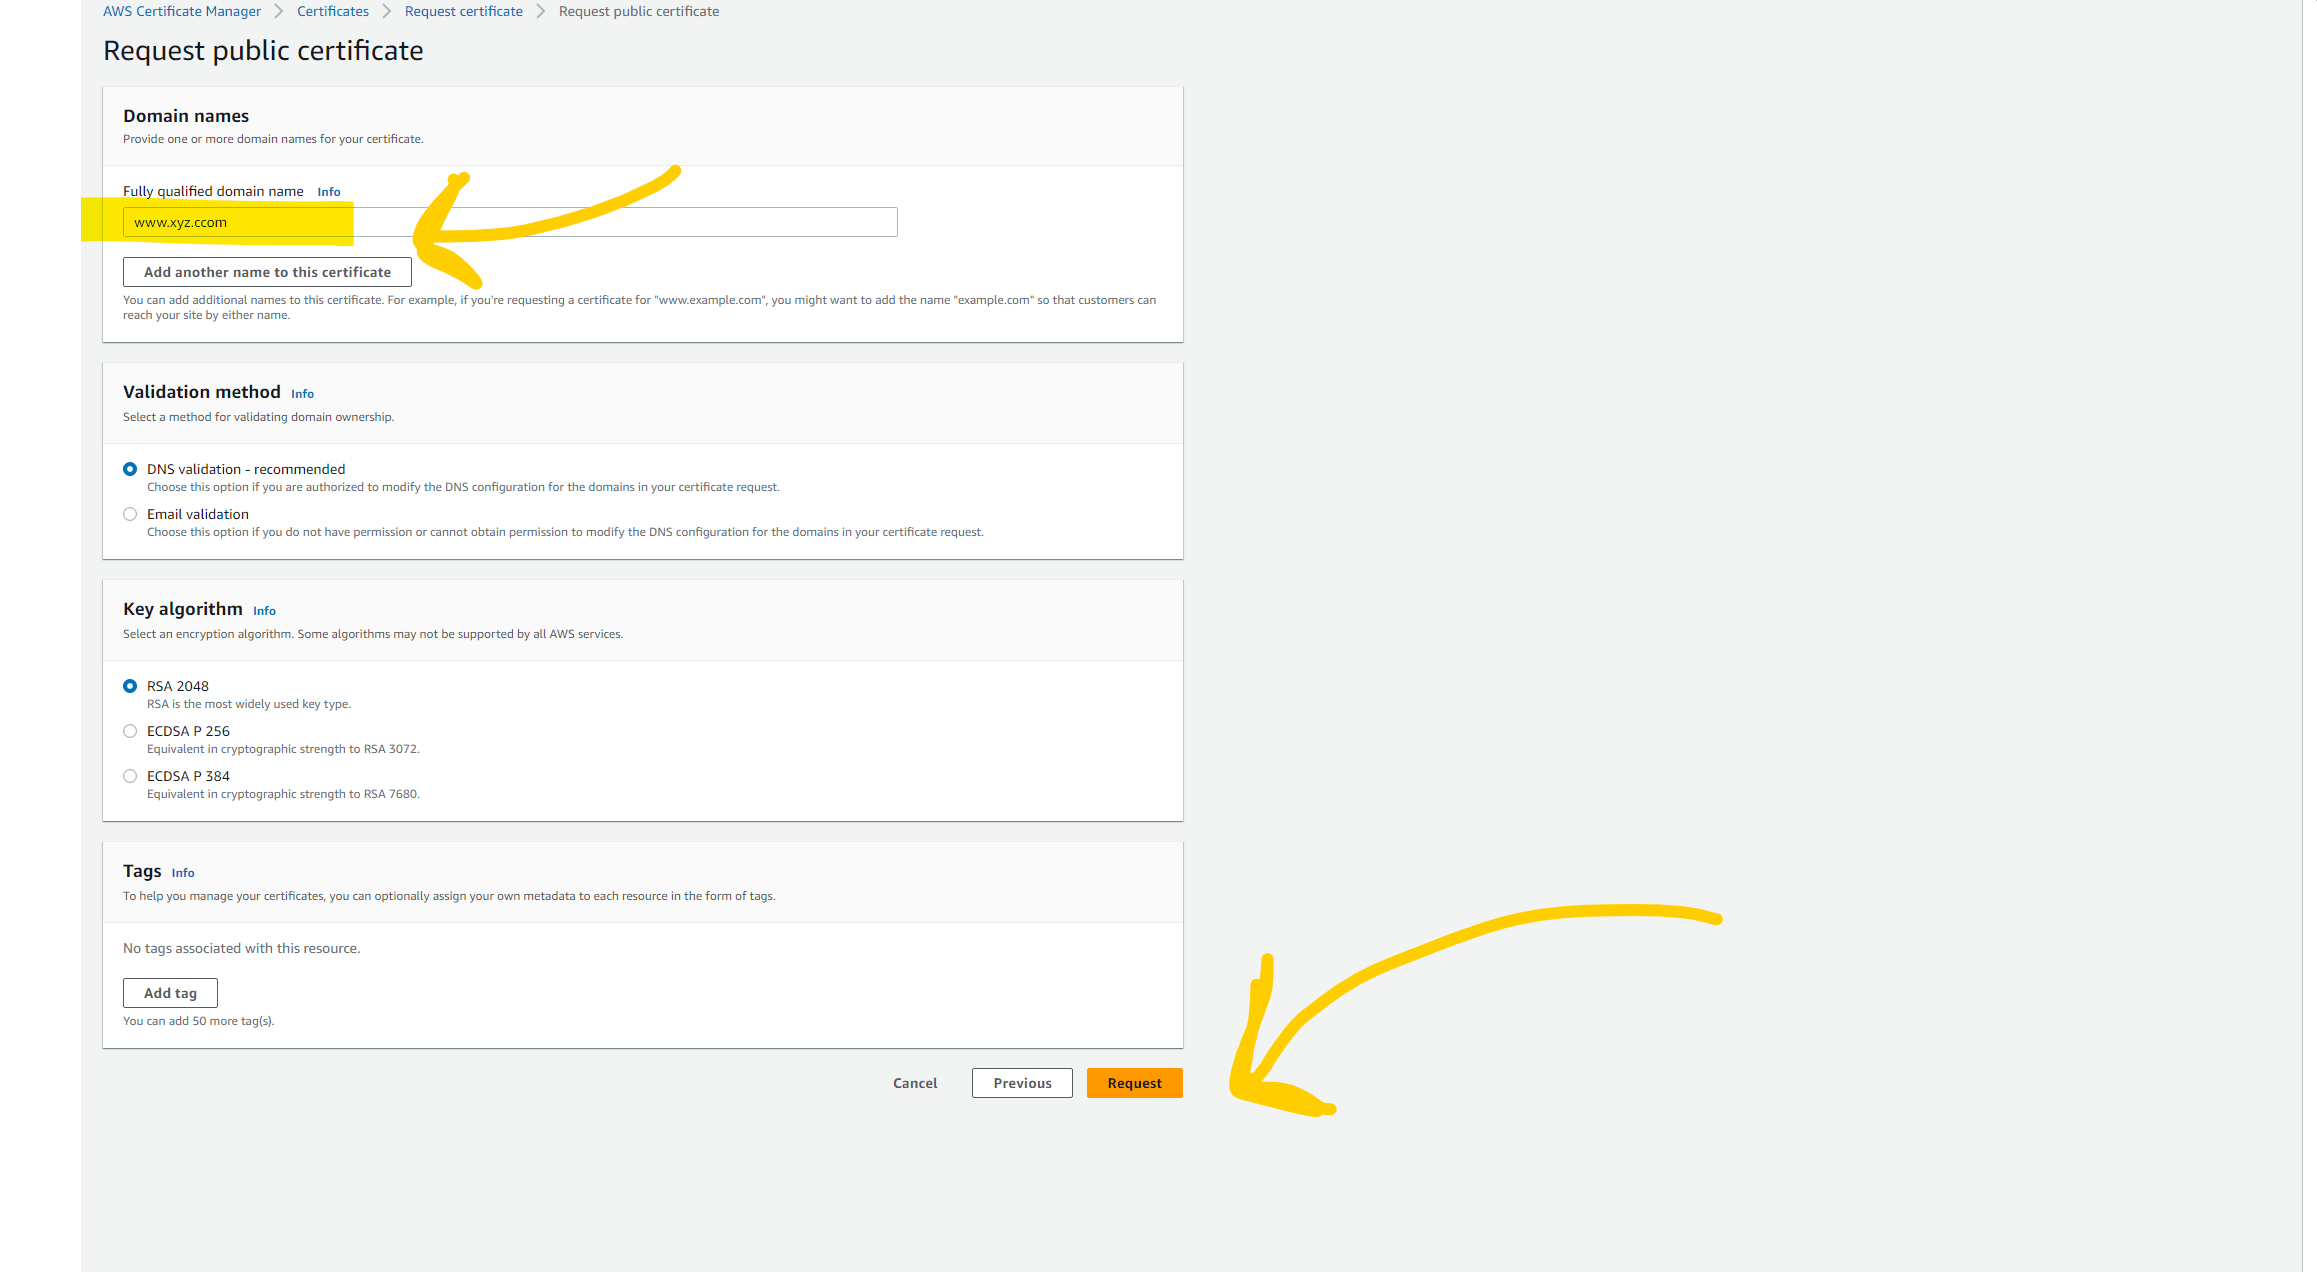
Click on Request certificate and again click on the Request public certificate.
type your domain name "xyz.com. shown below.
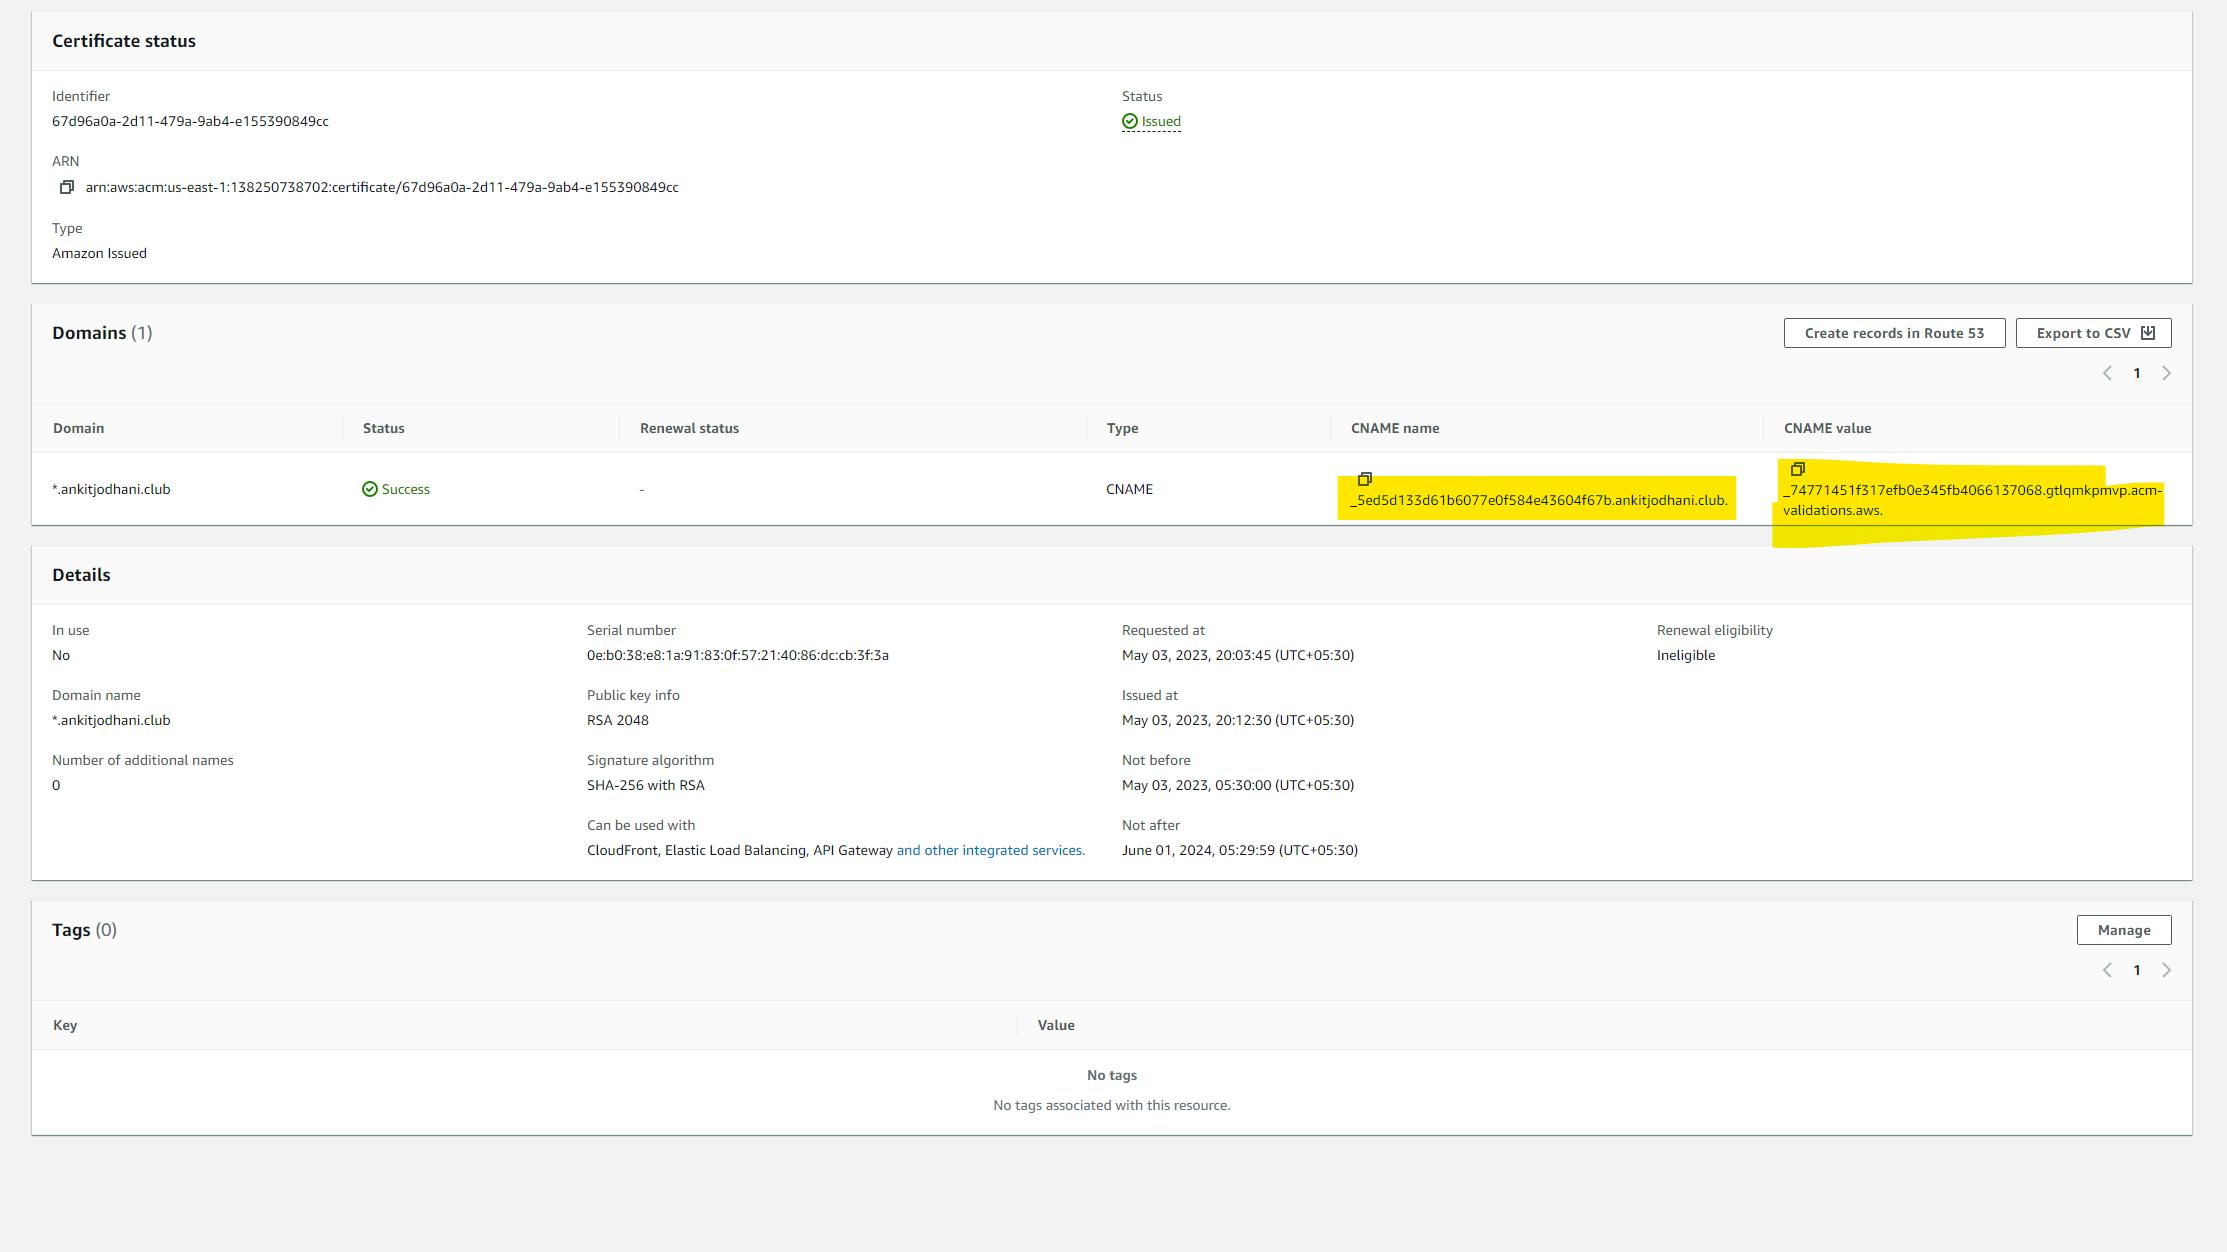
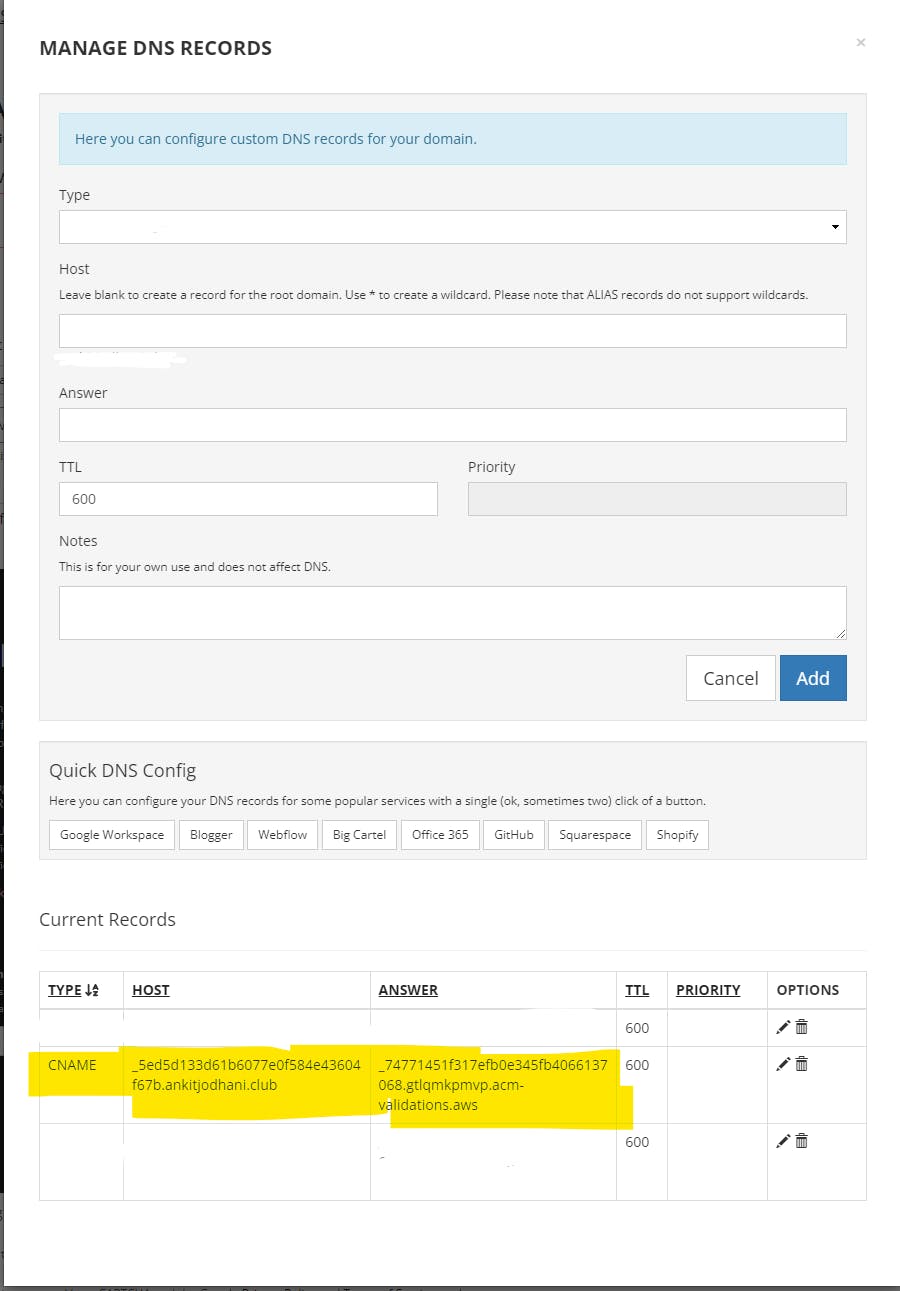
Now refresh the page and you can see your certificate. now we need to validate it. so for that click on the certificate and copy the CNAME name and CNAME value. and add both in your domain by creating a CNAME record. After a few minutes it will be issued to you and you can check the status Issued.
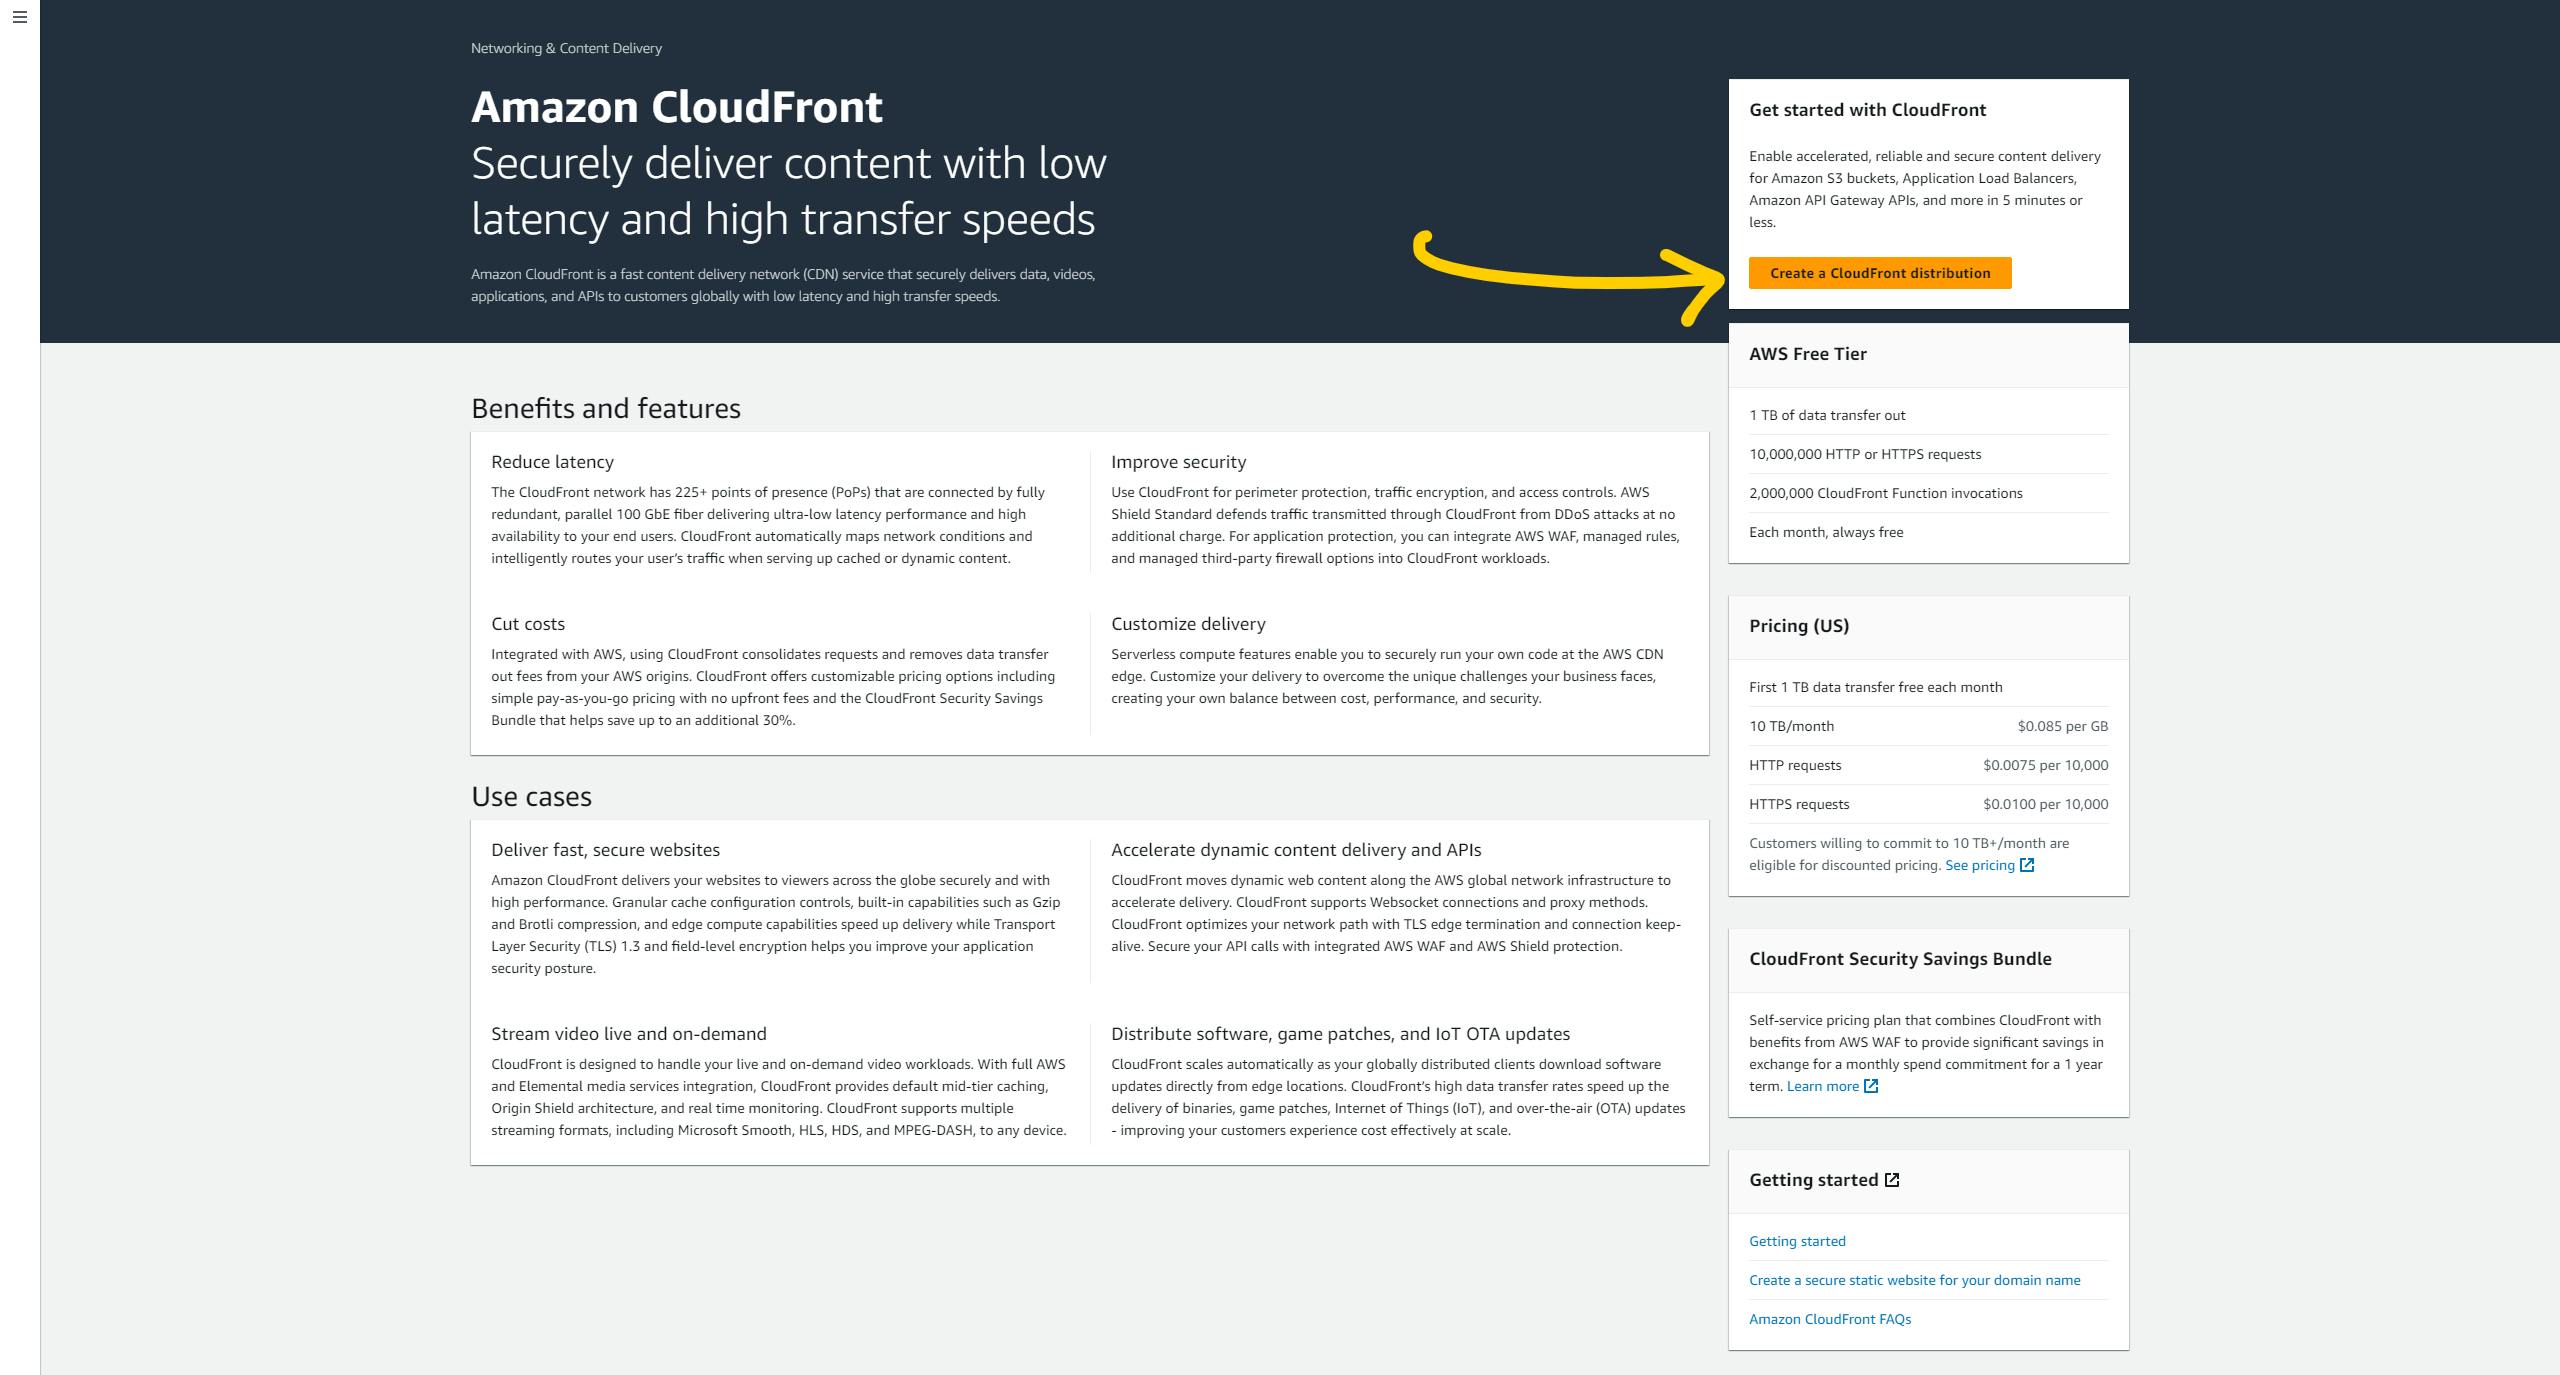
Now we have an SSL certificate. It's time to create CDN for our website. to do that we need to use Amazon CloudFront service. so head to the CloudFront dashboard and click on Create a Cloud Distribution button.
now in the origin domain box select your bucket name (it might give you a warning to select endpoint but ignore that.), in Origin access select Legecy access identities and again select your bucket. now click on button create new OAI and click create. select Yes, update the bucket policy.
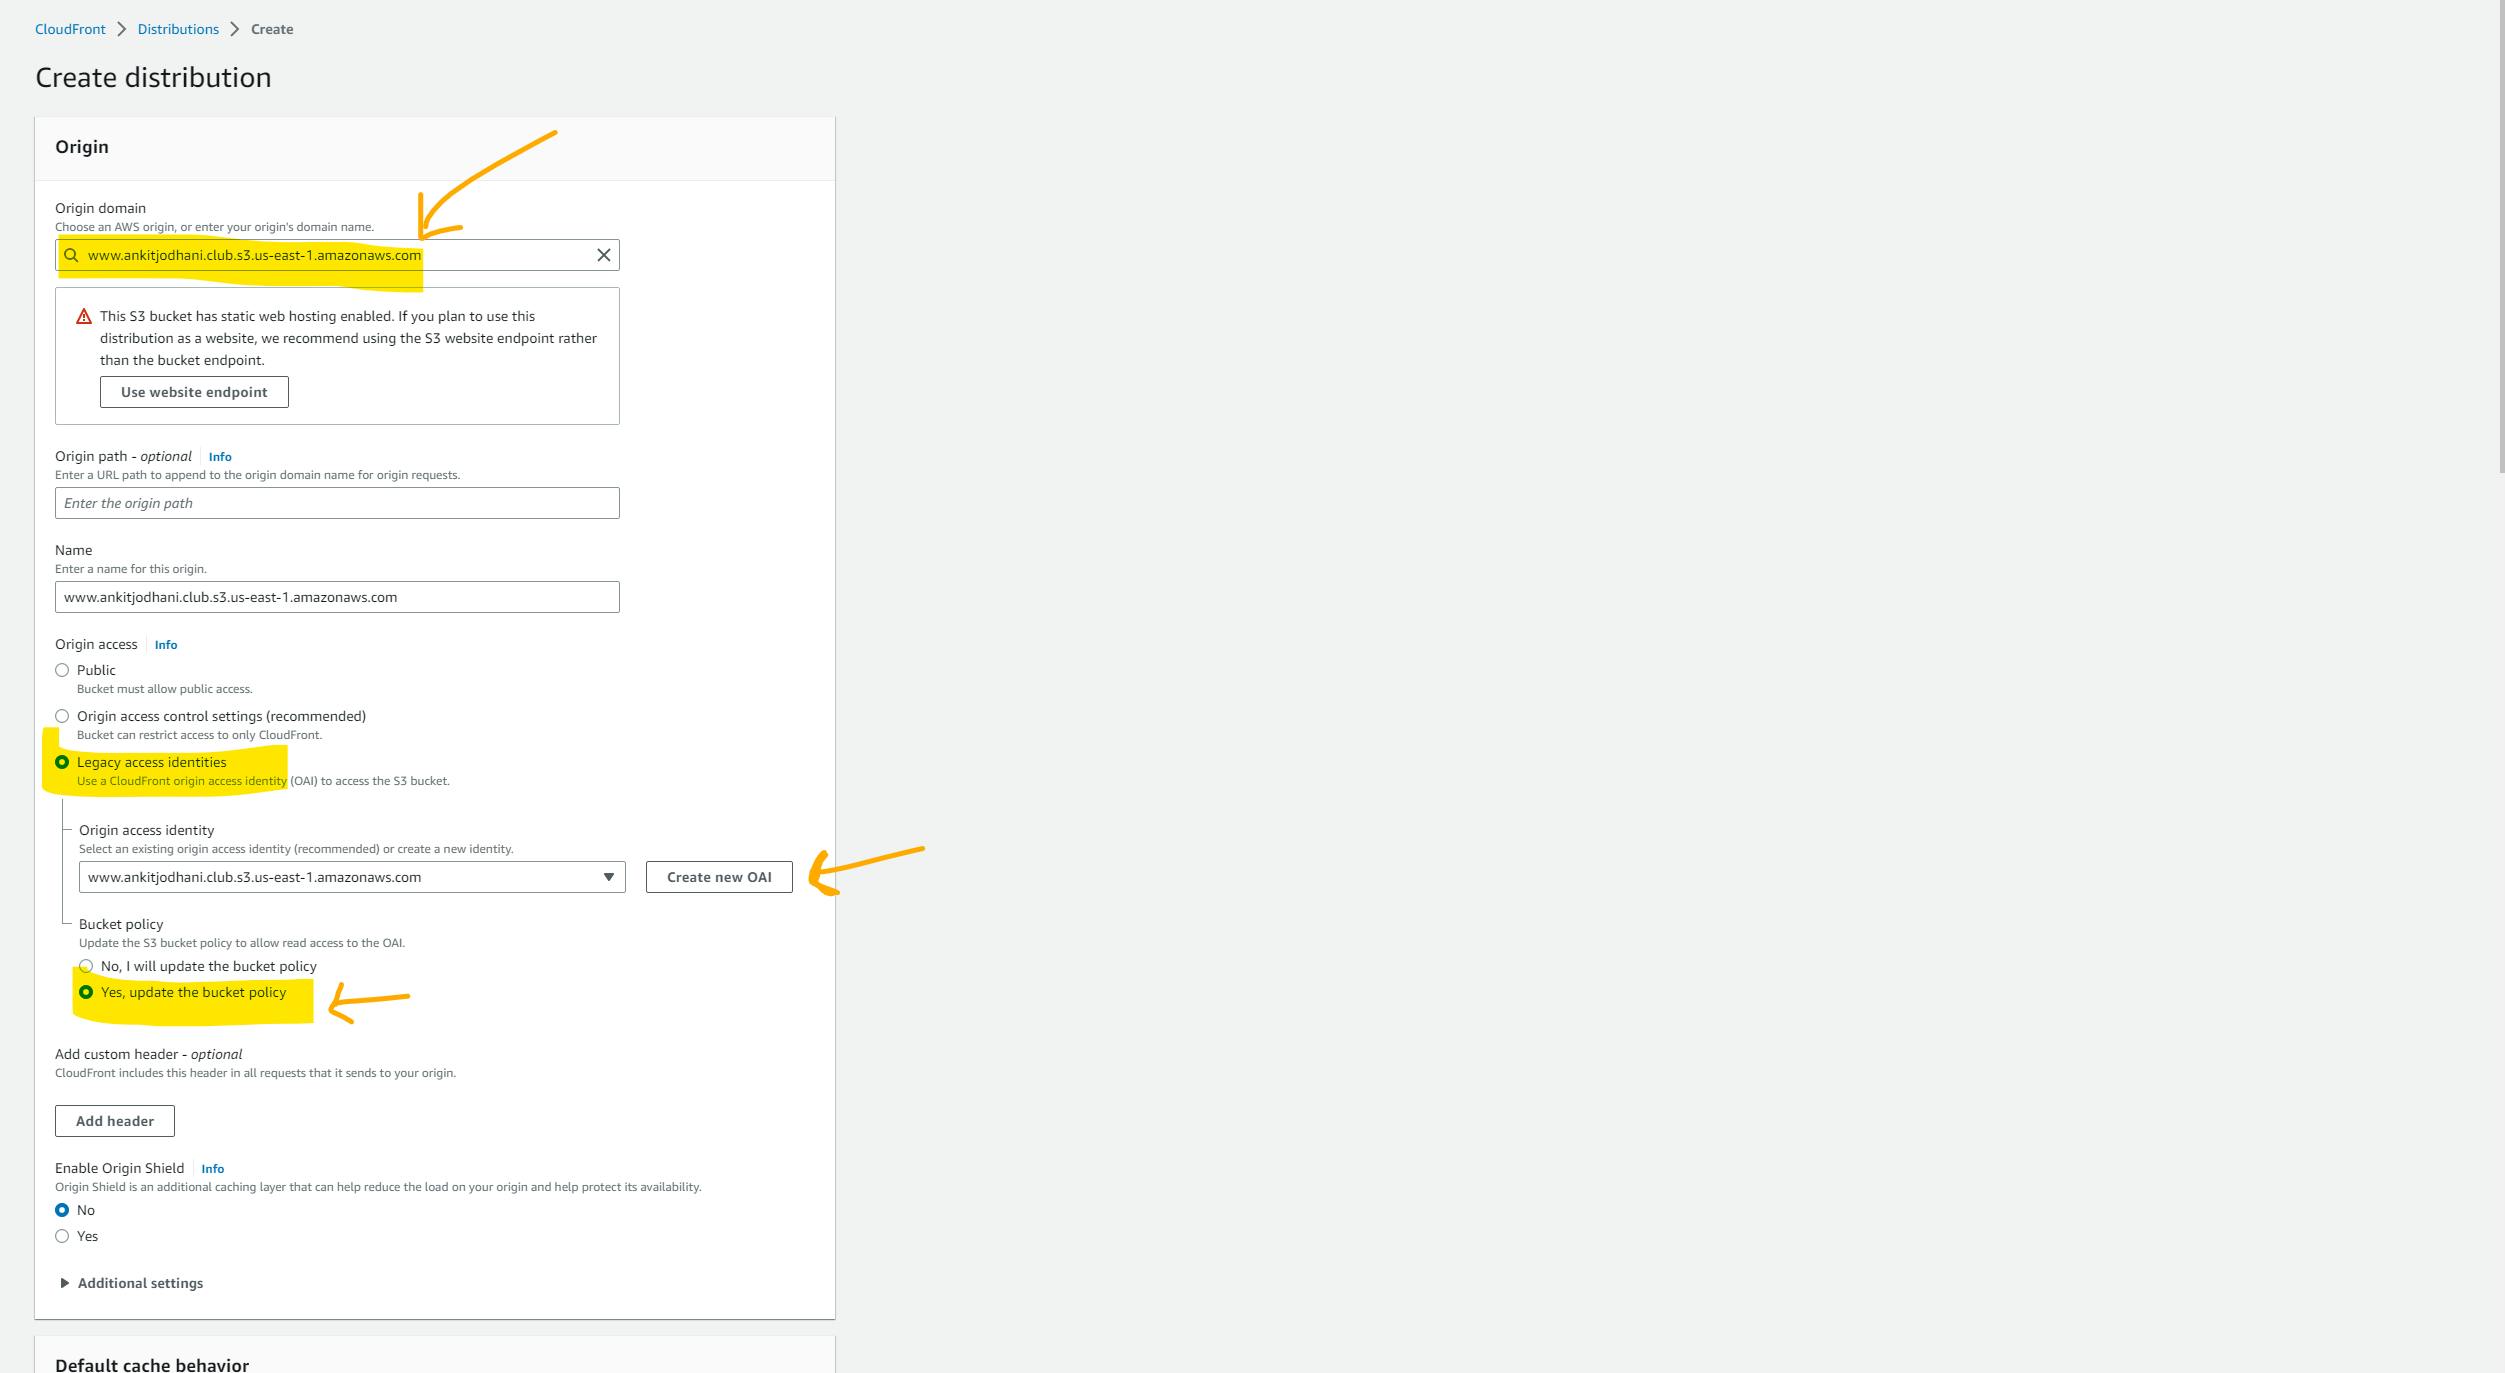
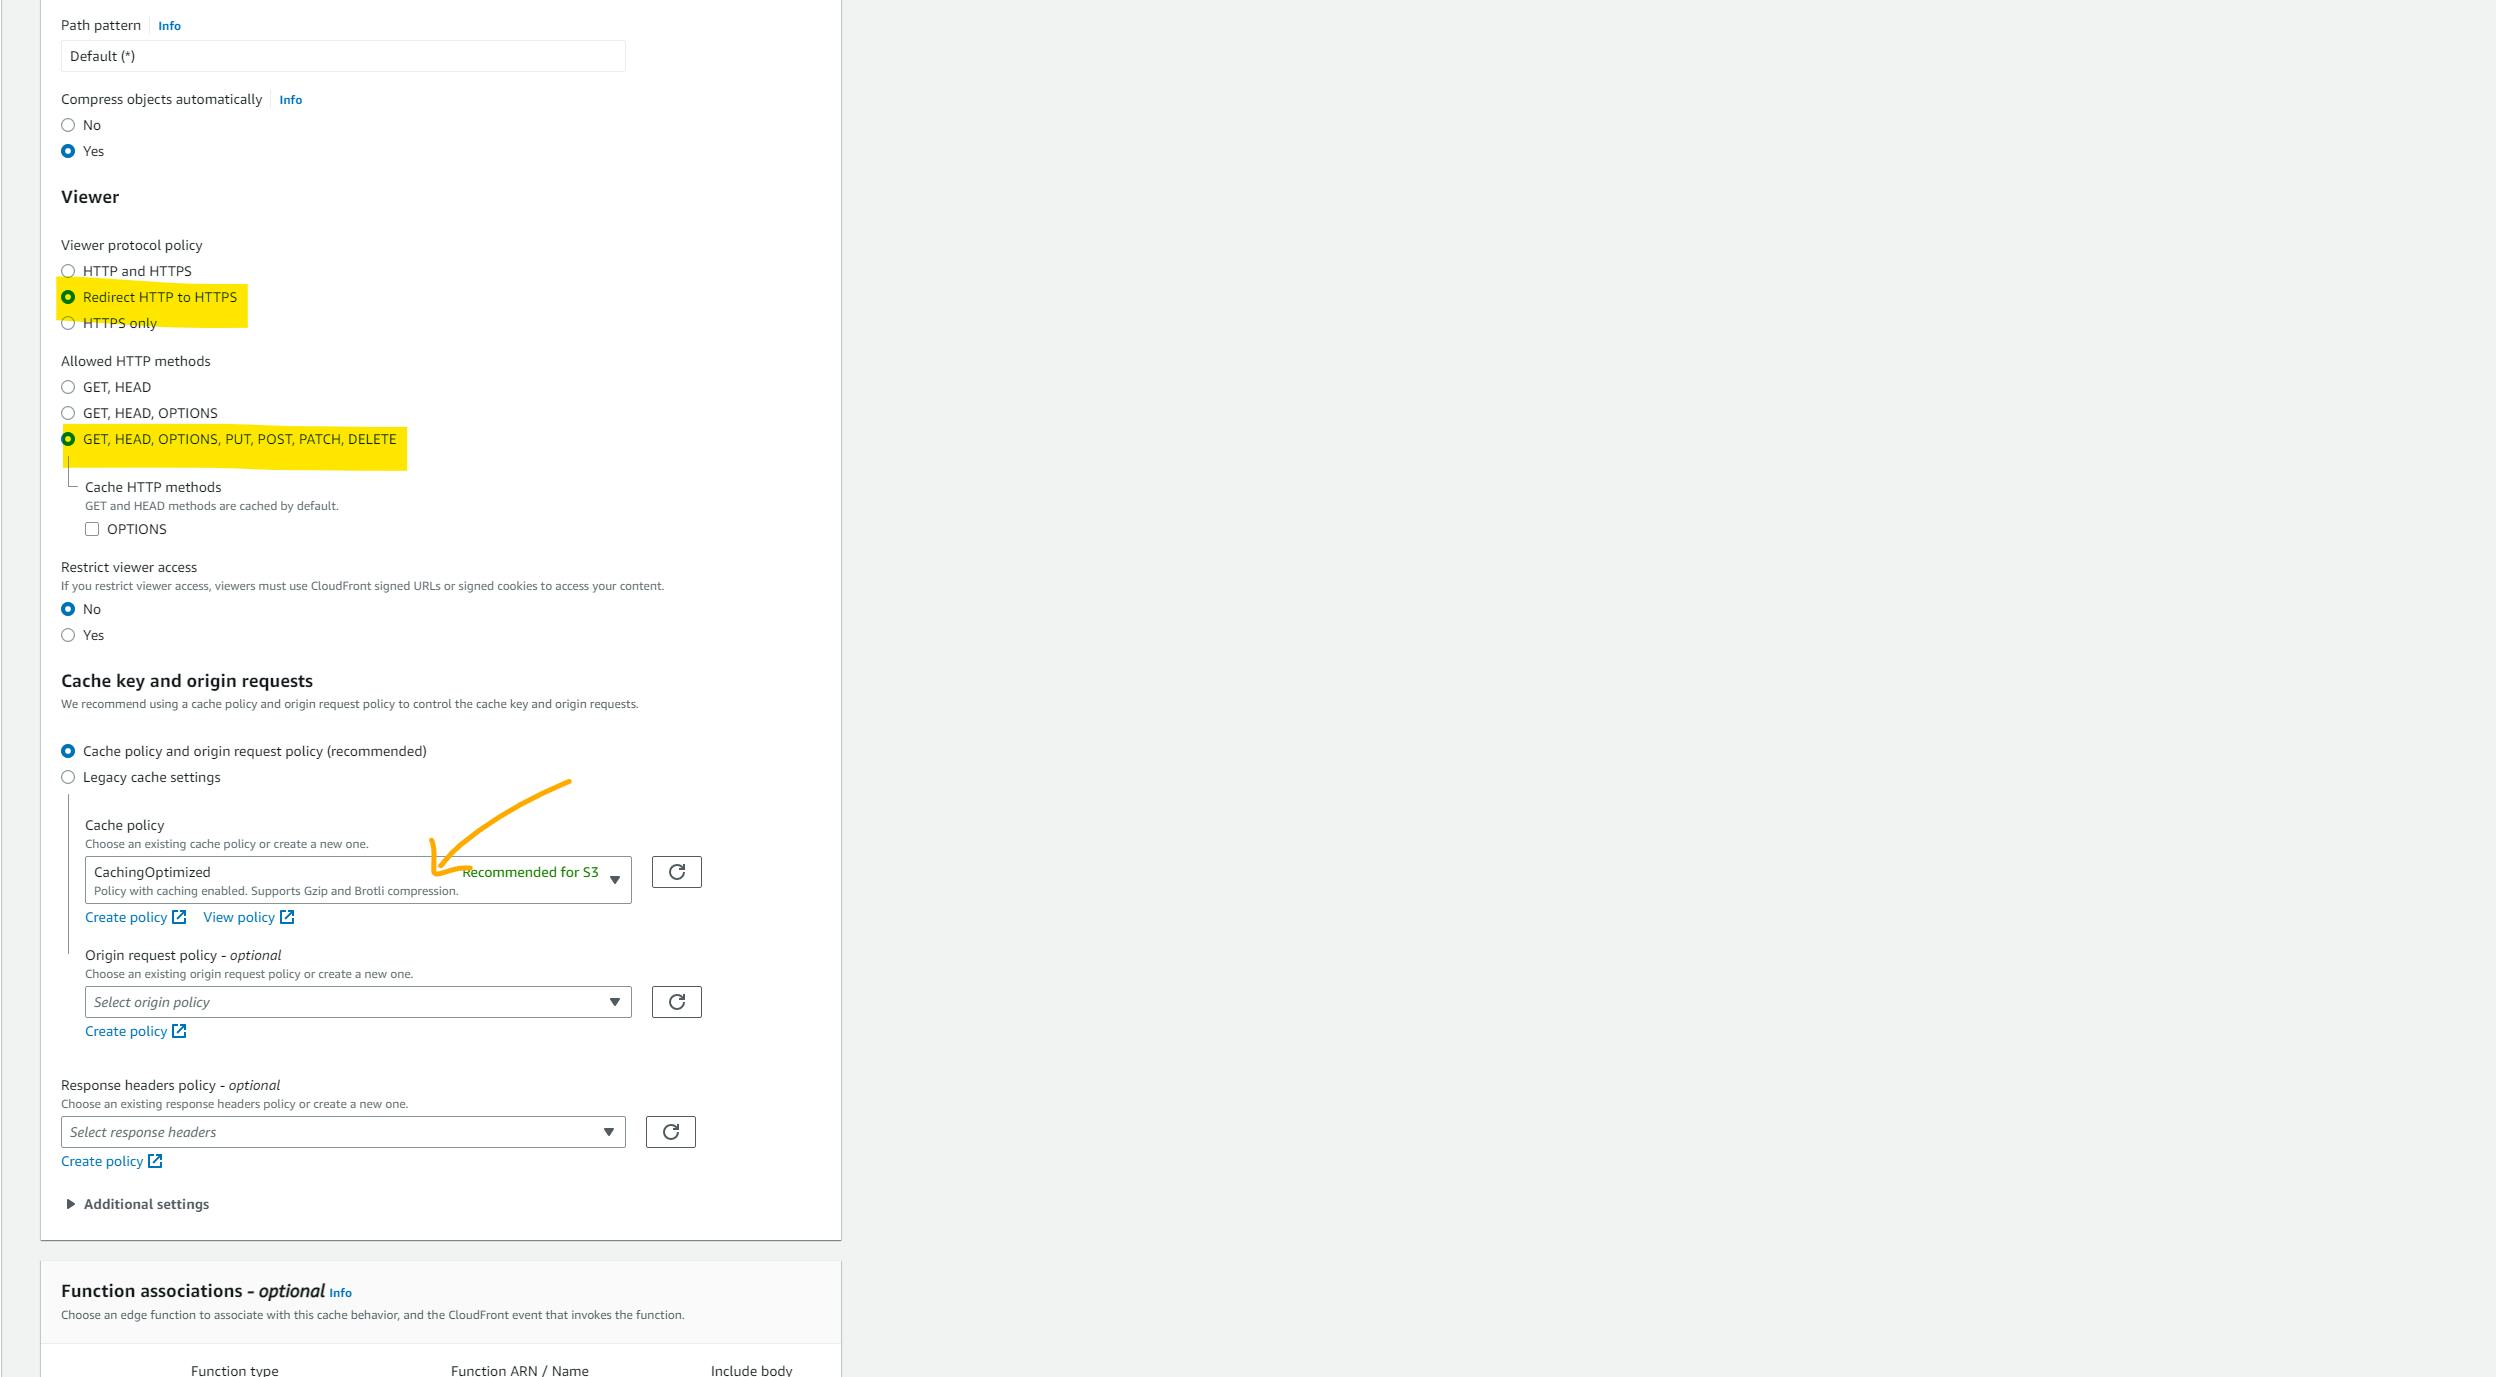
Scroll down and follow the below images for further steps .
make sure you select your certificate that we have created just now form the drop-down many.
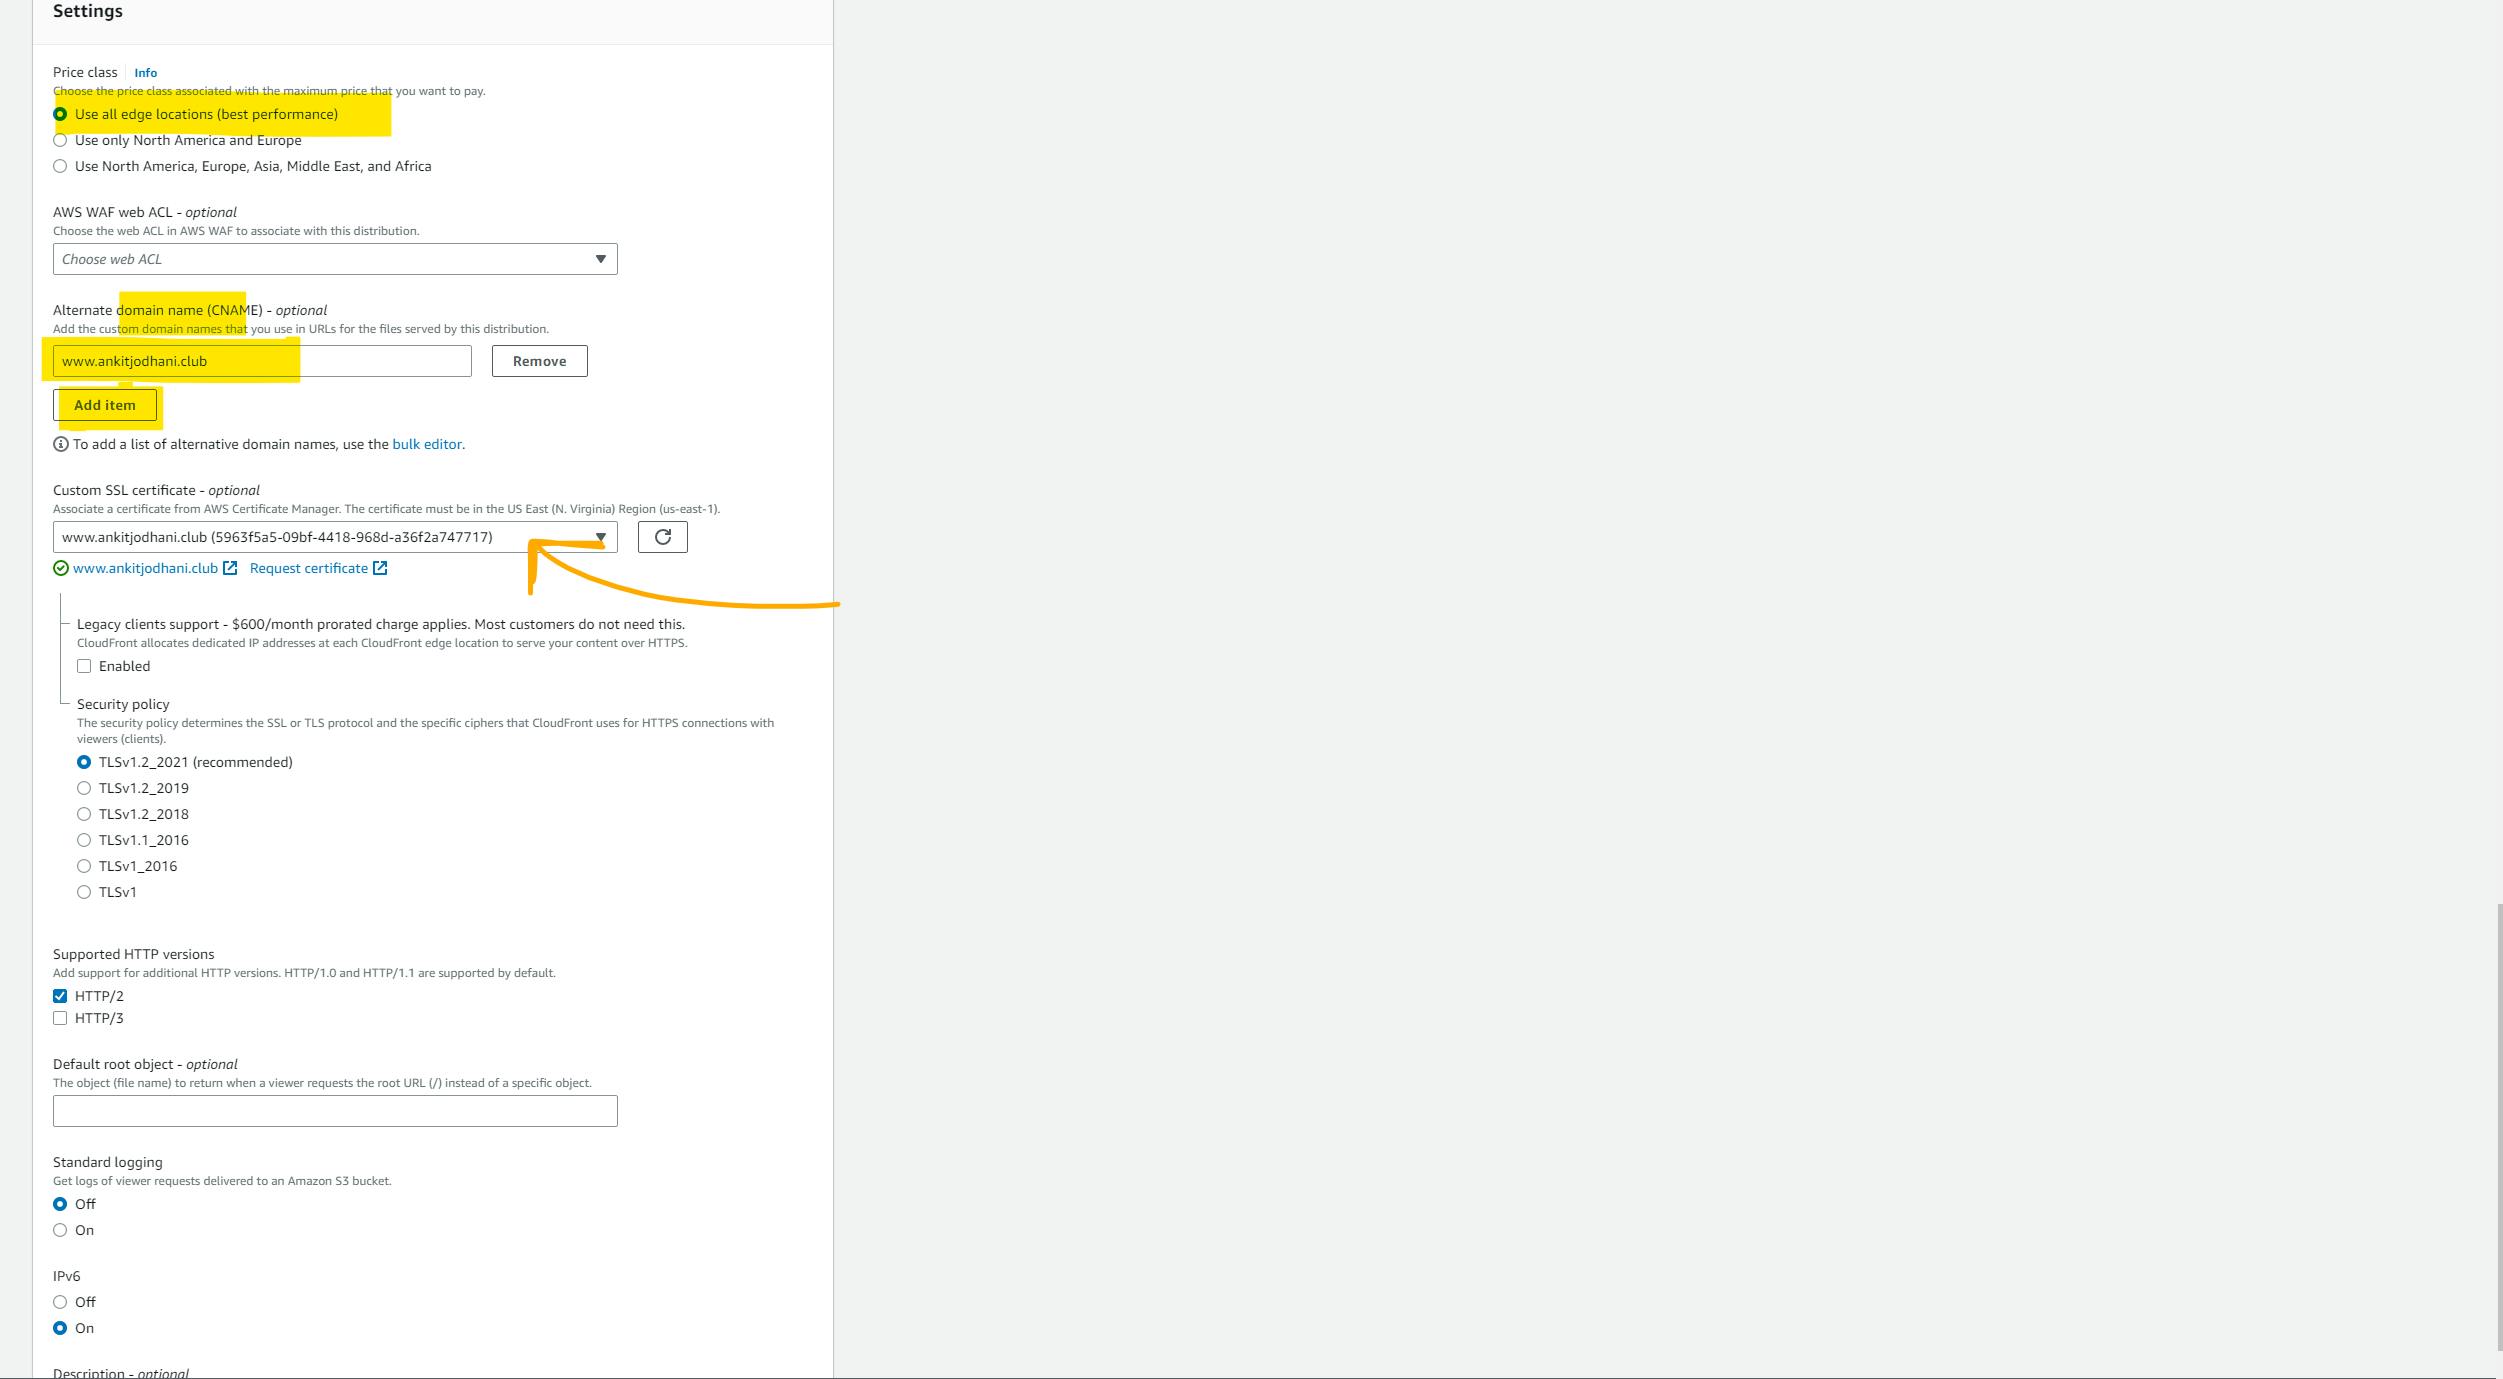
Go to the end of the page and select Create distribution button.
It will take a long time to deploy or cache our website to all the edge locations. so have patience and wait for at least 10 minutes.
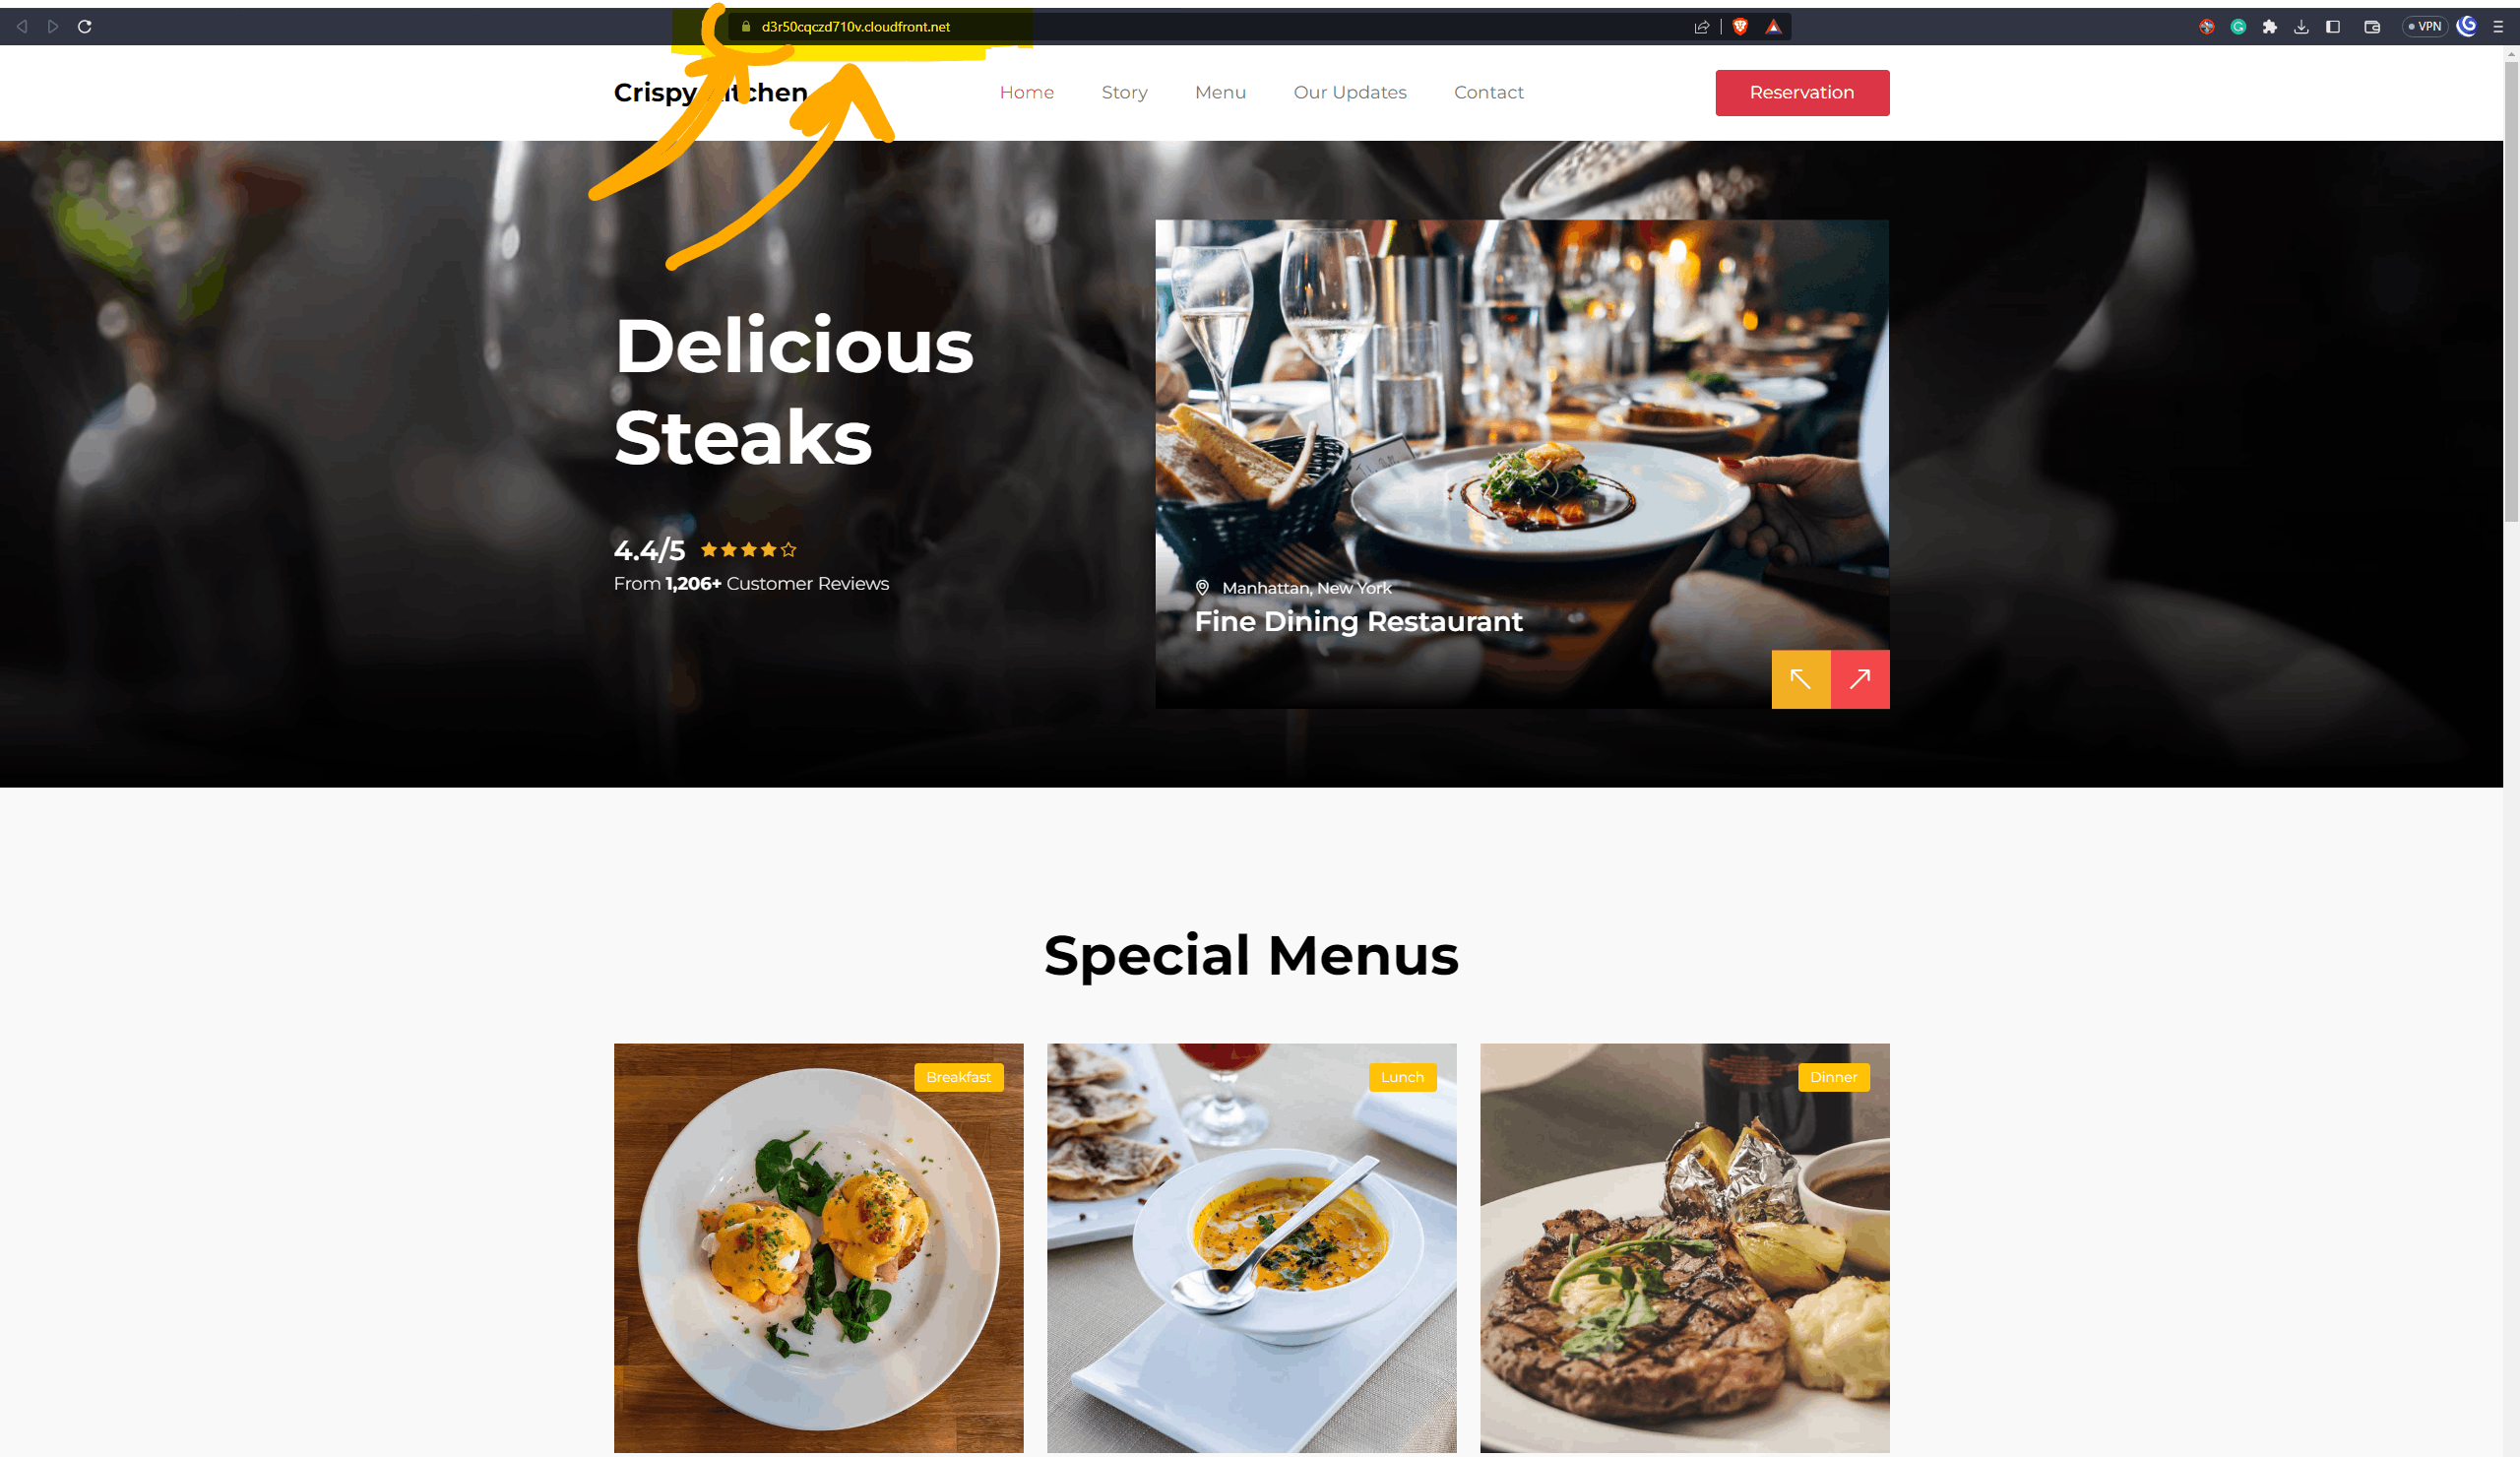
take the Domain name that you paste into the browser. (you can see the domain name from your distribution)

Now add a CNAME record in the domain that you got by creating distribution to your registrars like Godaddy, Porkbun whatever.
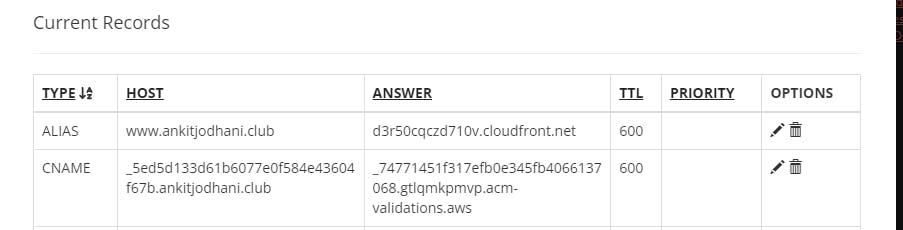
Now you can visit your website. it will have SSL + Domain
And Here it ends 🥱..
Thank you so much for reading this long blog.
I hope that it will help you.
Github link: https://github.com/AnkitJodhani/-1stWeeksofCloudOps