Deep Dive into CloudFront: Understanding Internal Caching Mechanisms and Implementing Websites on S3 with Region Failover
🙋♂️ Introduction
Hi folks, this is Ankit Jodhani. I recently graduated from university and am currently exploring and learning DevOps and cloud technologies, specifically AWS. I have written many blogs and completed projects on Could and Devops you can see that on my Hashnode profile Ankit Jodhani. I would like to thank Piyush Sachdeva for providing valuable guidance. In order to gain a comprehensive understanding of CloudFront and its policies, I watched several YouTube videos by Namrata H Shah. I am immensely thankful to Namrata H Shah for sharing valuable resources and contributing to the community.
📚 Synopsis
In this blog, I'm going to show you how CloudFront works internally and how it handles caching and failover. Additionally, I'll demonstrate the practical implementation by deploying a static website on S3 with region failover.

🗞️ Prerequisites
🔖 AWS Account
🔖 time to invest in learning
📦 List of AWS services
🌍 Amazon CloudFront
🪣 Amazon S3
💡 Plan of Execution
🤷♂️ What is CloudFront
🙄 How it works?
🔬 Hands-on
🔬 Hands-on
🧪 Testing
🤷♂️ What is CloudFront
CloudFront is one of the services from AWS Cloud. CloudFront is a CDN service (Content delivery network). it is used to boost your website performance. CloudFront caches content such as HTML, CSS, JS, Images, and dynamic content to a worldwide data center called Edge Location or Regional edge location. mostly these edge locations are located in all the big cities of the world so that user requests can be fulfilled quickly and face low latency while accessing the website or its content. when I'm writing this blog aws has 450+ edge locations or it is known as PoP(Points of Presence) and 13 Regional Edge Caches across the world. Please verify with aws doc for the latest information.
🙄 How it works?
As we know, CloudFront caches the contents in all the edge locations around the world. You may wonder, what exactly is caching? Well, it's quite simple to understand. Caching refers to storing frequently accessed data in high-speed hardware, allowing for faster retrieval compared to a regular disk. This hardware is known as a cache. The concept of caching is also familiar in the field of Operating Systems (OS), where it improves process management and overall system performance. Similarly, in Computer Organization and Architecture (COA), caching helps the CPU access data quickly and reduces I/O (input-output) time. However, caches have limited memory capacity, and it is not possible to store everything in them due to their relatively expensive hardware. We use caching strategically to maximize performance. Now, before we delve into CloudFront, I want to clarify two key terms: Cache hit and cache miss. these terms directly impact system performance.
🔷 Cache Hit ➡️ A cache hit refers to a situation where the requested data is already present in the cache. It improves performance by avoiding the need to fetch the data from the original source or storage, such as a disk or server. Cache hits are desirable because they accelerate the retrieval process and contribute to overall system efficiency.
🔶 Cache Miss ➡️ A cache miss occurs when the requested data is not found in the cache. In other words, the cache does not contain a copy of the data that is being requested. When a cache miss happens, the system needs to fetch the data from the original source, which can involve a longer retrieval time and higher latency compared to a cache hit. The data is then stored in the cache for future access, improving subsequent performance if the same data is requested again. Cache misses are inevitable and can happen due to various reasons, such as accessing new data or when the data in the cache has expired or been evicted.
let's see how CloudFront utilizes caching to reduce the latency and increase the performance
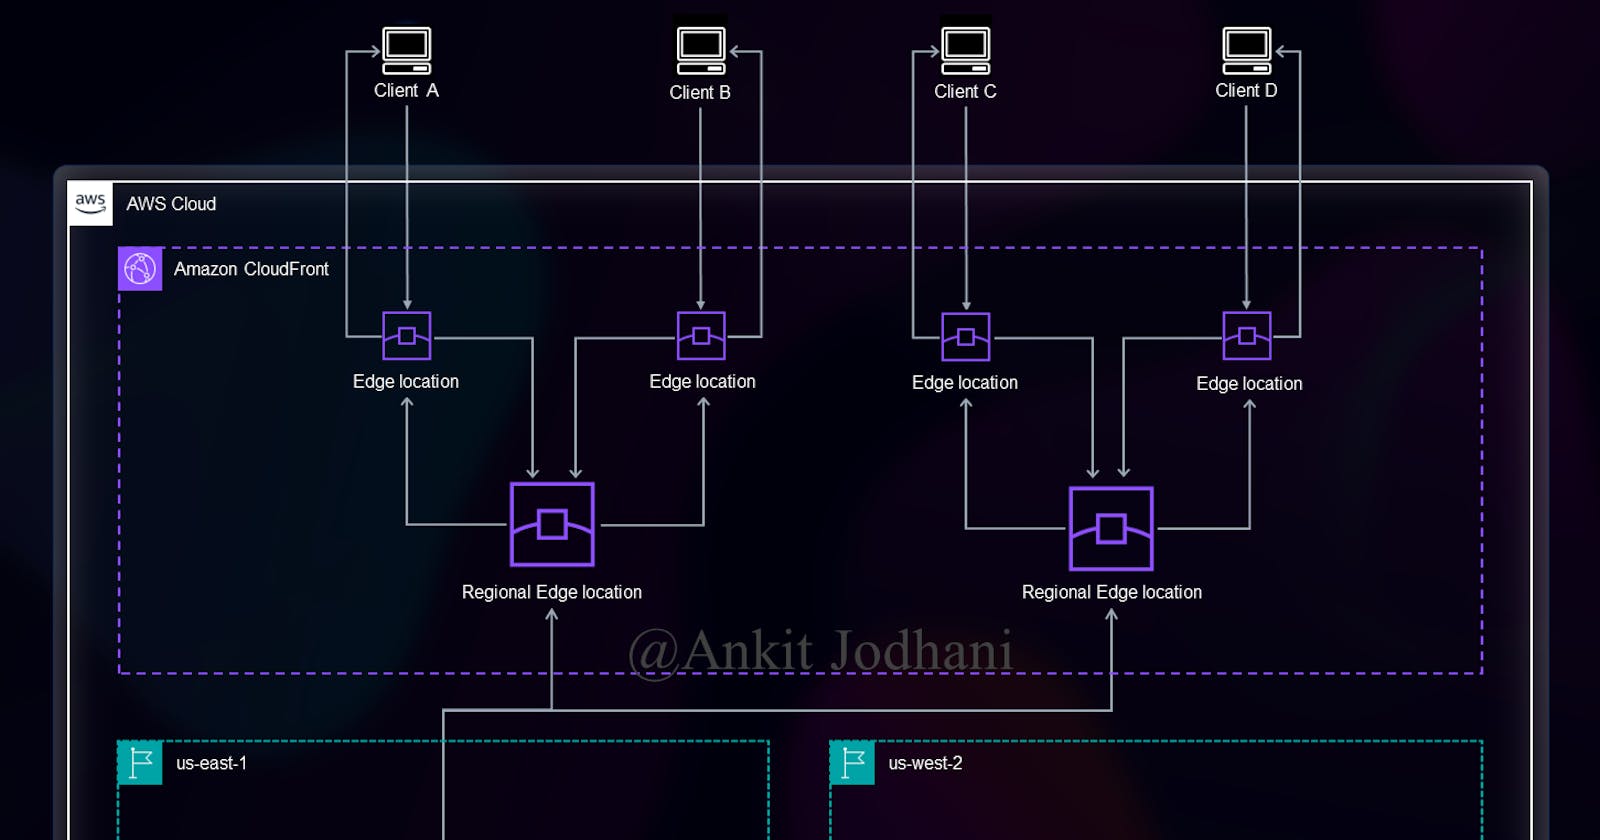
When a user requests a website, the DNS service resolves to the DNS of the CloudFront distribution, which then redirects the user to the nearest edge location. The user receives the response from that particular edge location. However, there are instances when the requested data is not present in the edge location, resulting in a cache miss. In such cases, the request is sent from the regional edge location, and the user receives the data from there if it is available, indicating a cache hit. However, this process can take some time.
In situations where the data is not present in the regional edge location either, retrieving the data becomes a lengthier process. In such cases, the data needs to be fetched from the origin server, which, in our case, is the S3 bucket. This additional step of fetching the data from the origin server can introduce latency and increase the overall response time for the user.
simply we can see it seems like Two level cache. but implementation can be different.
Follow the below architecture to get more details.
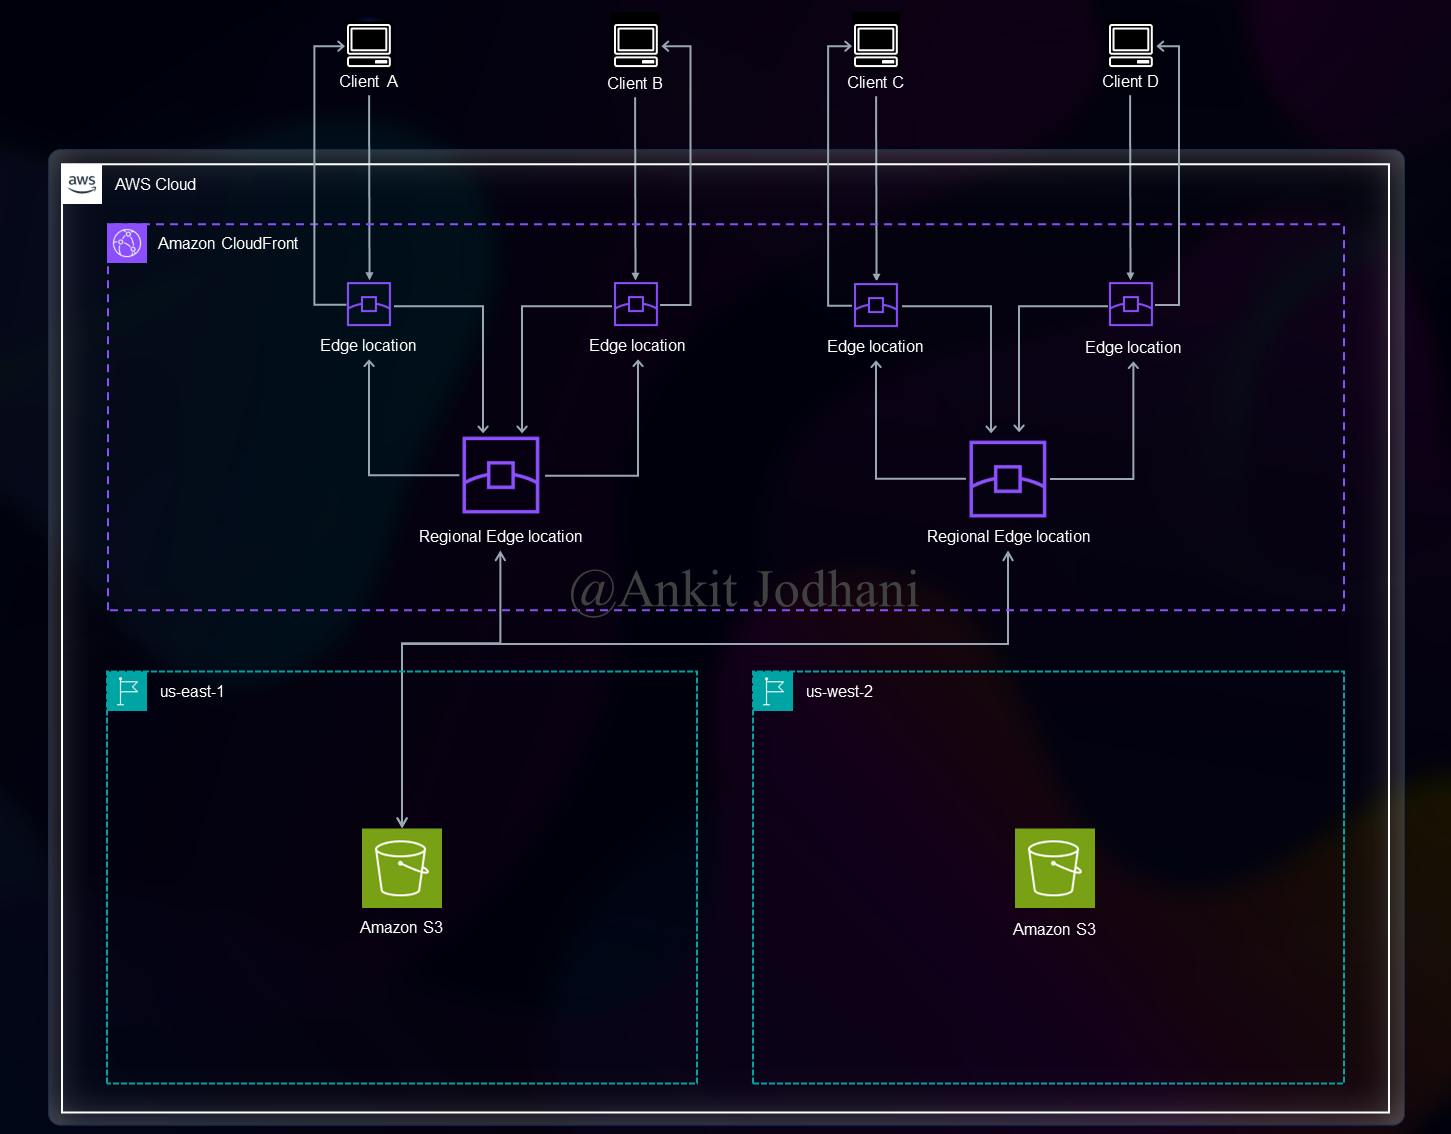
if you want to see the animated flow.
4K animated video: https://www.youtube.com/watch?v=ASH27LzXmrU
if you like my work please follow me on LinkedIn and Twitter for more such content.
🔬 Hands-on
Let's get our hands dirty with the implementation. we are going to utilize two regions. N.virginia (us-east-1) is the Primary and Oregon (us-west-2) is the Secondary region.
Log in to your AWS account and navigate to the AWS console. Type 'S3' in the search bar and open the S3 dashboard.

click on the create bucket button in the top left corner.

Give a name to your bucket. Try to provide a relevant name such as 'website-primary-nvir' and select a region from the drop-down list. Scroll down and keep the rest of the settings as they are. Finally, click on the 'Create Bucket' button below.
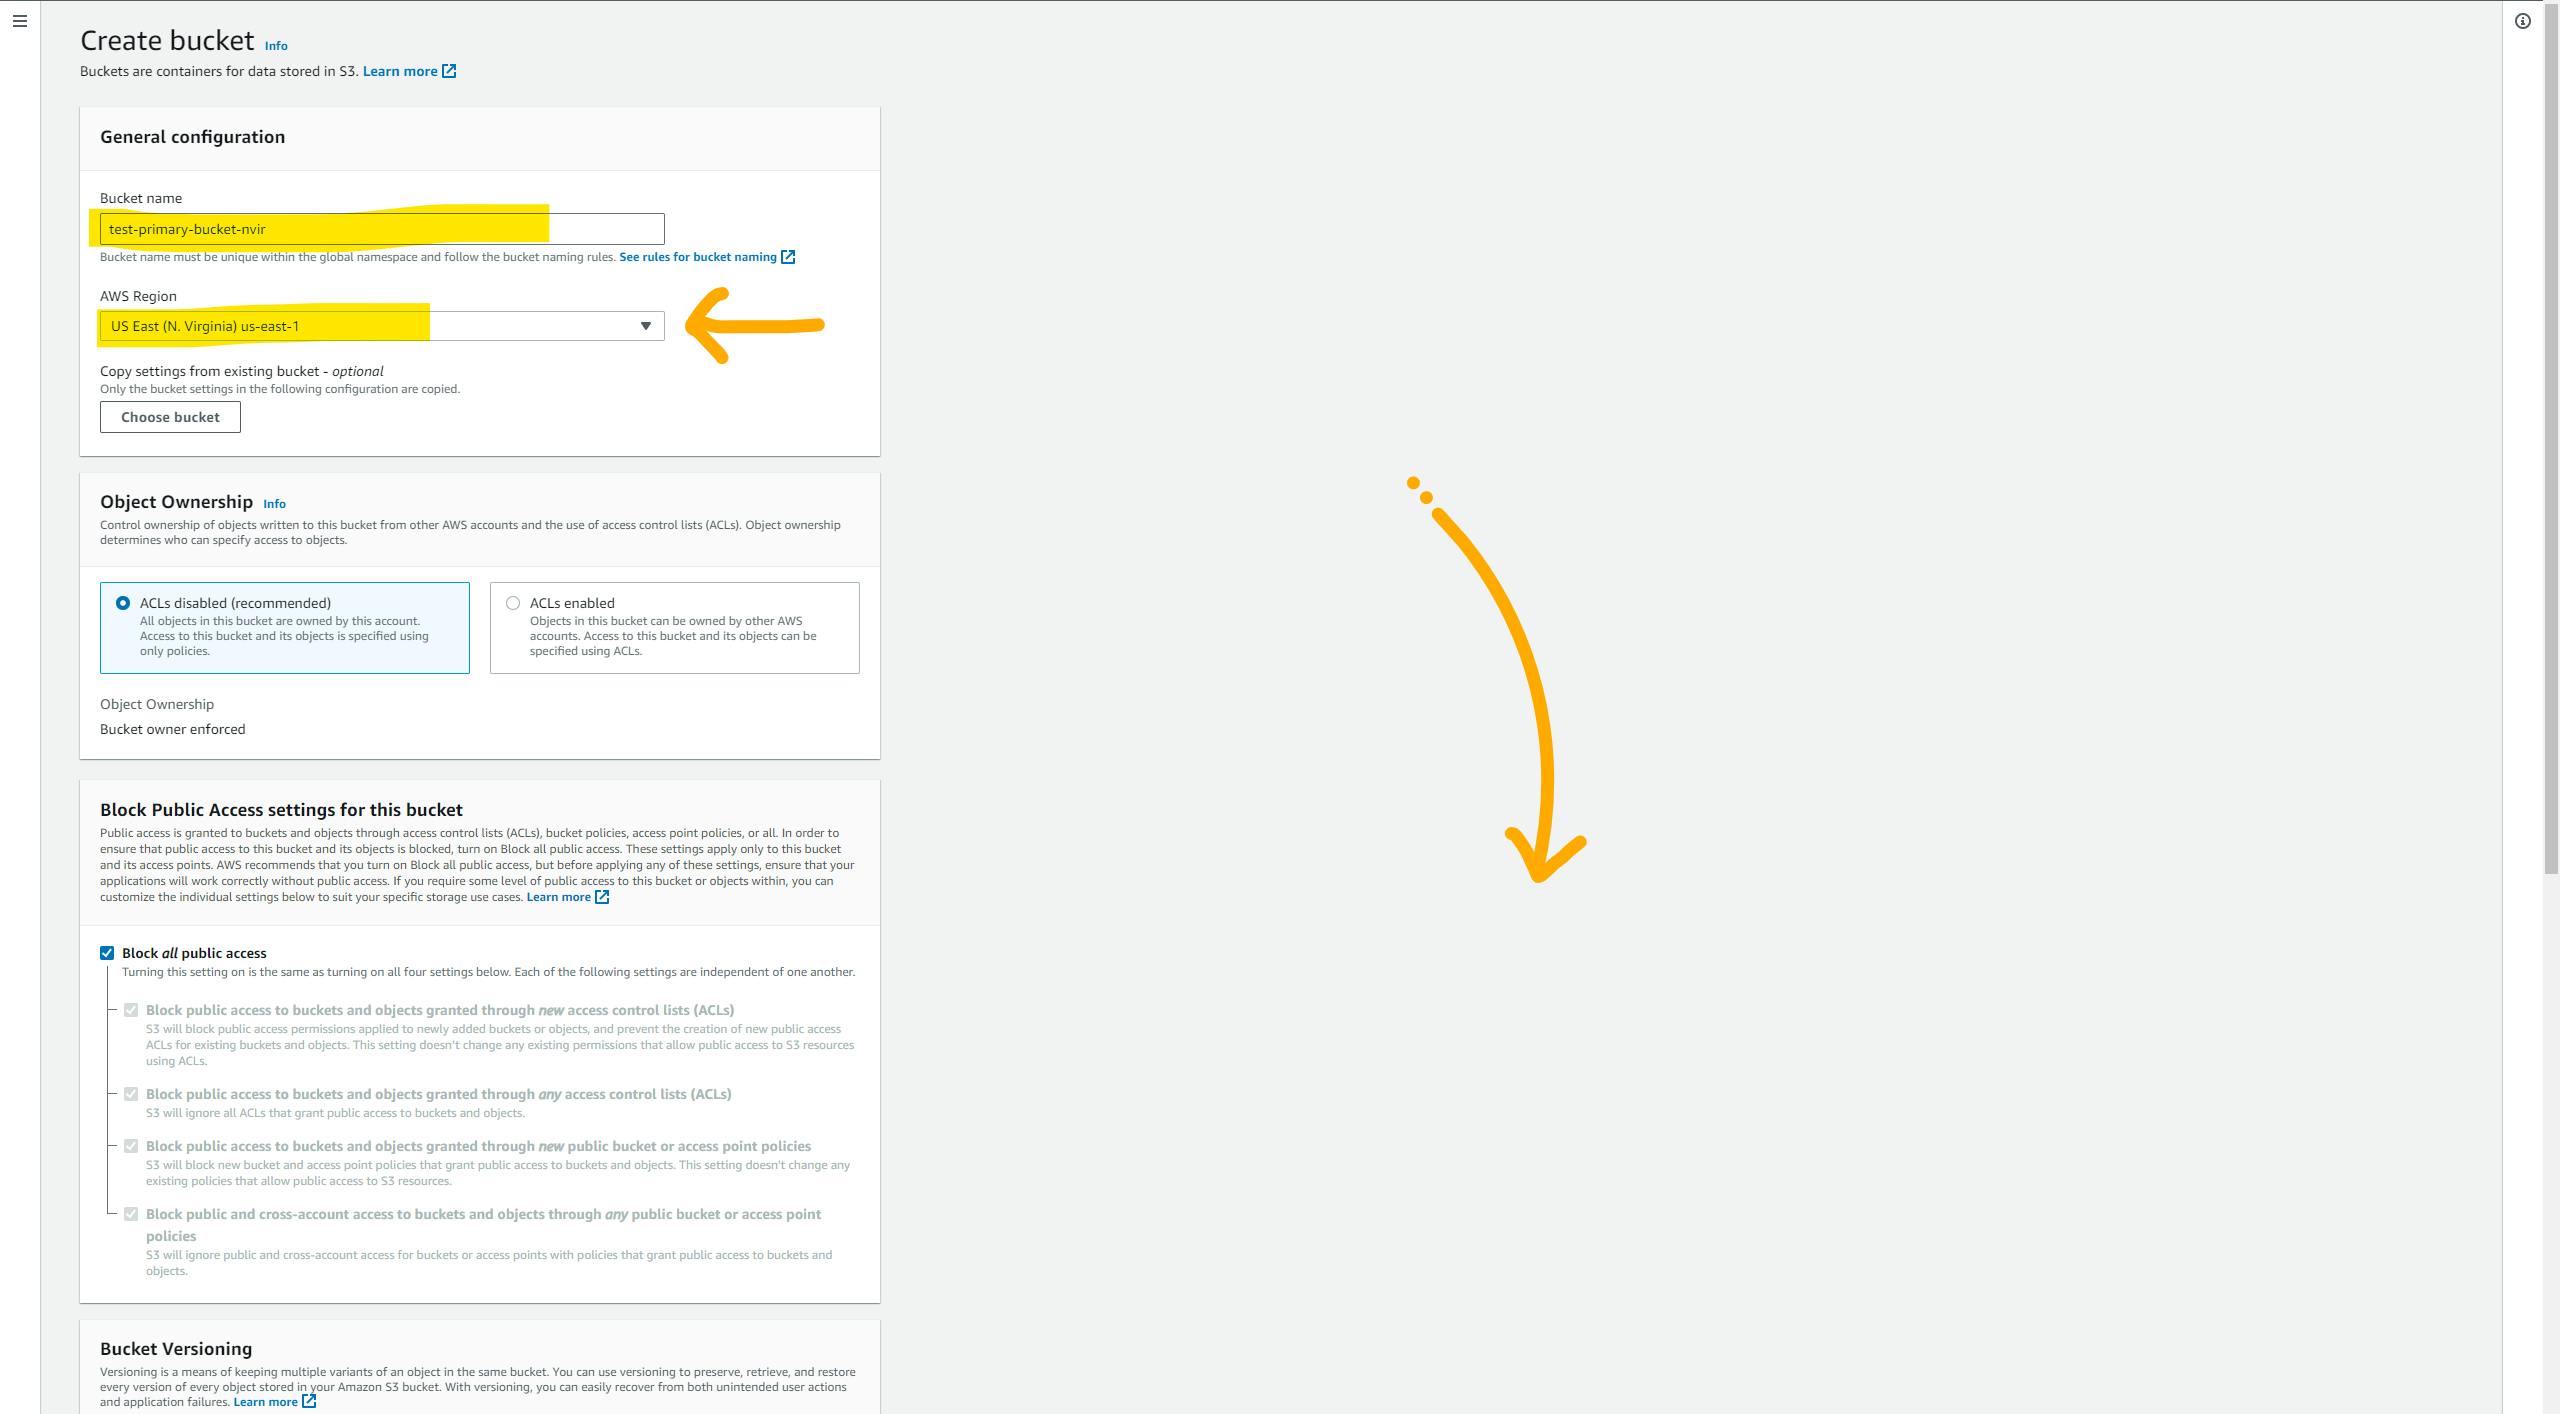
Go inside the bucket and upload your static files(index.html, style.css, main.js etc.). and navigate to the 'properties' tab

Scroll down til the bottom of the page and here we can see one configuration with the name static website hosting. we need to enable that. So click on the edit button.

In the static website hosting settings, select 'Enable'. Then, choose 'Host a static website' as the hosting type. Provide the name of your default page in the index document text box (e.g., index.html). If you have an error page, you can specify its name in the error document text box (e.g., 404.html). Finally, click on the 'Save' button below to save the settings.

Now, you will see the endpoint to access the website. but you won't be able to see the website if you paste that in browse because to do that you need to give proper permission. but we are not going to touch any permission this will be done by CloudFront.

and that's it, we did the setup for one region now it's time to set up the same thing in the secondary region. all steps are exactly the same just you need to give another name to the bucket. because each bucket name must be unique across all AWS accounts in all the AWS Regions. so please complete the setup for the secondary region.
after setup, I've two buckets.

Now, let's utilize the ⚡ Power of CloudFront.
head to the CloudFront dashboard. click on the distribution and click on the Create distribution button in the top left corner.

To configure the CloudFront distribution, select your bucket (Primary) name from the drop-down list. In the Origin Access section, choose 'Legacy access identities' and click on the 'Create new OAI' button next to the drop-down menu. This will create a policy that allows CloudFront to access the S3 bucket and its content. Ensure that you select the 'Yes' radio button in the bucket policy configuration. By doing so, the newly created policy will be automatically inserted into the S3 bucket, eliminating the need for manual configuration. Scroll down to proceed ⬇️

Caching policy is very important for the performance of the website, Actually, it's all the way different topic. but to keep things easy AWS gives some predefined policies that you can utilize instead of writing your own. the policy should be written based on the number of times Cache Hit and Cache Miss.
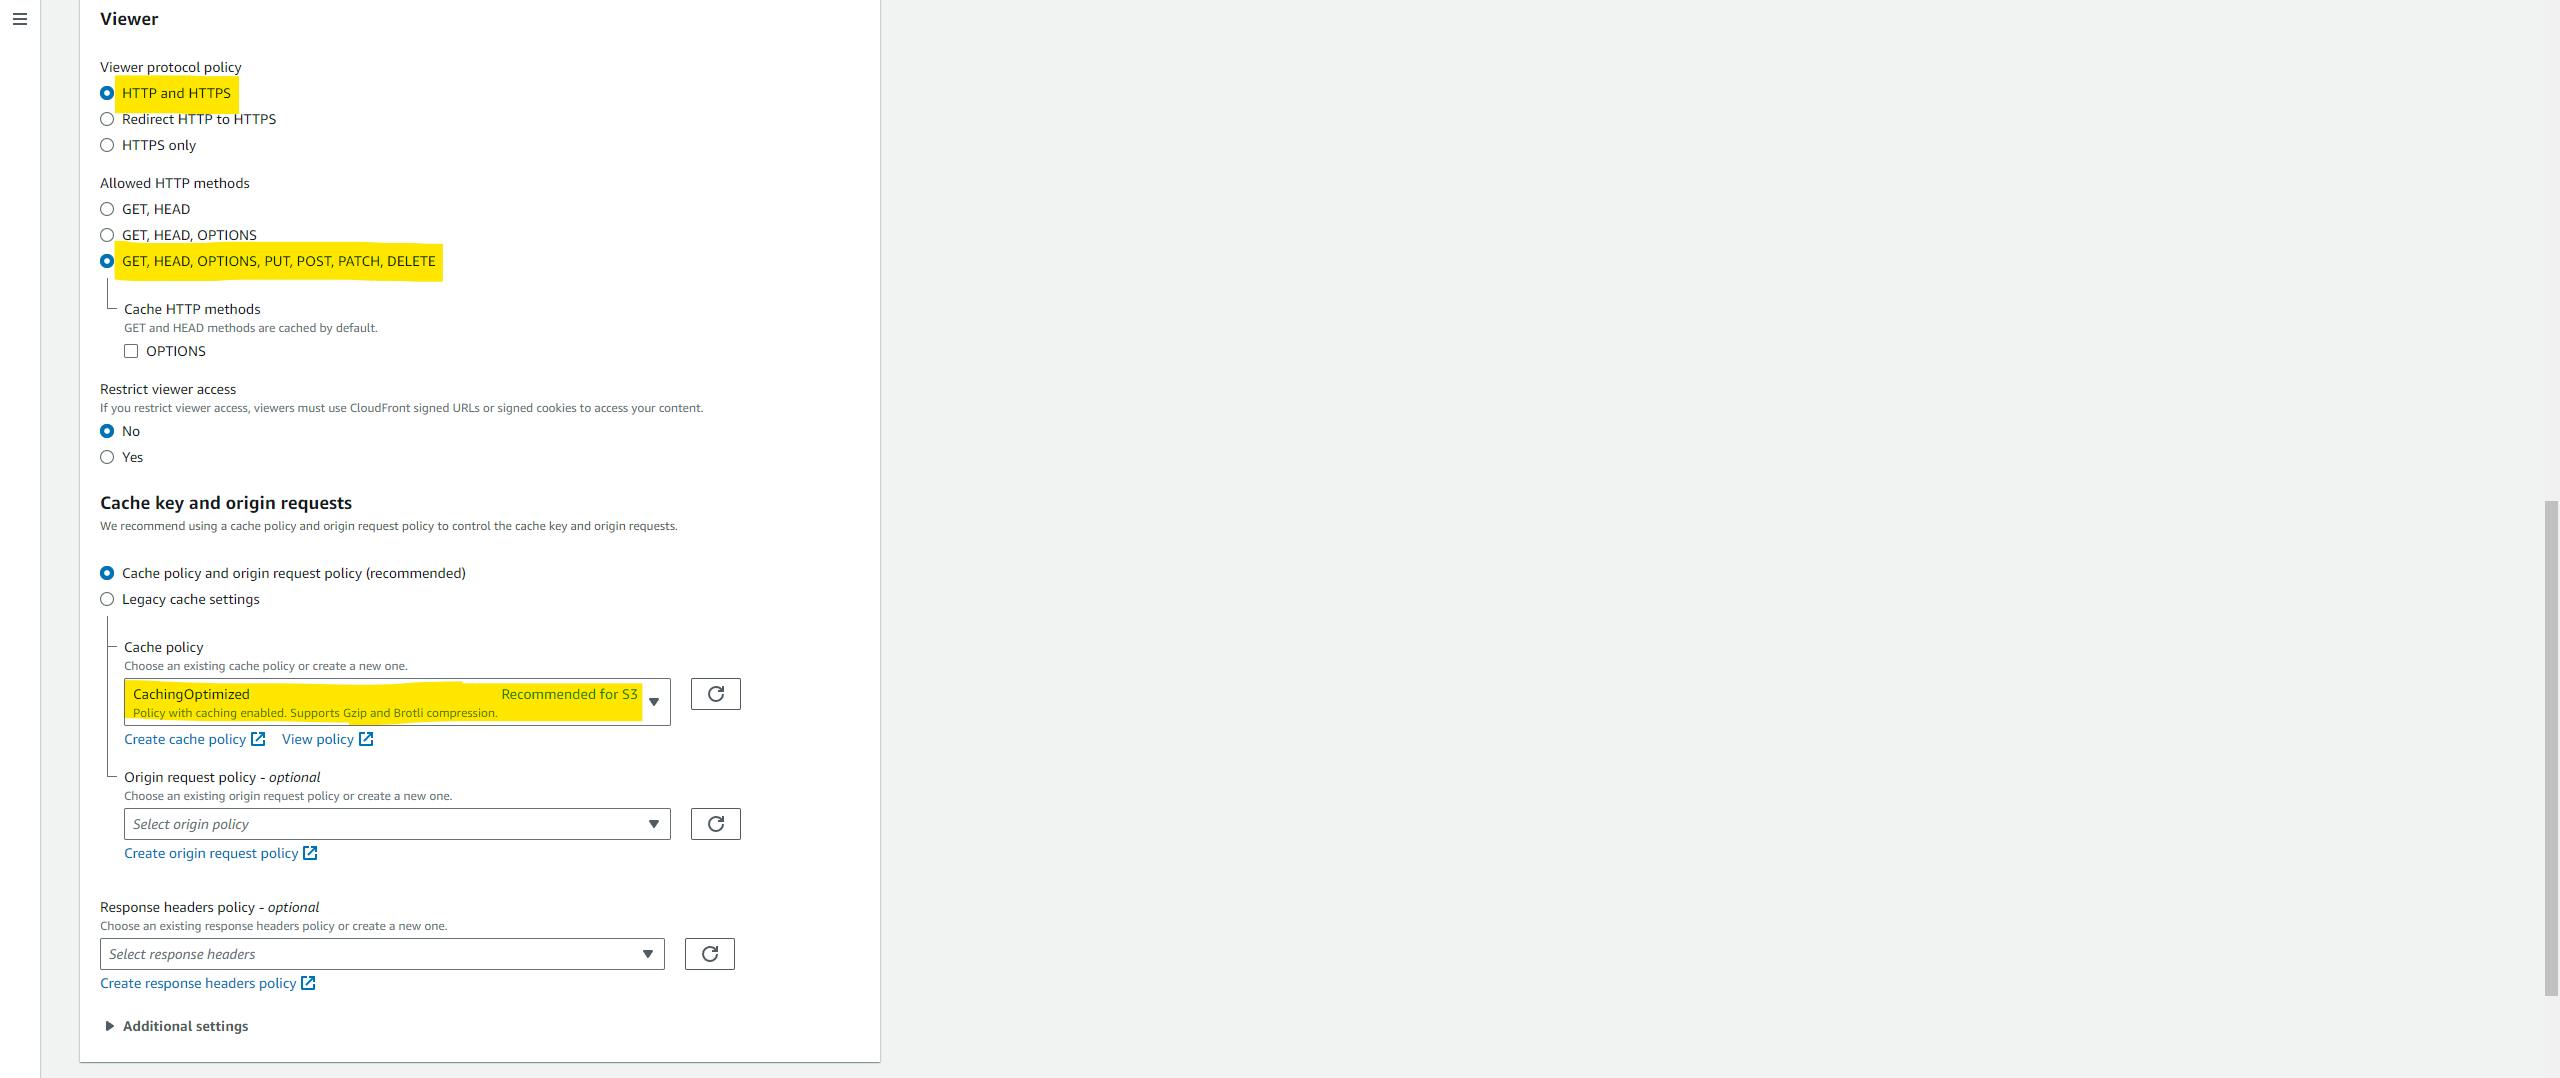
You can configure the rest of the settings depending on the resources you have like a custom SSL certificate or AWS WAF etc. but here I'm just showing you a demo so currently I'm ignoring those stuff. but in a real-time scenario, we can't ignore security😅.
write the name of the default object in the default root object. (e.g. index.html) and lastly, click on the Create Distribution button.

CloudFront takes a few minutes to cache our website all over the world. so please wait for a few minutes. you will get a DNS name from CloudFront to access your website.

let's test it. paste the endpoint in the browser.

currently, our CloudFront pointing to a bucket that is in N.virginia but we need to attach one origin or bucket that is in Oregon so that we can perform failover in case of disaster or region failure.
click on the 'Origin' tab and click on the 'Create Origin' button.

Here can configure CF for another origin, and select a secondary bucket from the drop-down list. and all the steps are similar to what we did before. so lastly click on the 'Create origin' button.
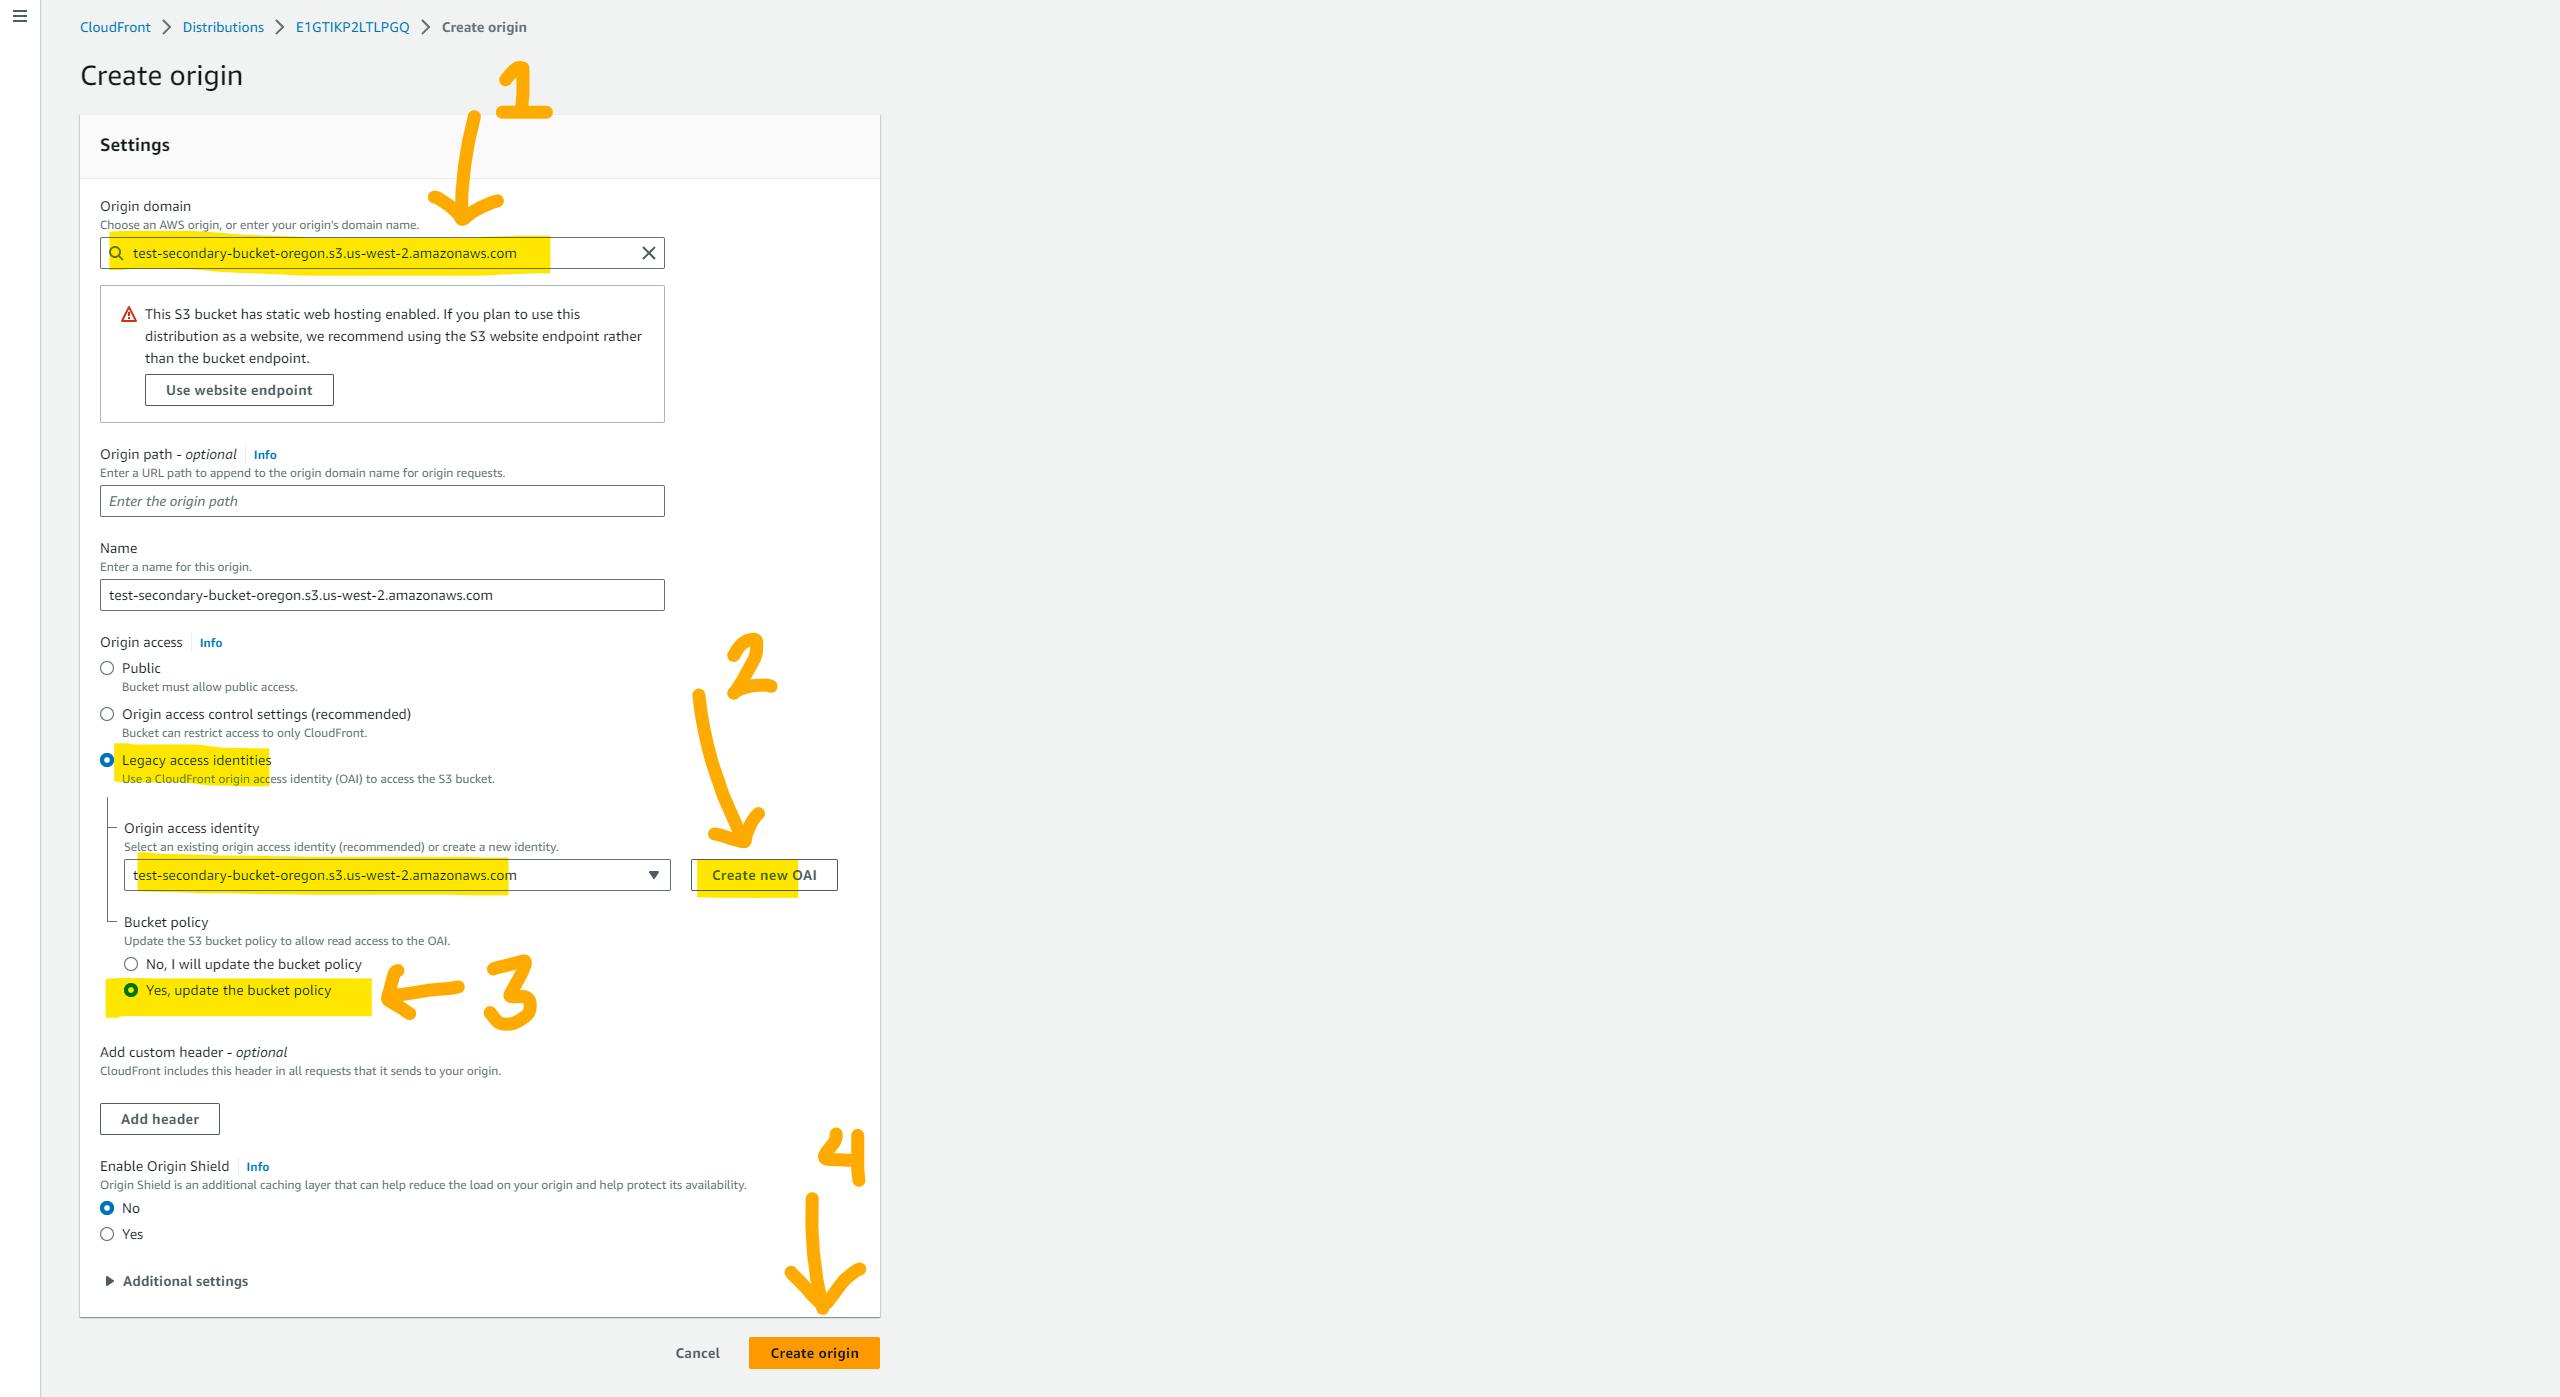
Now we have two origins, let's create an origin group. click on create origin group button.

Select the primary bucket from the drop-down list and click on the 'Add' button. Now, select the secondary bucket and click on the 'Add' button. Here, you can specify which bucket's content should be sent to the user. Please provide the name of the group. Select all the failover criteria for CloudFront. If CloudFront receives any of the specified status codes, it will initiate failover. but we have to manually do the invalidation. you can use lambda for invalidation.
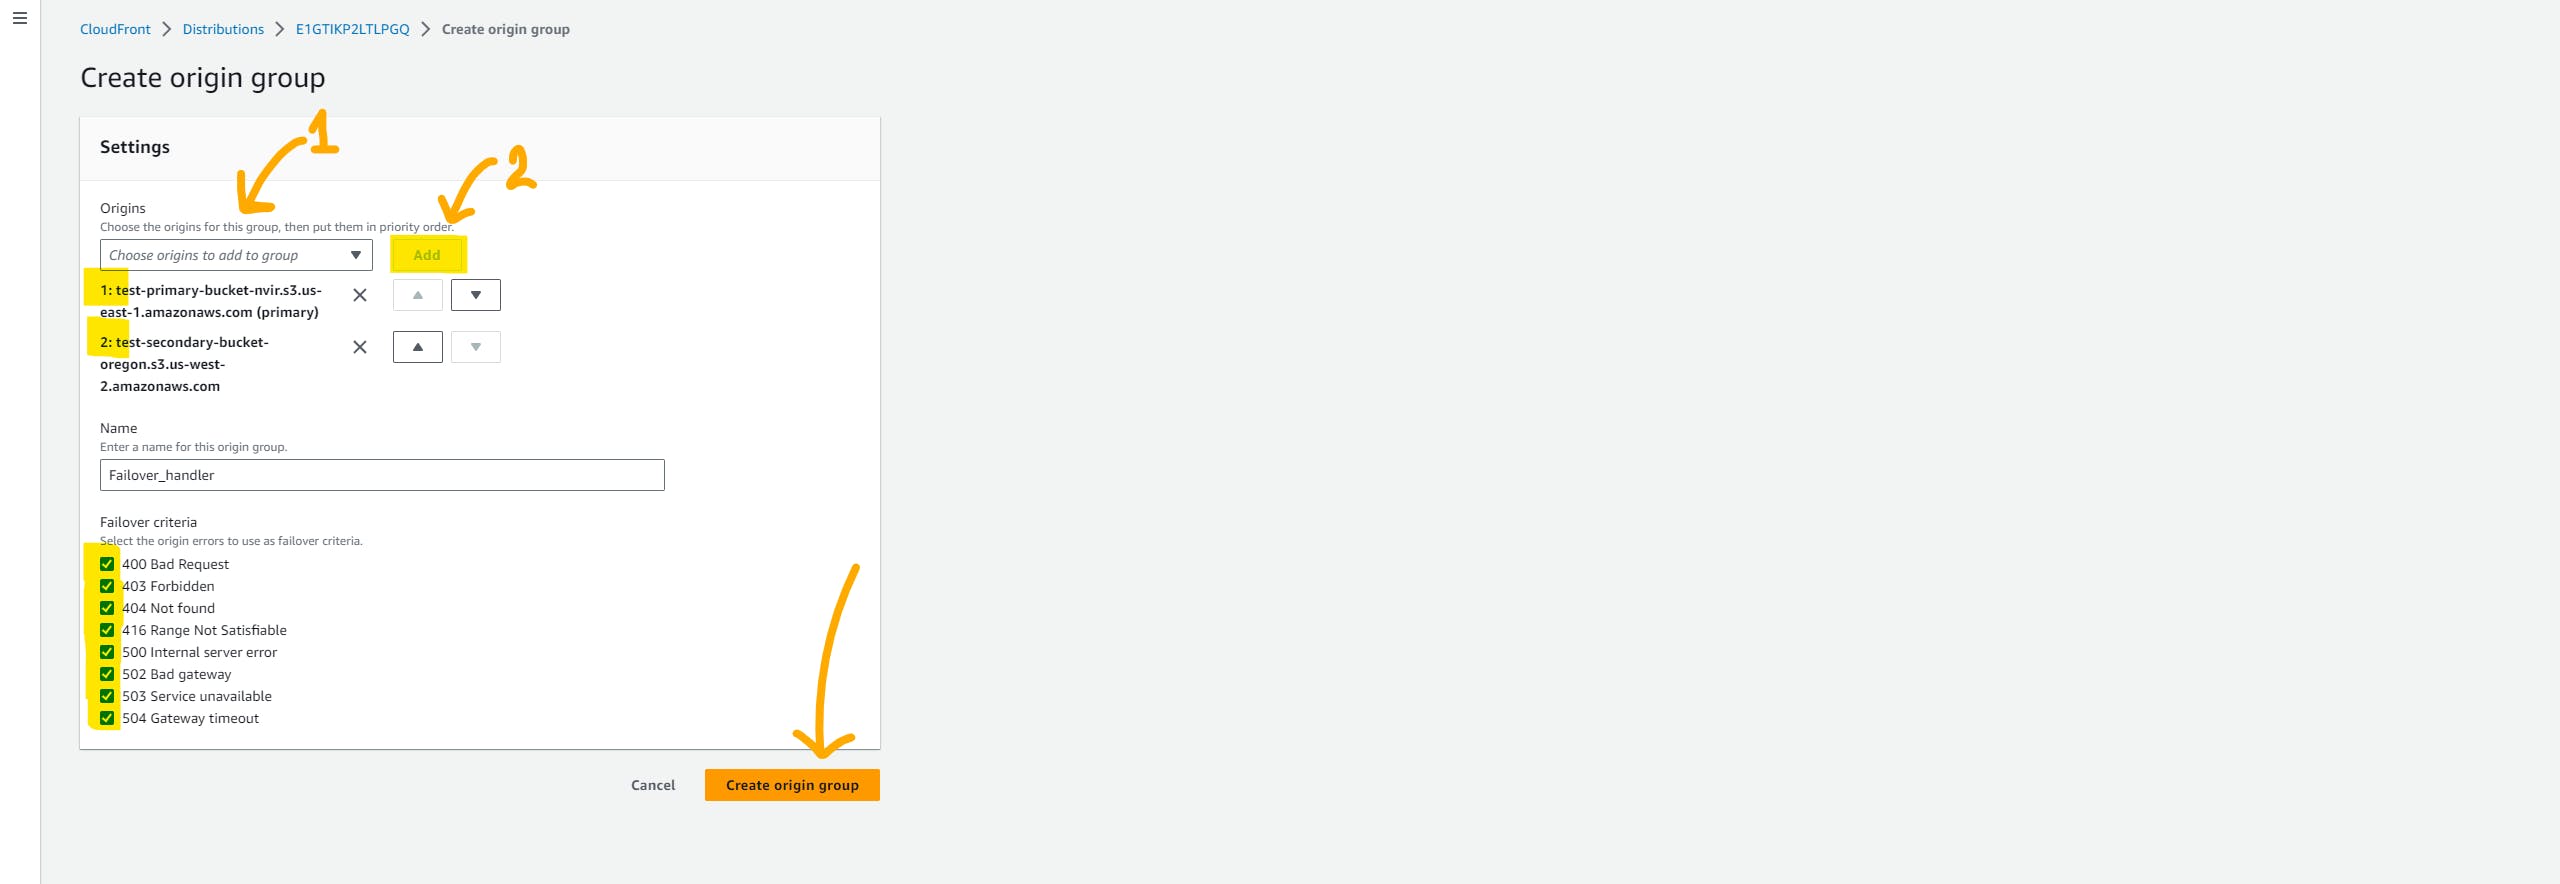
Lastly, we need to change the behavior configuration. click on the 'behavior' tab. select and click on the edit button

here we just have to change the Origin and Origin group. so select the Origin group that we have just created from the drop-down list. and click on the save button below.

please wait for a few minutes till CloudFront do the distribution. now take the DNS name and paste it into the browser.
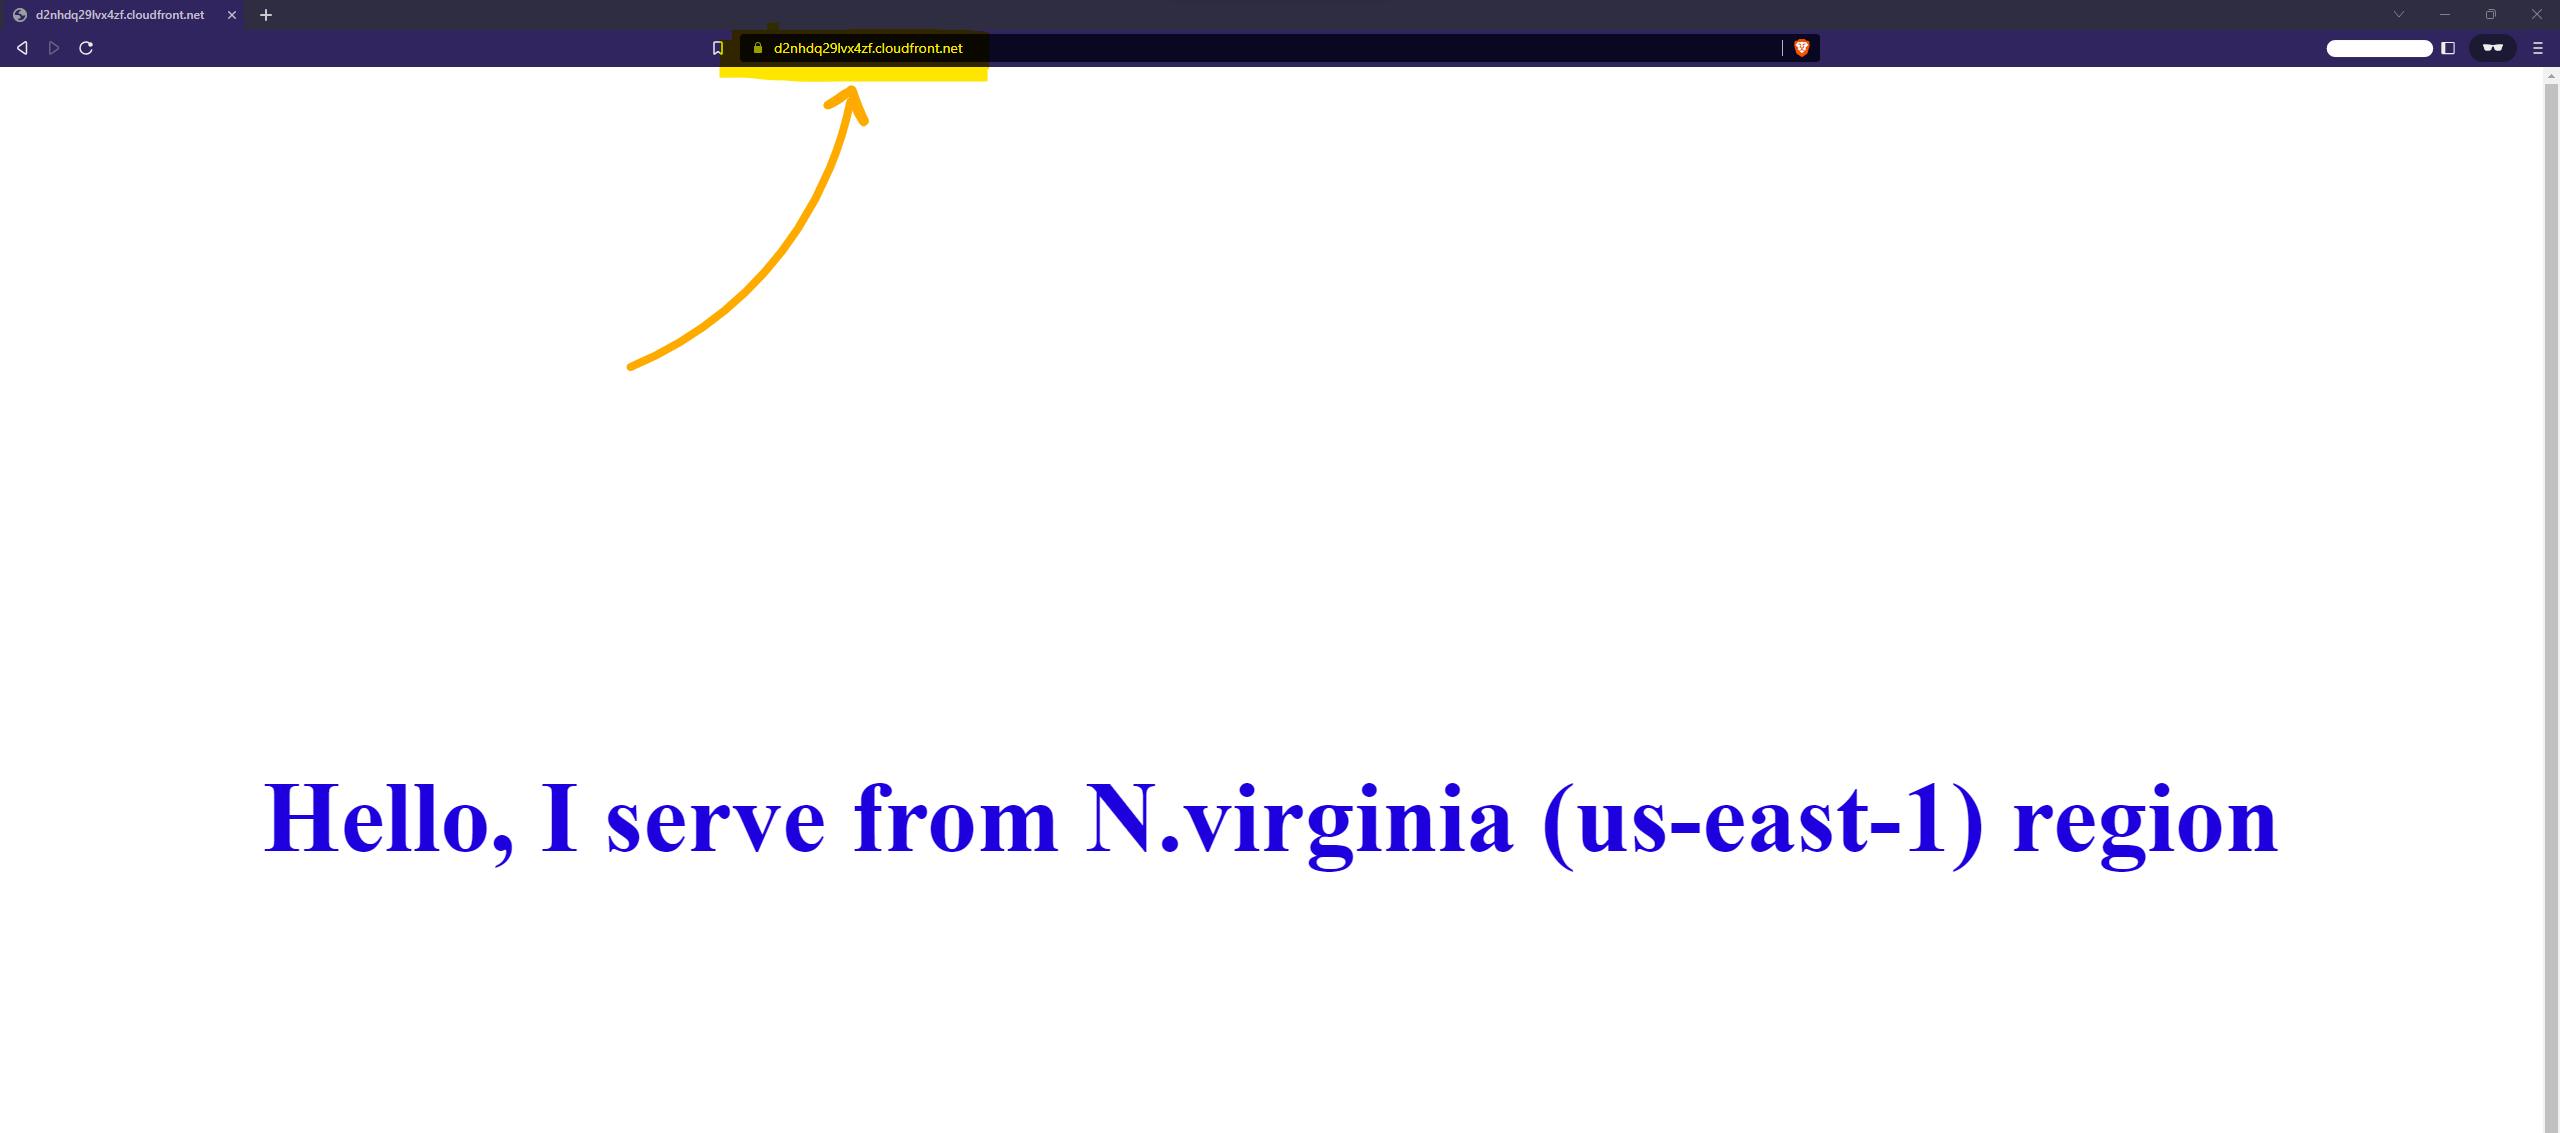
🧪 Testing
It's time to test the failover. However, to do that, we need to generate some errors such as 400, 403, or 504. To generate these errors, we will rename the index.html file in the primary bucket. This will prevent CloudFront from finding the default object, resulting in a 404 error. Consequently, it will fetch the content from the secondary bucket, which is located in the Oregon region.
index.html ➡️➡️➡️ whatever.html

Now let's invalidate the cache, so CloudFront will remove the old data and caches new data from the secondary bucket (Oregon region).
click on the 'Invalidation' tab and click on the Create invalidation button. type /* in the Object path text box, because we want to remove everything from the cache.

Please wait till the invalidation completes. and then type the DNS of CloudFront in the browser. you will the content from the secondary object(Oregon)
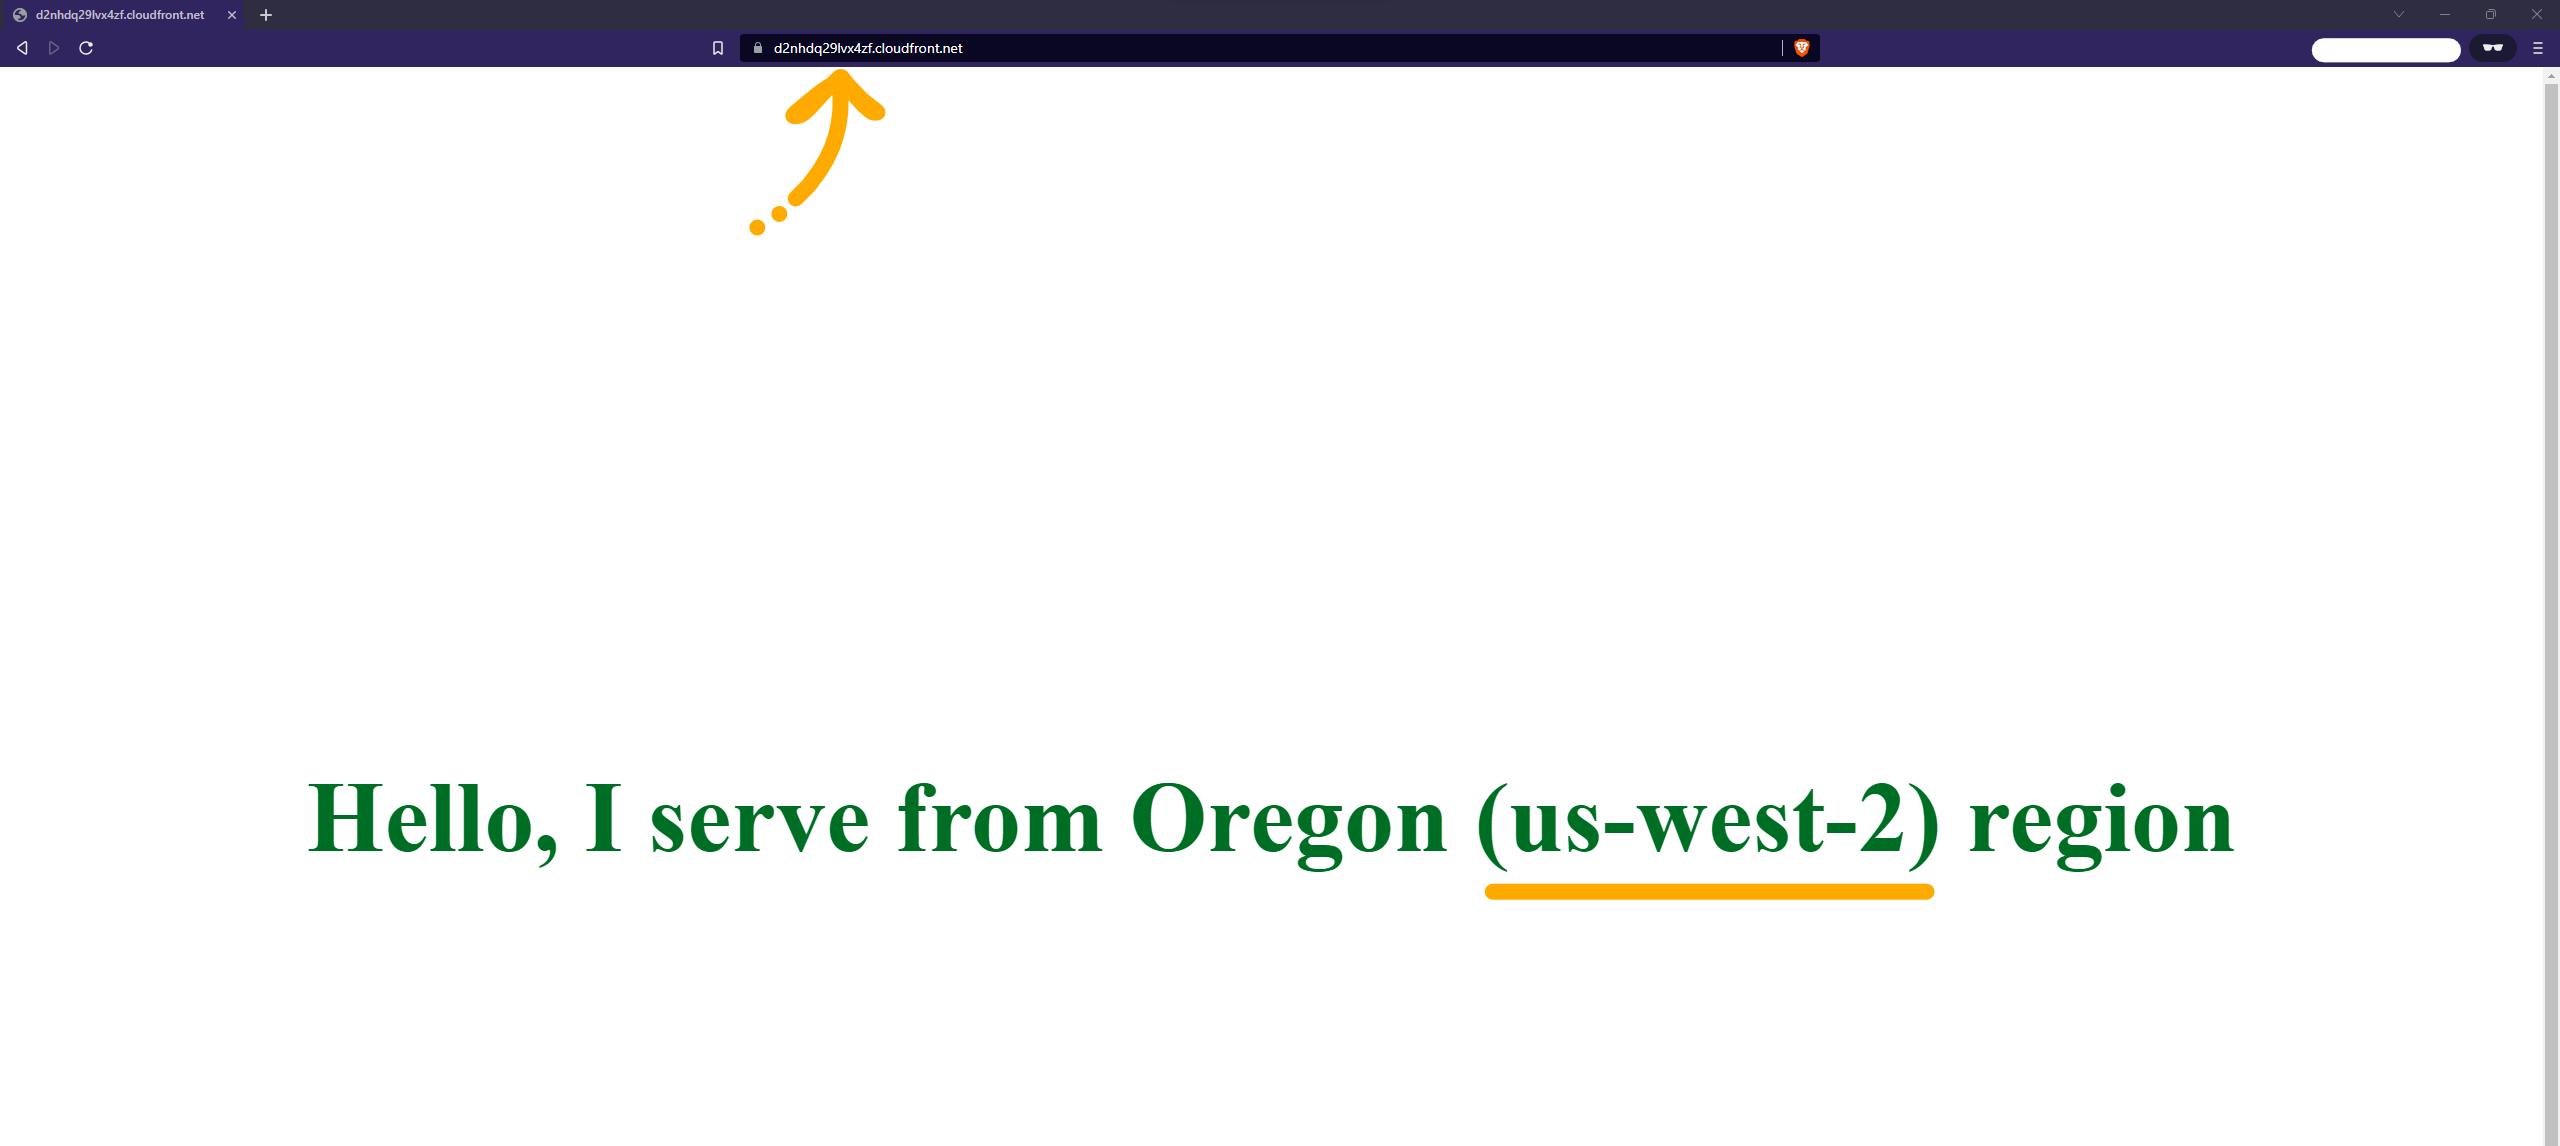
Yeah!! it's working as we expected. Now let's again cache the data from the Primary bucket. just undo whatever change you've done(rename) in the primary bucket.
whatever.html ➡️➡️➡️ index.html

lets again invalidate the cache. again type /* or /index.html to remove data from the cache.

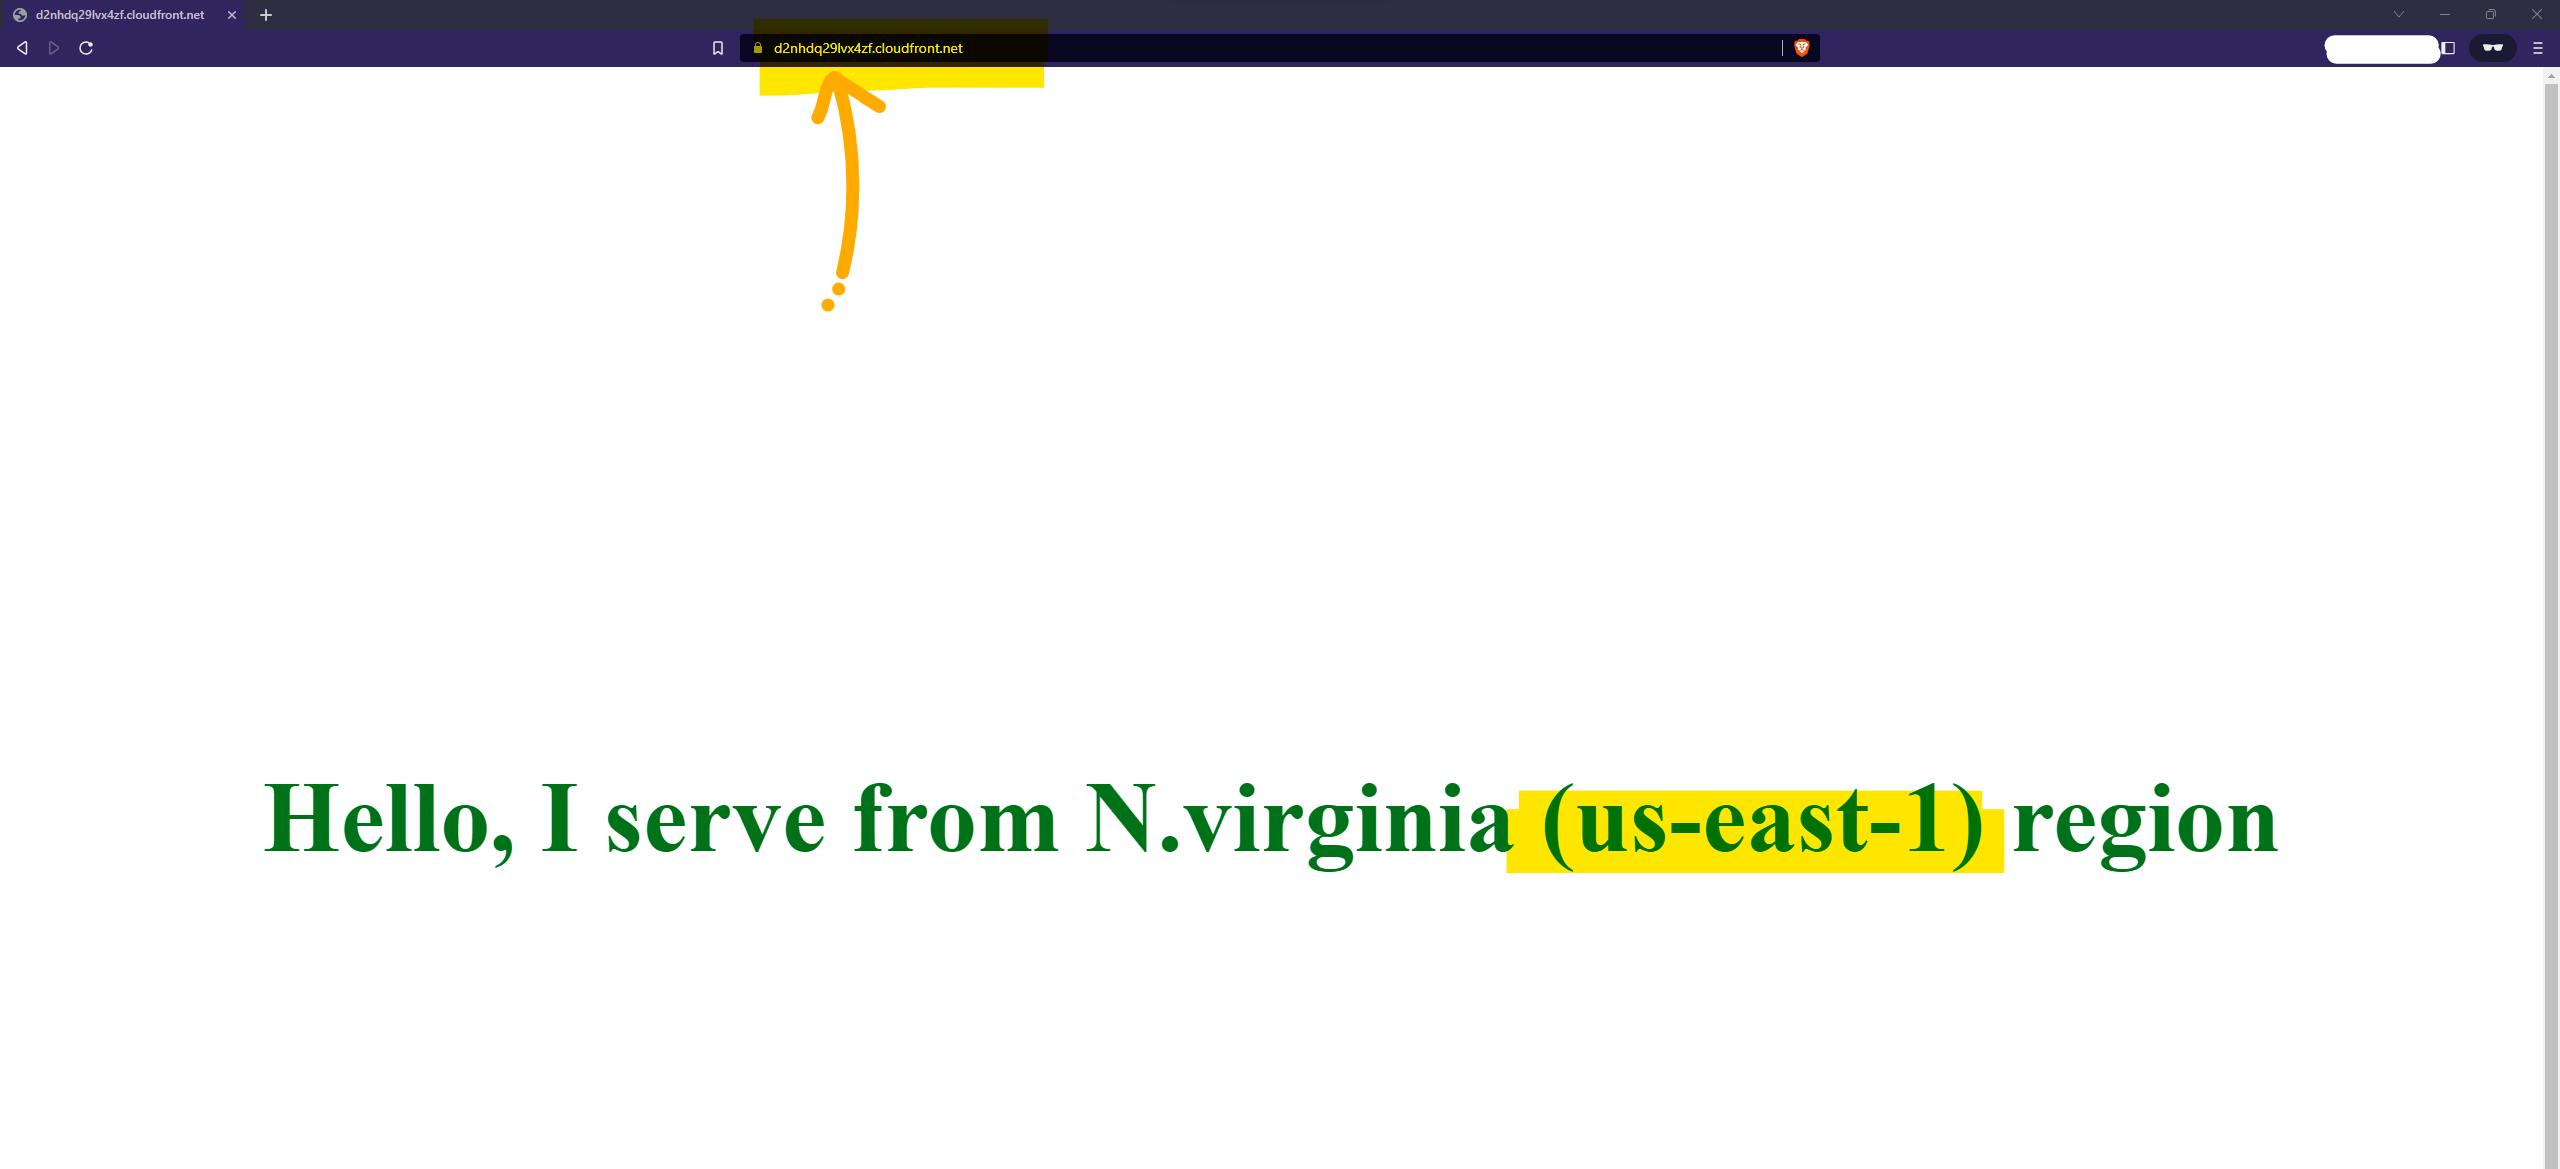
Finally, let's check the browser again, Reload the page. you will see the content from the Primary bucket(us-east-1).
🥂 Conclusion
🥳 In conclusion, CloudFront proves to be a ⚡ powerful tool for optimizing content delivery and enhancing user experience. By understanding how caching works internally and implementing a static website with region failover using S3 and CloudFront, we have explored the various facets of CloudFront's functionality.
The concept of caching, with cache hits and cache misses, provides insights into how CloudFront efficiently retrieves and serves content to users. By strategically leveraging edge locations worldwide, CloudFront reduces latency and ensures faster content delivery.
📧 reach me at ankitjodhani1903@gmail.com
🔗 Follow me on LinkedIn: https://www.linkedin.com/in/ankit-jodhani/
🔗 Follow me on Twitter: https://twitter.com/Ankit__Jodhani
👁️ Resources
🔸 Namrata H Shah https://www.youtube.com/@NamrataHShah
🔸 Video: https://www.youtube.com/watch?v=zARVMeOPqko
🔸Video: https://www.youtube.com/watch?v=vube26bjjZk&t=228s
🔸 AWS Doc:
https://docs.aws.amazon.com/AmazonCloudFront/latest/DeveloperGuide/HowCloudFrontWorks.html
https://docs.aws.amazon.com/AmazonCloudFront/latest/DeveloperGuide/Introduction.html
